How to add an Order Bump to your checkout form?
An order bump is not the main product but an add-on product and it is one way to add products to the checkout page. With just a single click, the customer can add an order bump to their purchase.
Step 1: Create a product that will serve as your order bump.
Create a product and this product will serve as your order bump.
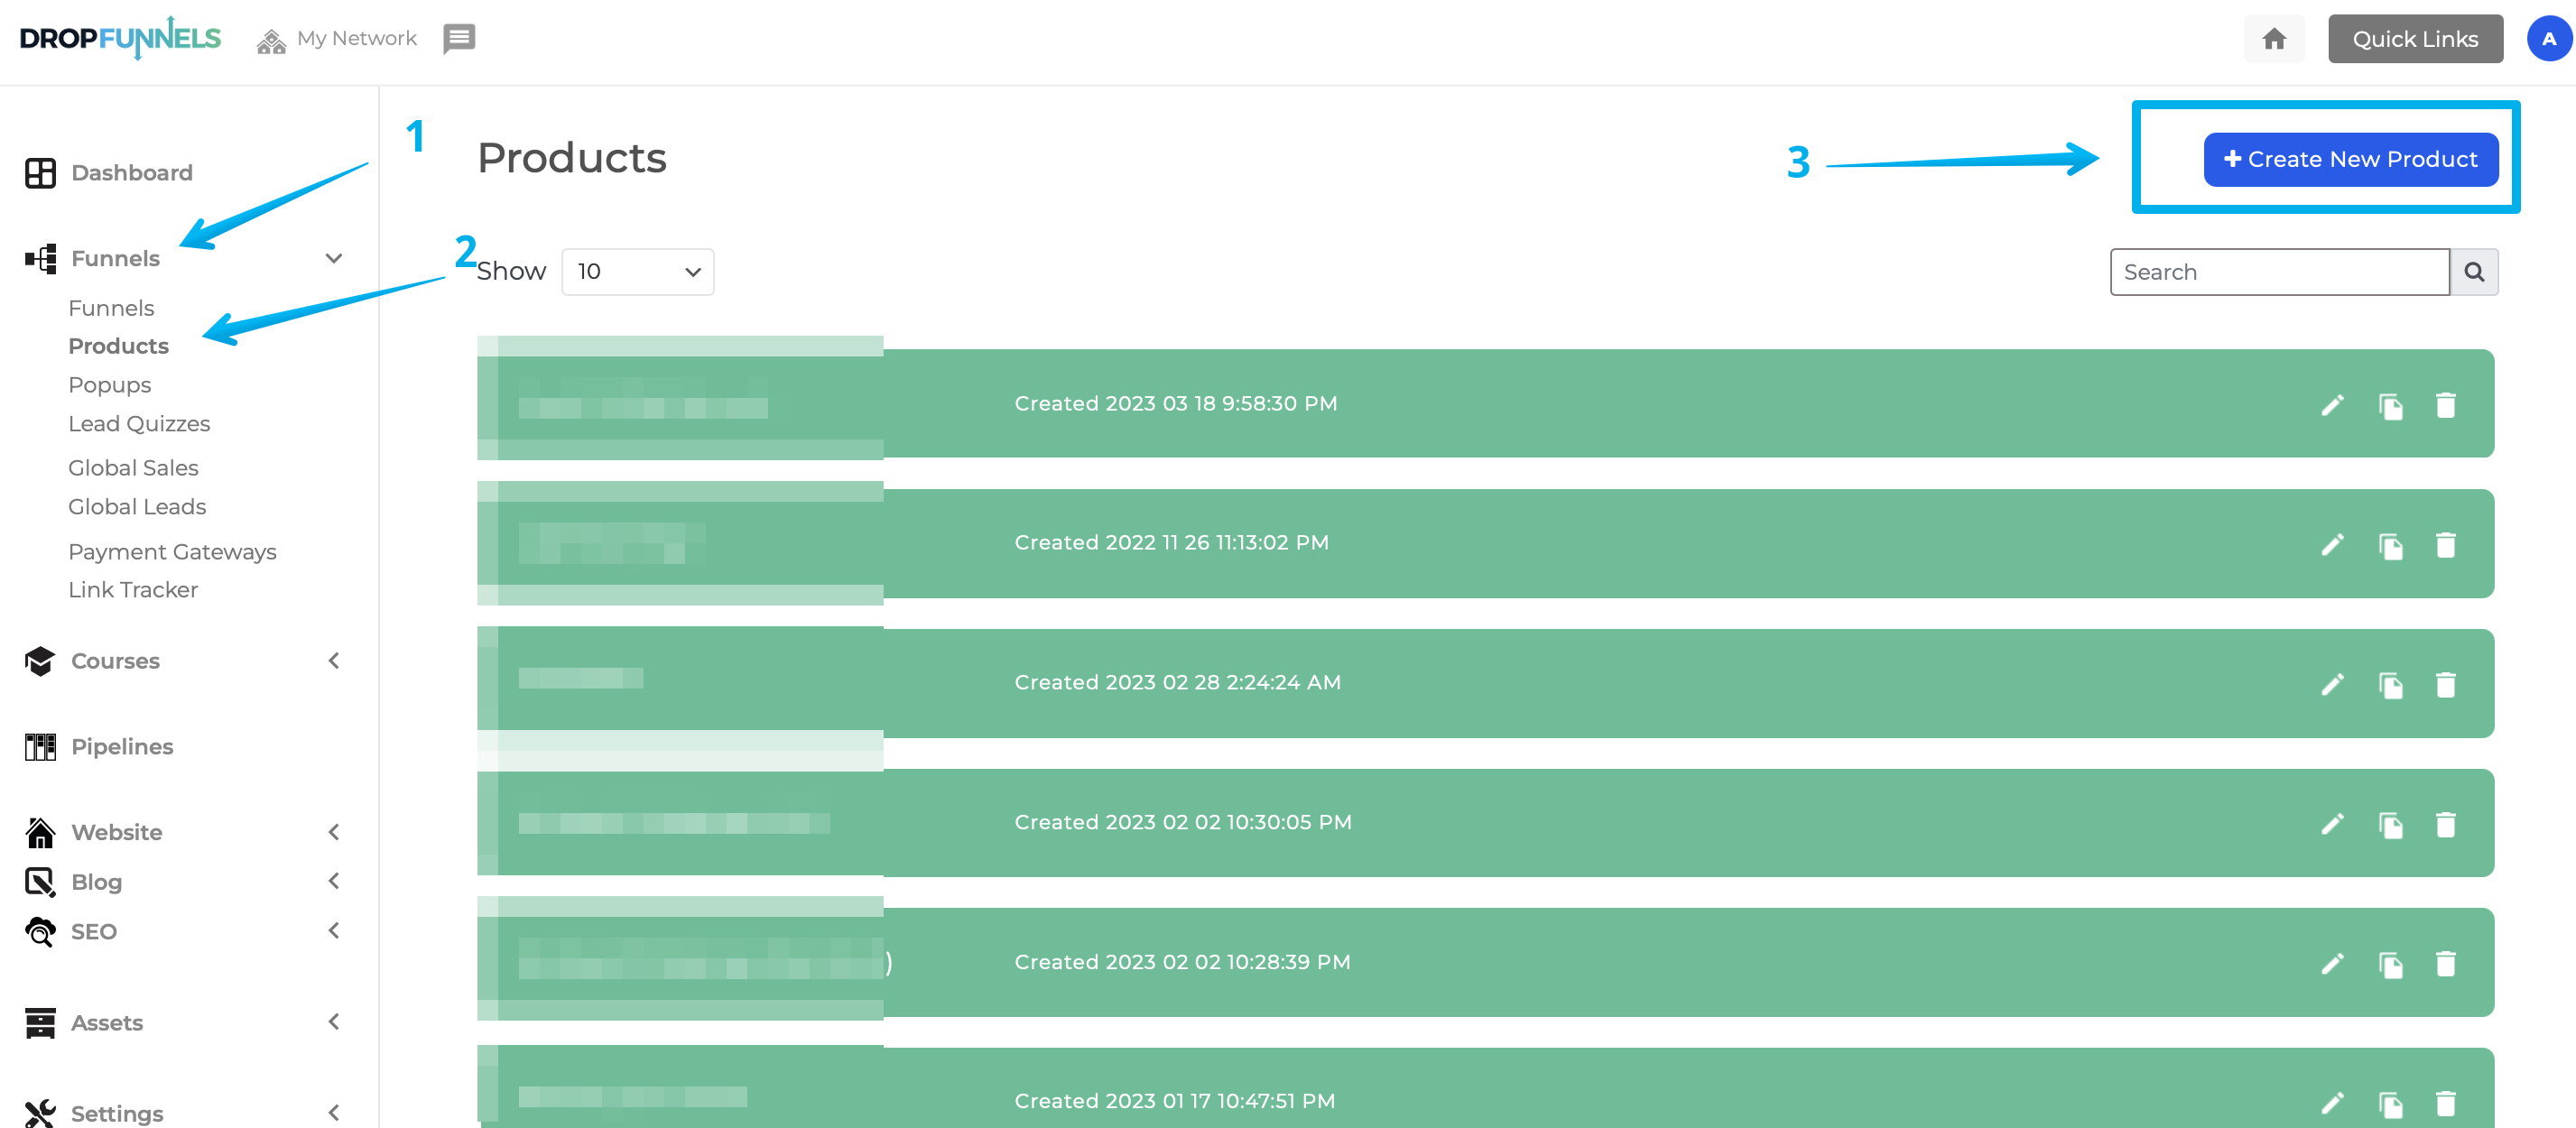
To create a product go to your Dashboard > Funnels > Products > Create New Product. Click here for more information.
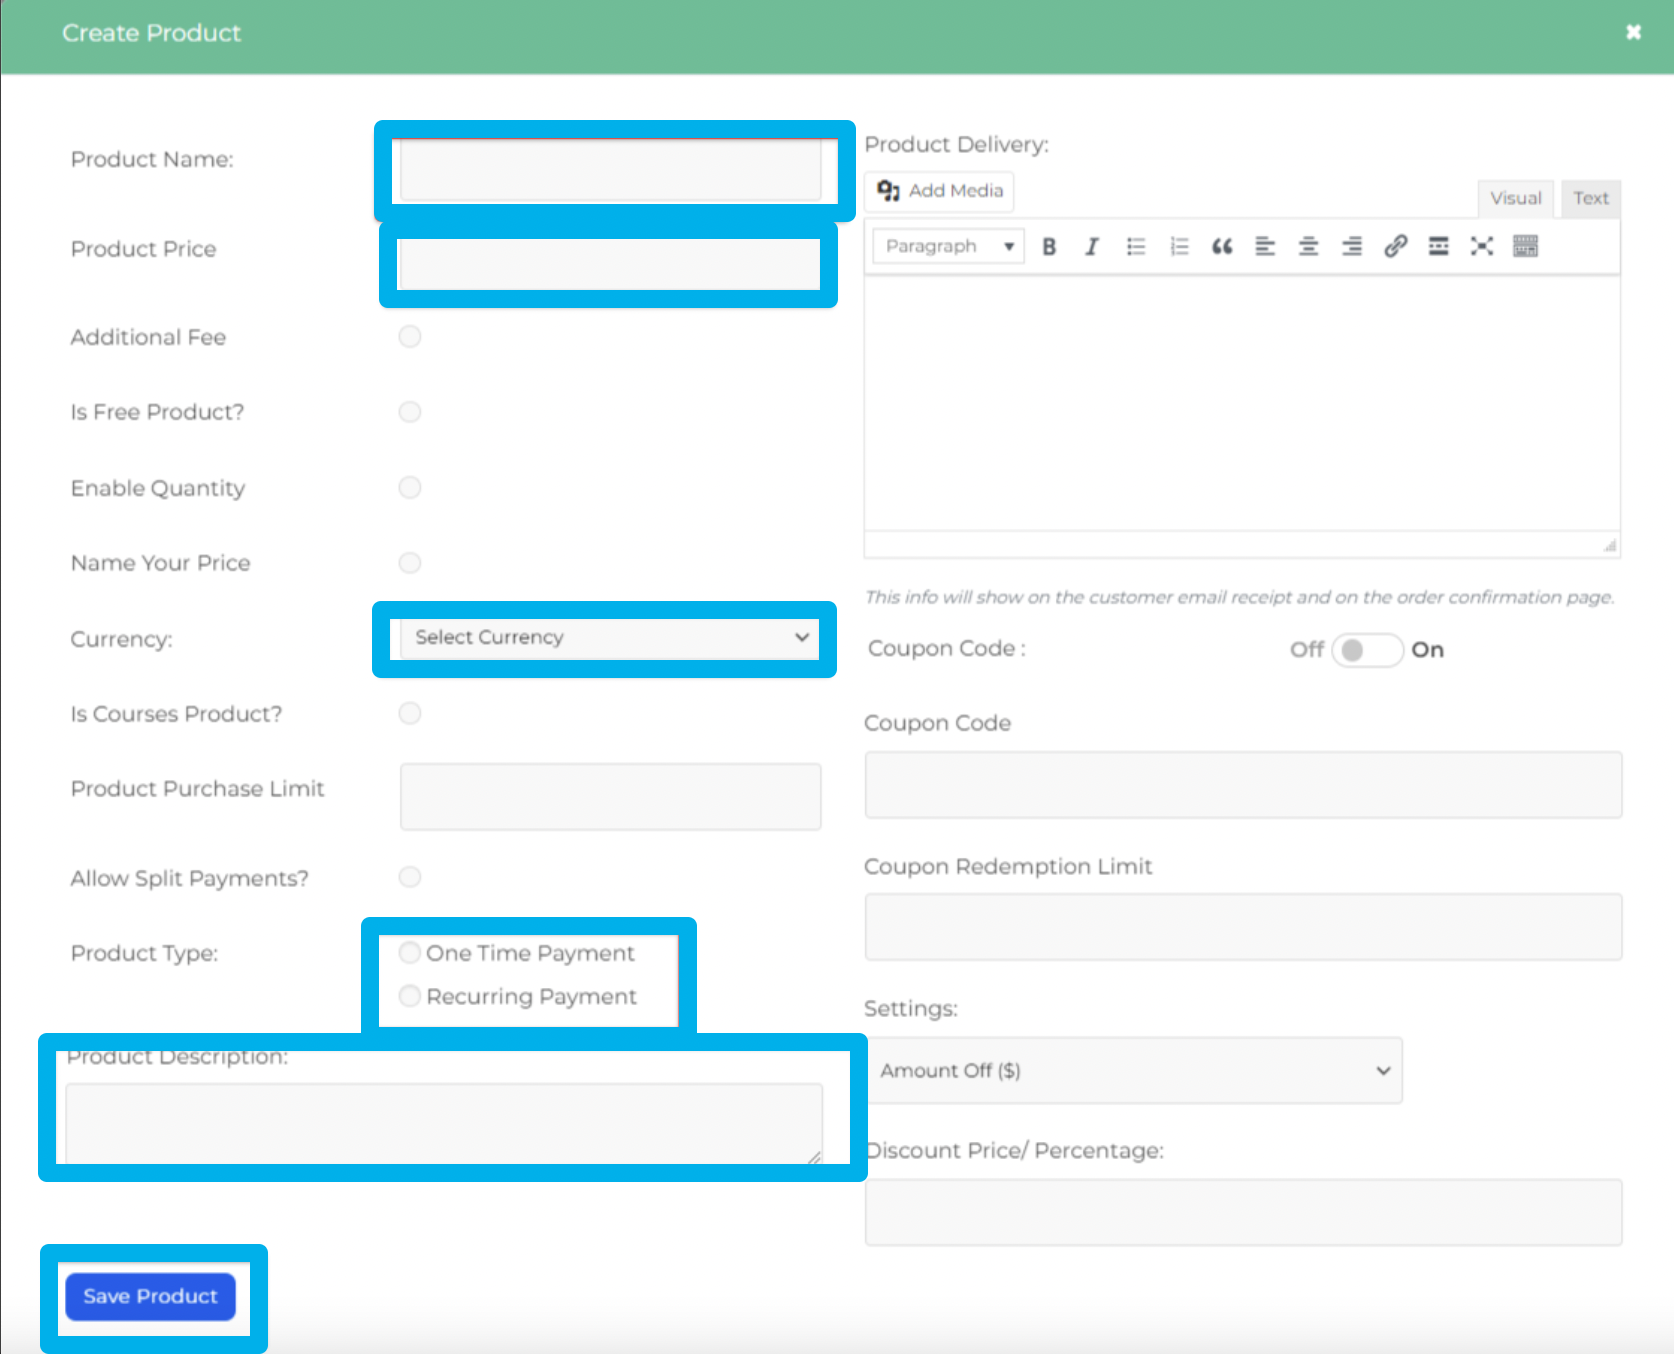
Fill up all the necessary information and hit Save Product.
Step 2: Connect your Main Product to your Checkout form
IMPORTANT NOTE: The checkout form is only available on a funnel page and not a website page.
A checkout form module is required in order for you to connect your product.
Please see the article on the Checkout Form module
On the checkout form settings, go to the Products tab and select the product that you've just created.
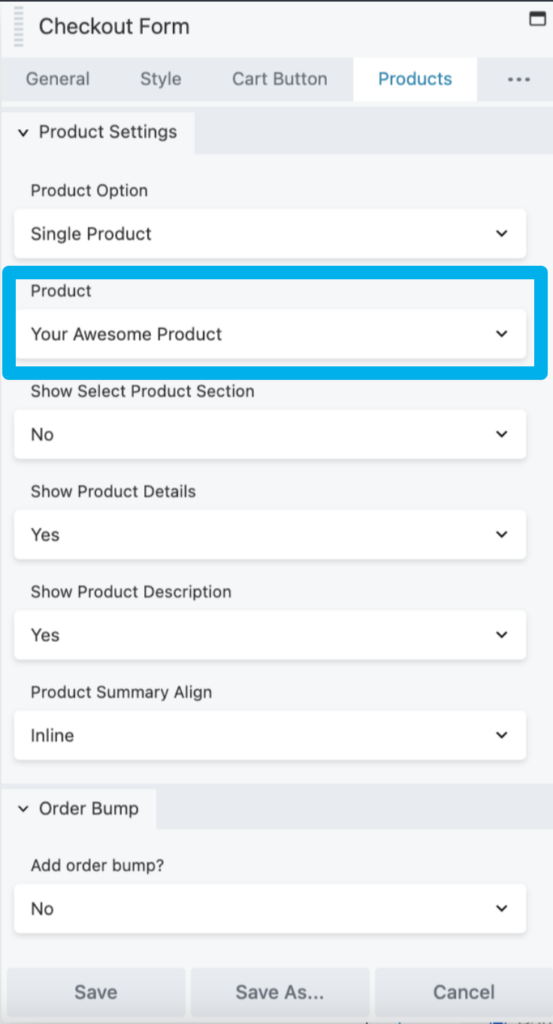
Make sure you've connected your Payment Gateway too.
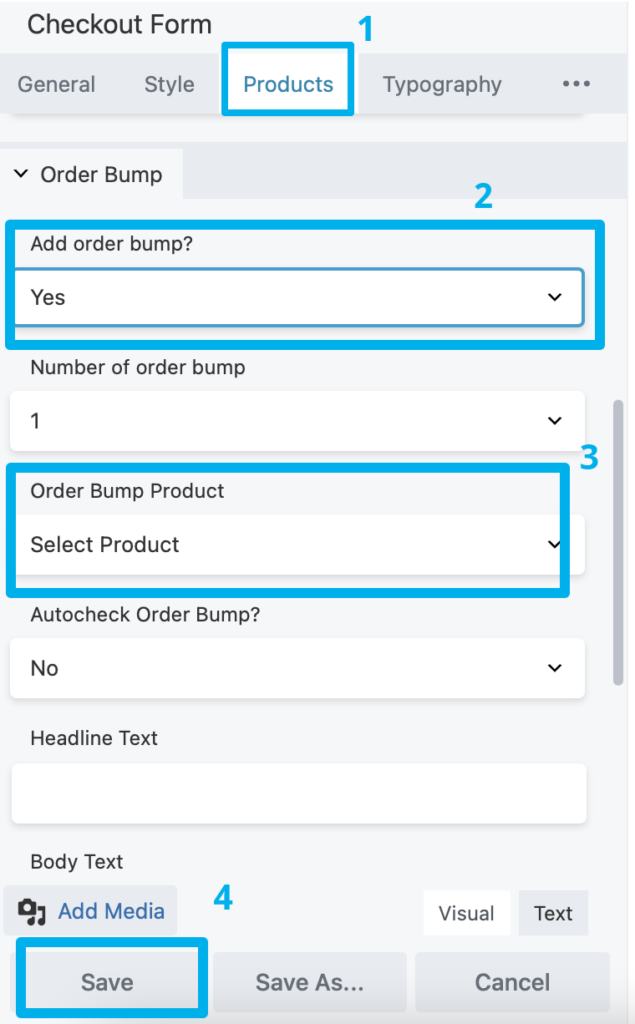
Step 3: Turn on Order Bump and select an Order Bump Product.
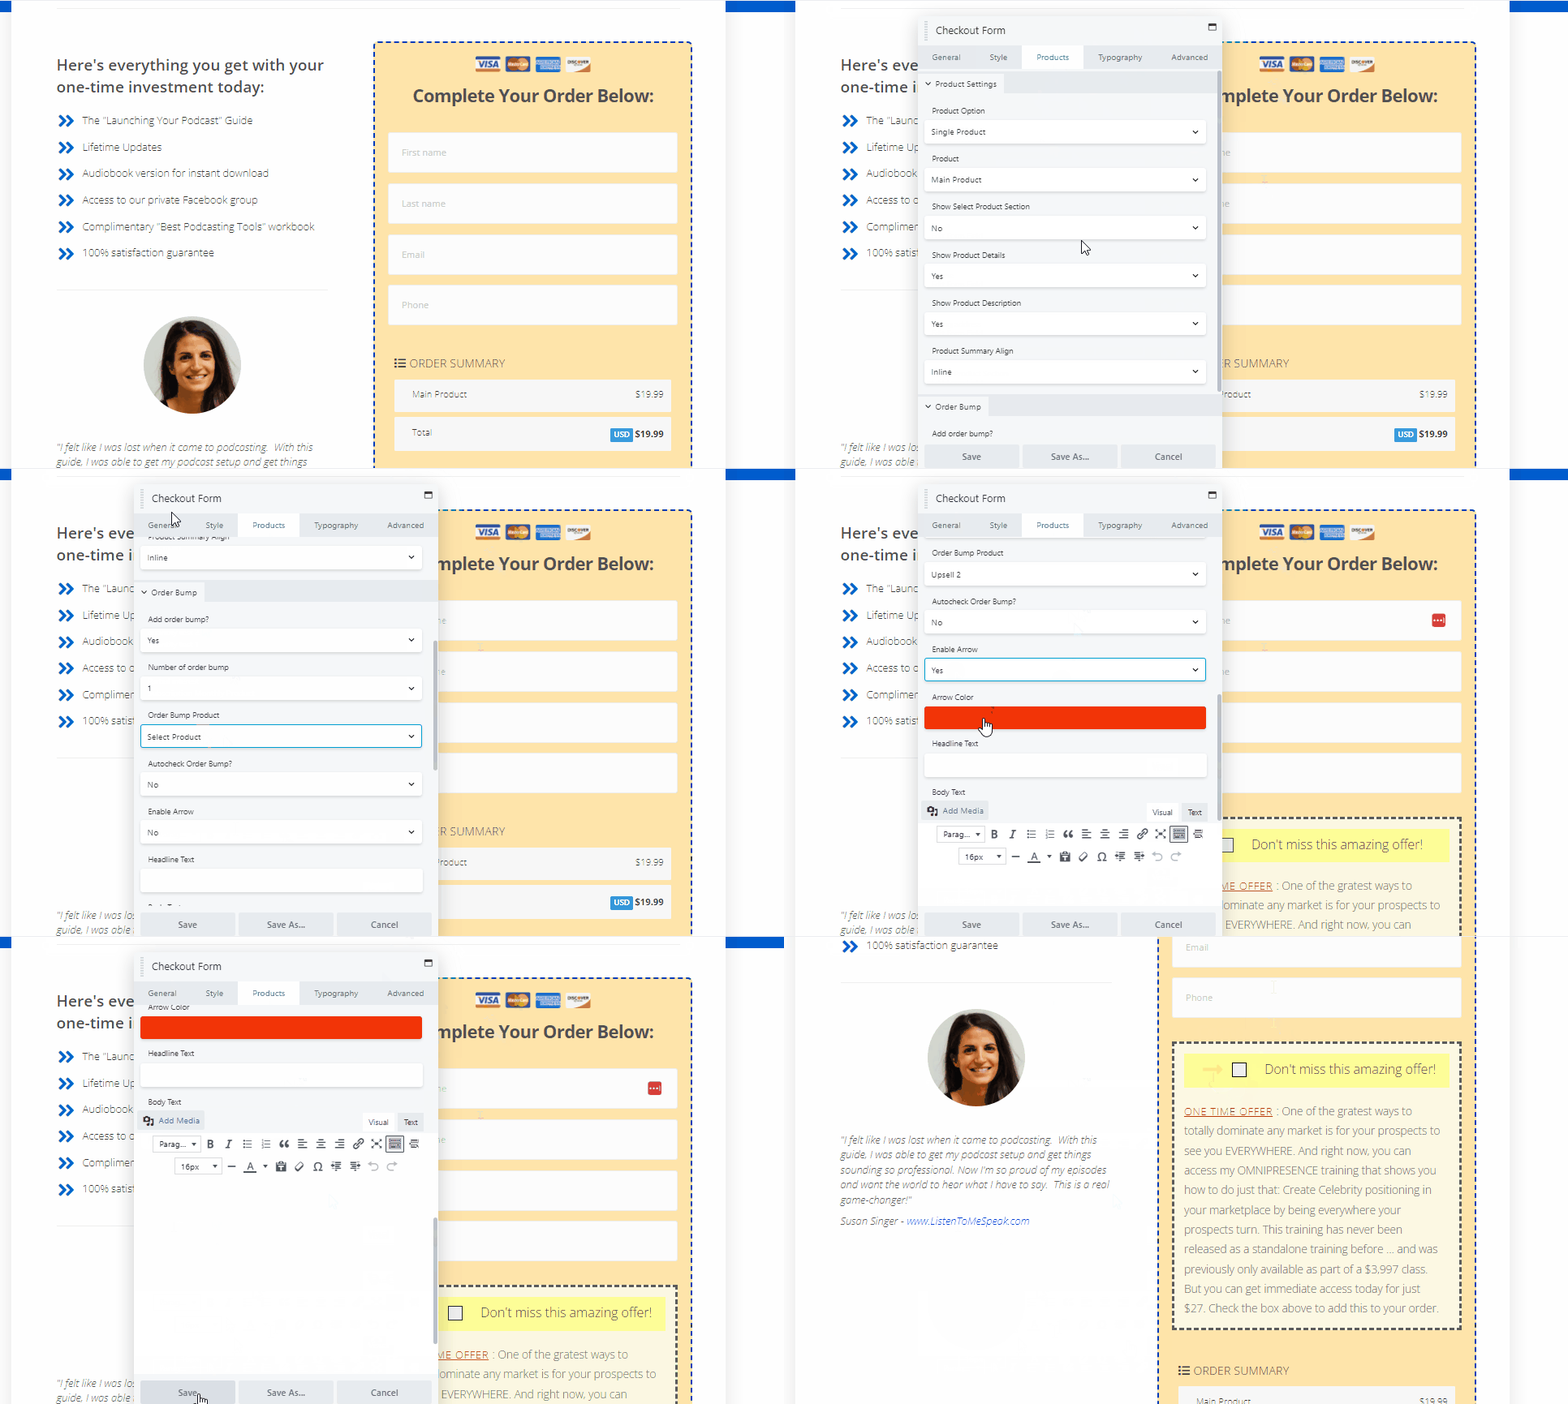
To turn on your Order Bump go to your Checkout form > Add an Order Bump? > "Yes".
Select an Order Bump Product (see figure #4) and click Save.
Important Note: You can make any product as an order Bump. But we do suggest that this product has a lower price than the main product. Remember this is just an add-on to your main product and you don't want to scare away your customers.
Once the Order Bump is created it should look like the image below.

Learn how to build your first funnels, courses, websites, and blog in just 1 day!
PLUS! Complete the training to apply for a FREE $50 DropFunnels Credit!
Start your Fast Start training now!
How to add a Blinking arrow
The blinking arrow on the order bump shows off urgency, thereby, attracting customers. Below is a video showing how to add a blinking arrow to your order bump.
Checkout Settings > Products tab > Turn on Order Bump > Select a product > Blinking arrow "Yes".
