How To Use DropFunnels Pipelines
The Pipeline is a powerful tool in DropFunnels (available in the Ultimate plan) that allows you to manage leads, organize them into stages, and automate email sequences.
Prerequisites
Before using the Pipeline, ensure that you have an SMTP service integrated for sending emails:
Adding a Pipeline
Step 1: Go to the Pipeline section in your DropFunnels dashboard.
Step 2: Click on Add Pipeline to create a new pipeline.
Step 3: To manage the pipeline, click on the Settings Icon next to the pipeline name.
-
- Use the Settings Icon to rename or delete the pipeline.

Add and Manage Stages
Step 1: Click on Add New Stage to create stages for your pipeline.
Step 2: Manage stages using the Settings Icon:
-
- Add a sequence to be sent to leads in this stage.
- Clone existing sequences to other stages in the pipeline.
Step 3: Use the Plus (+) Button to manually add leads to a stage.
Creating Sequences Inside a Stage
Step 1: Inside each stage, create an automated sequence:
-
- Add SMS: Send a text message to the leads.
- Add Emails: Schedule email delivery to the leads.
- Add Delays: Set a delay (in hours or days) between emails or SMS.
- Automations: Add conditions to move leads to different pipeline stages (e.g., transfer leads after receiving an SMS).
Step 2: Once the sequence is created, ensure to activate it.
Step 3: You can clone the sequence to use it in other pipeline stages.
Using Lead Actions
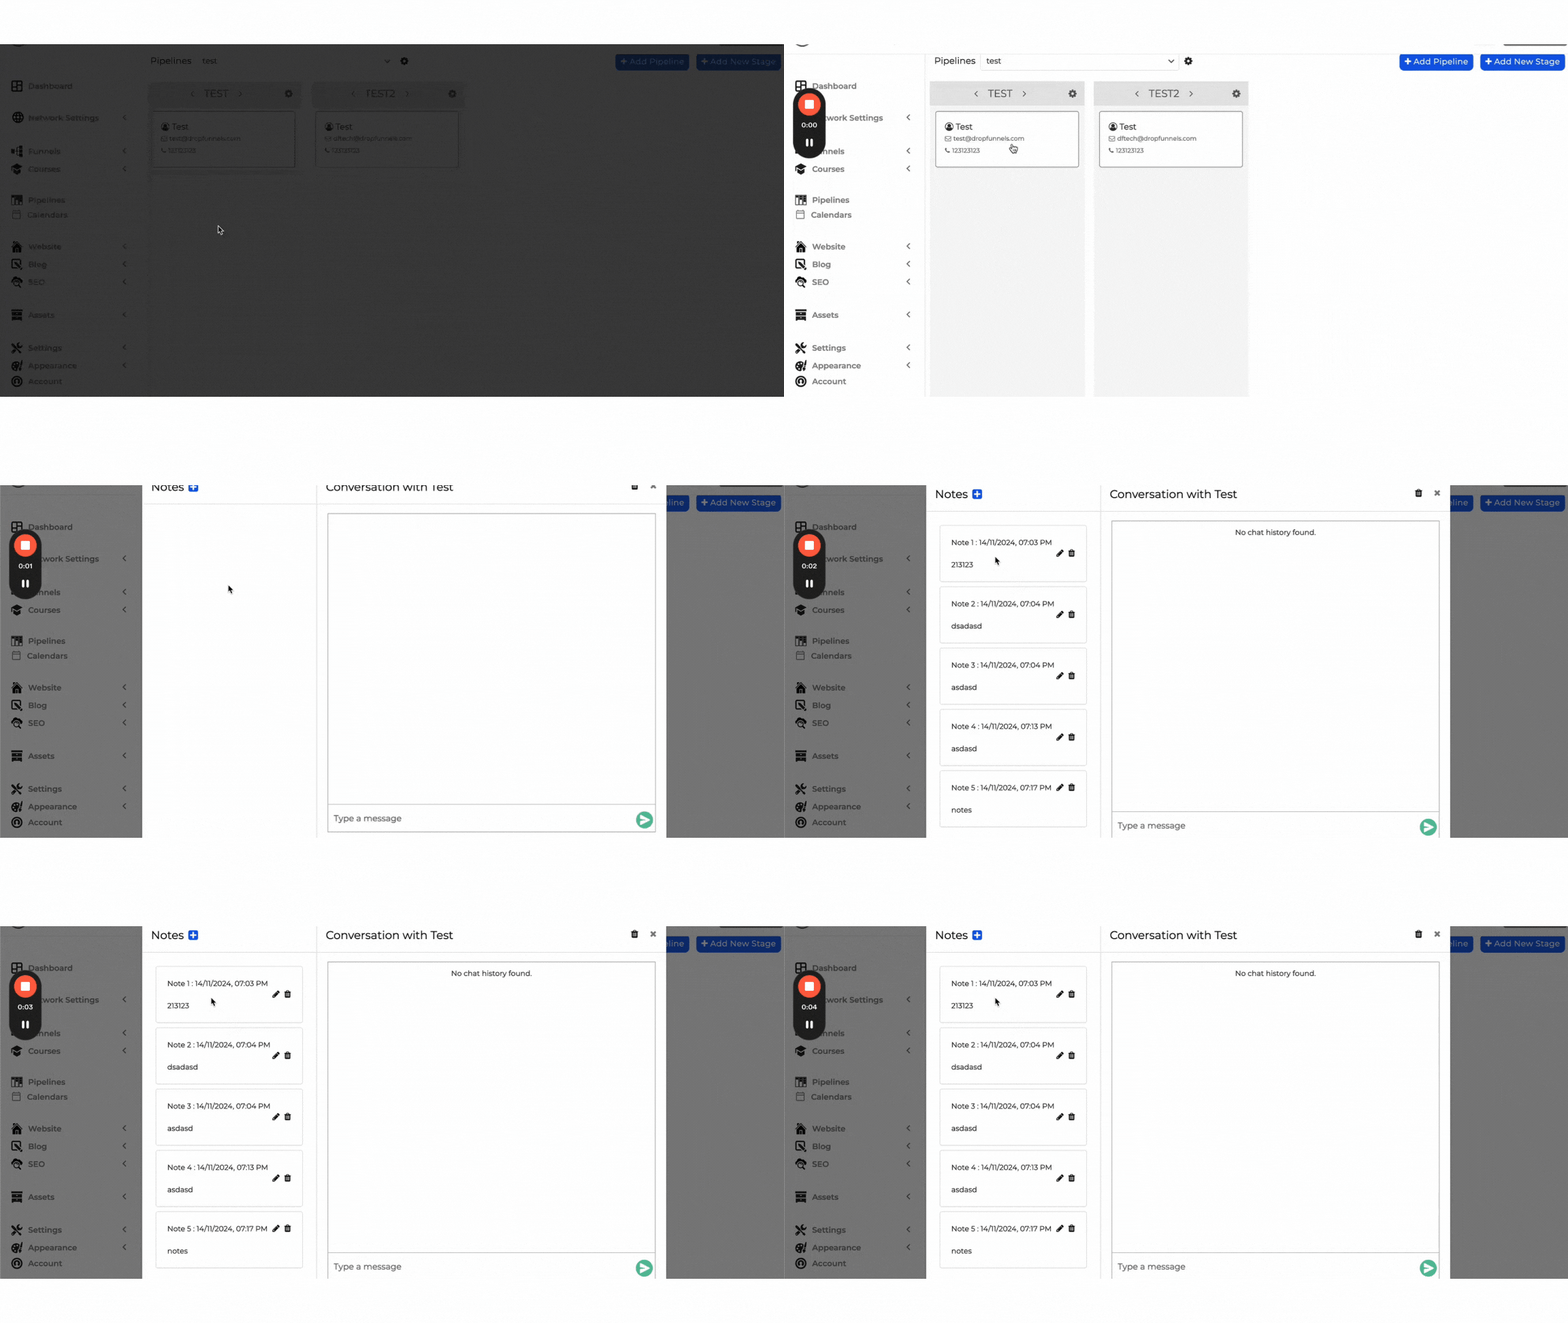
Click on a lead within the pipeline to:
-
- Add notes to track lead progress.
- Send SMS (requires Twilio integration).

Connecting Forms or Checkouts to Pipeline
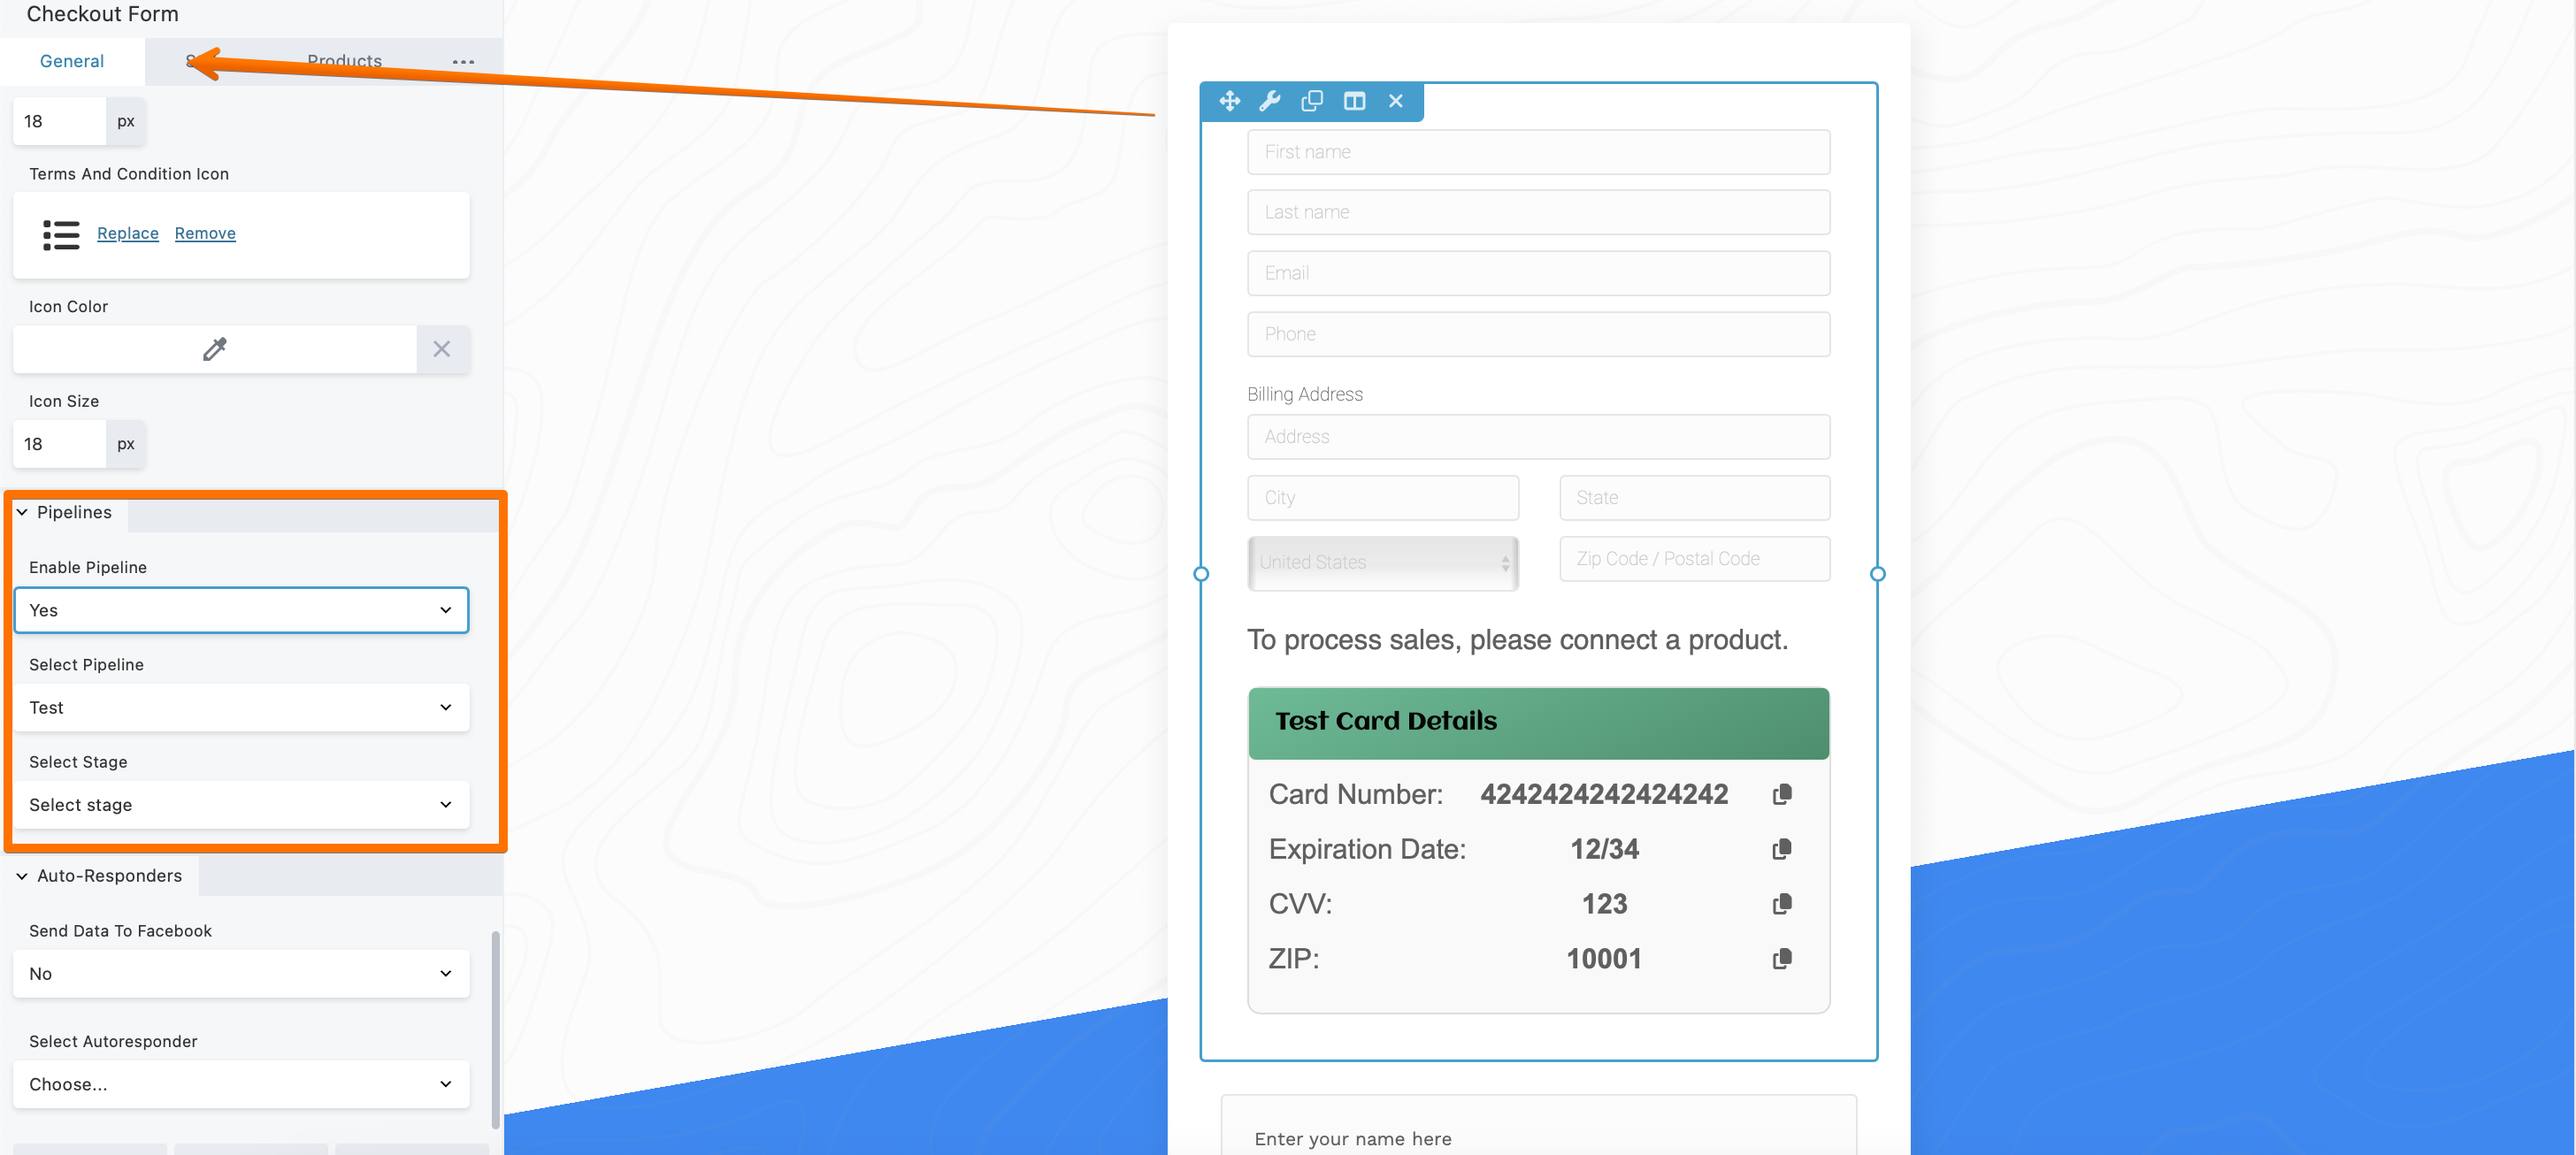
In your opt-in form or checkout module, configure the option to send leads to a specific pipeline stage after opt-in or purchase by enabling pipeline.

By following these steps, you can automate lead engagement, monitor progress, and optimize your sales process through the Pipeline feature in DropFunnels.

