How To Integrate Sendgrid with DropFunnels as your SMTP Service For Pipeline Emails
In this article, we are going to walk you through the process of connecting Sendgrid as your custom SMTP that will allow you to enable Pipeline and send emails.
By connecting your own custom SMTP, the Pipeline emails will come with your custom domain name.
Example: [email protected] or [email protected] depending what you set in the "From Email" field.
Before getting started, it's IMPORTANT to authenticate your Domain and Sender Identity. Please refer to SendGrid's article below:
We also have this Article on How to Verify Your Email When Using SendGrid Inside Your SMTP Configuration
After completing the process above, follow the steps below to connect SendGrid to your DropFunnels account.
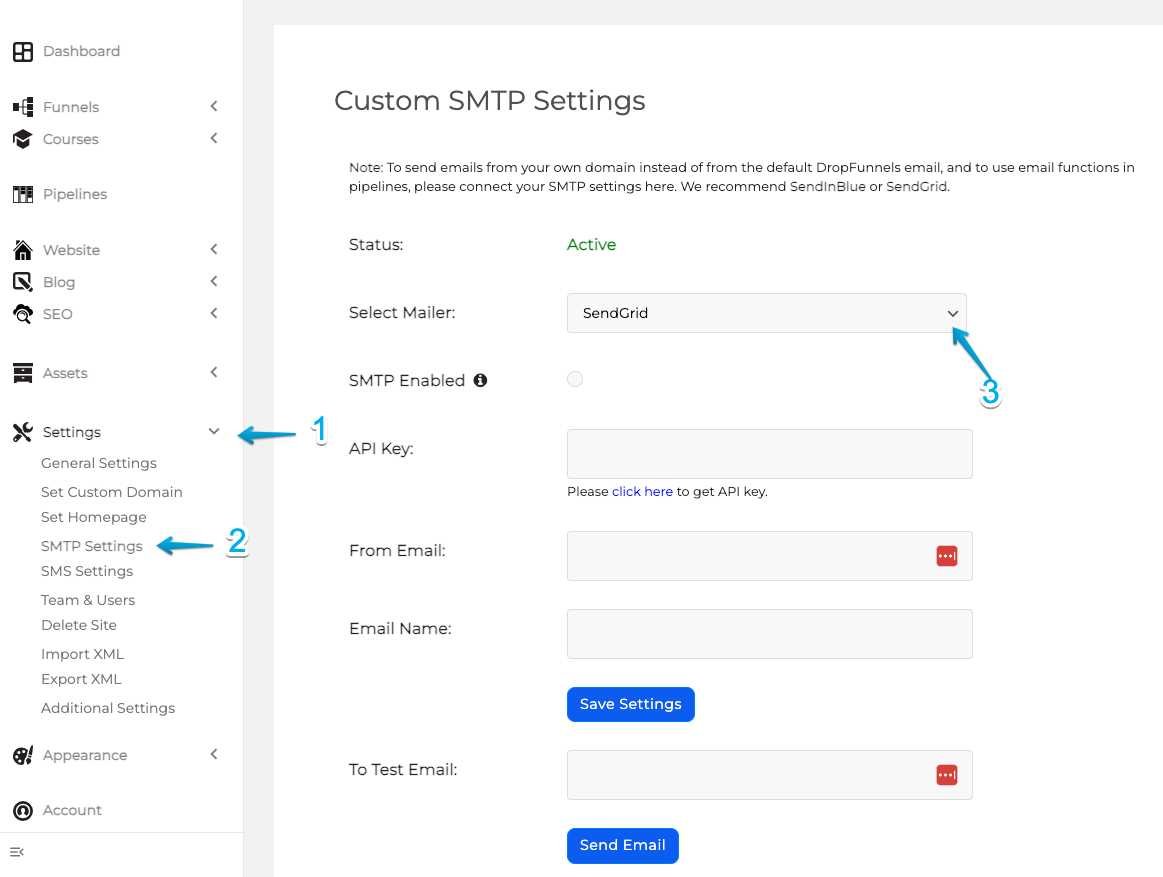
Step 1: On your DropFunnels dashboard, go to Settings > SMTP Settings > Select SendGrid from the dropdown.
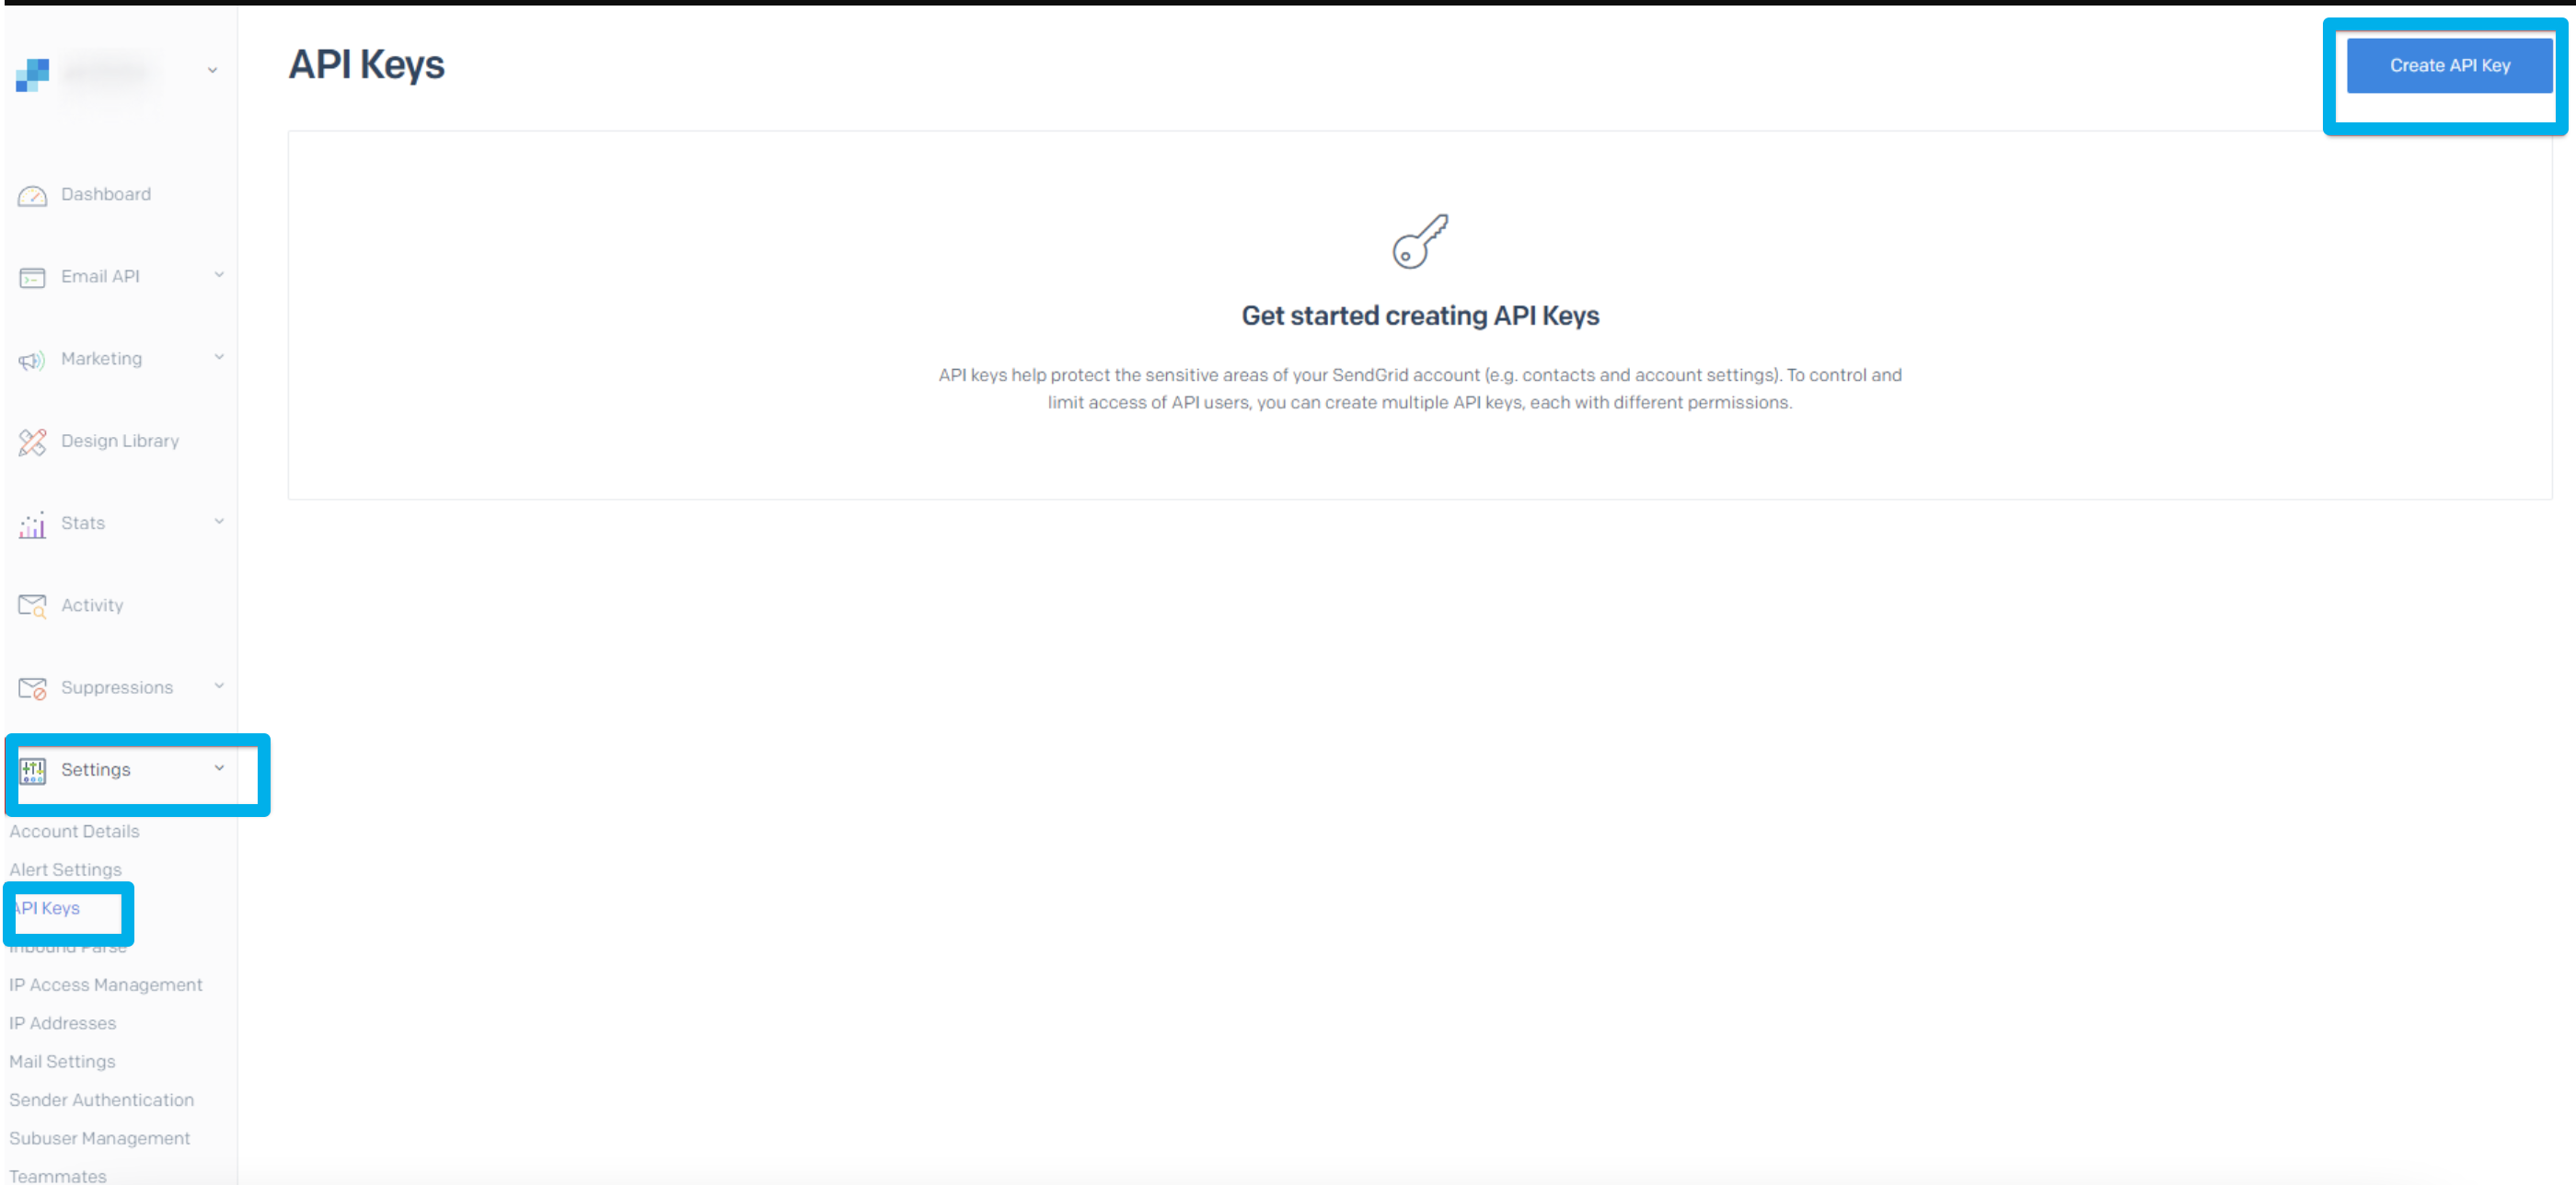
Step 2: You'll need to get the API key inside your SendGrid account.
Once you logged in to your SendGrid account go to Settings > API Keys > "CREATE API KEY".
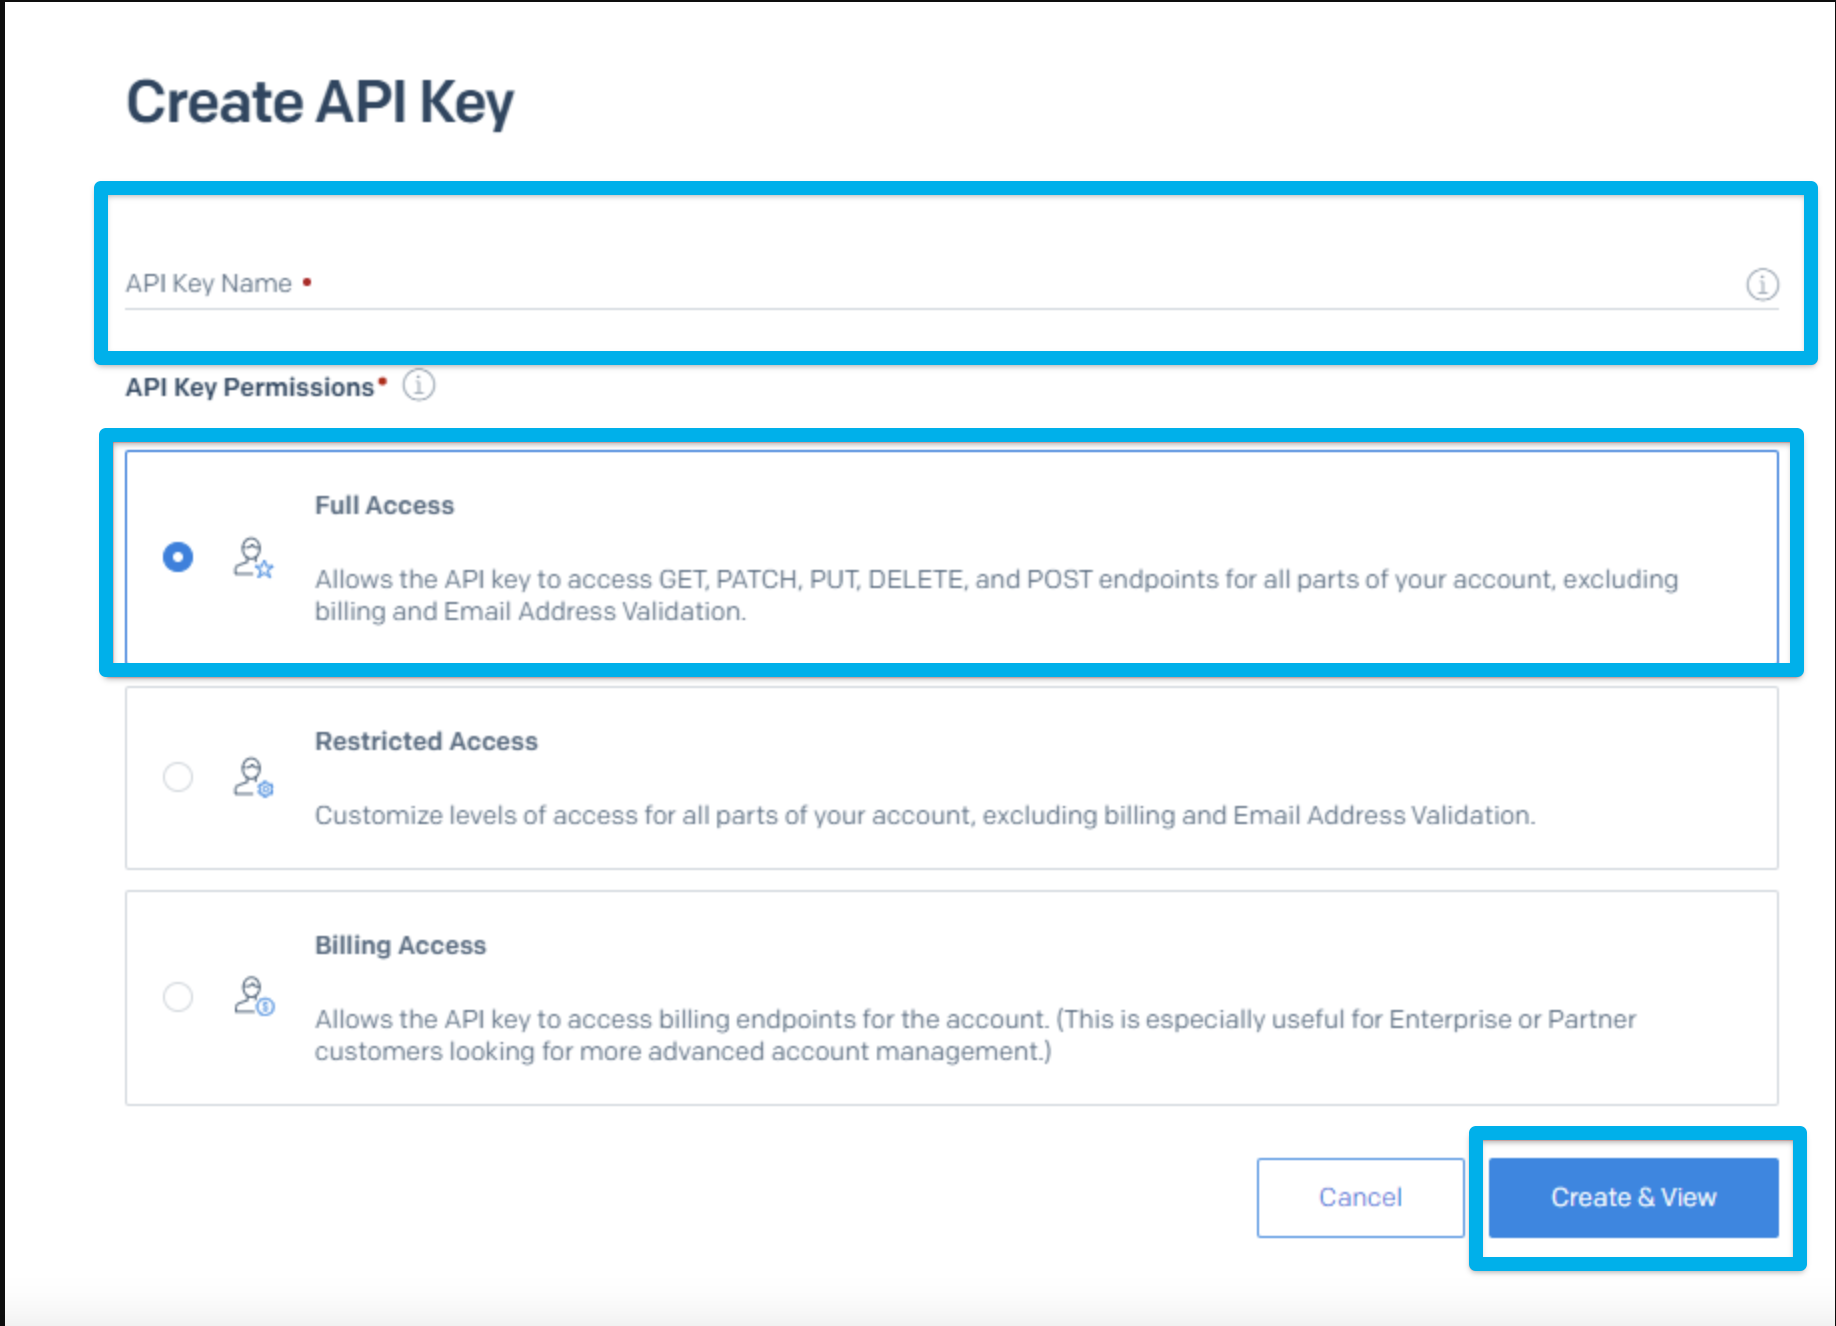
Step 3: Generate SendGrid API KEY
Choose a name for your API key, it could be any name you want, once you decided on a name for your API key, press Create & View.
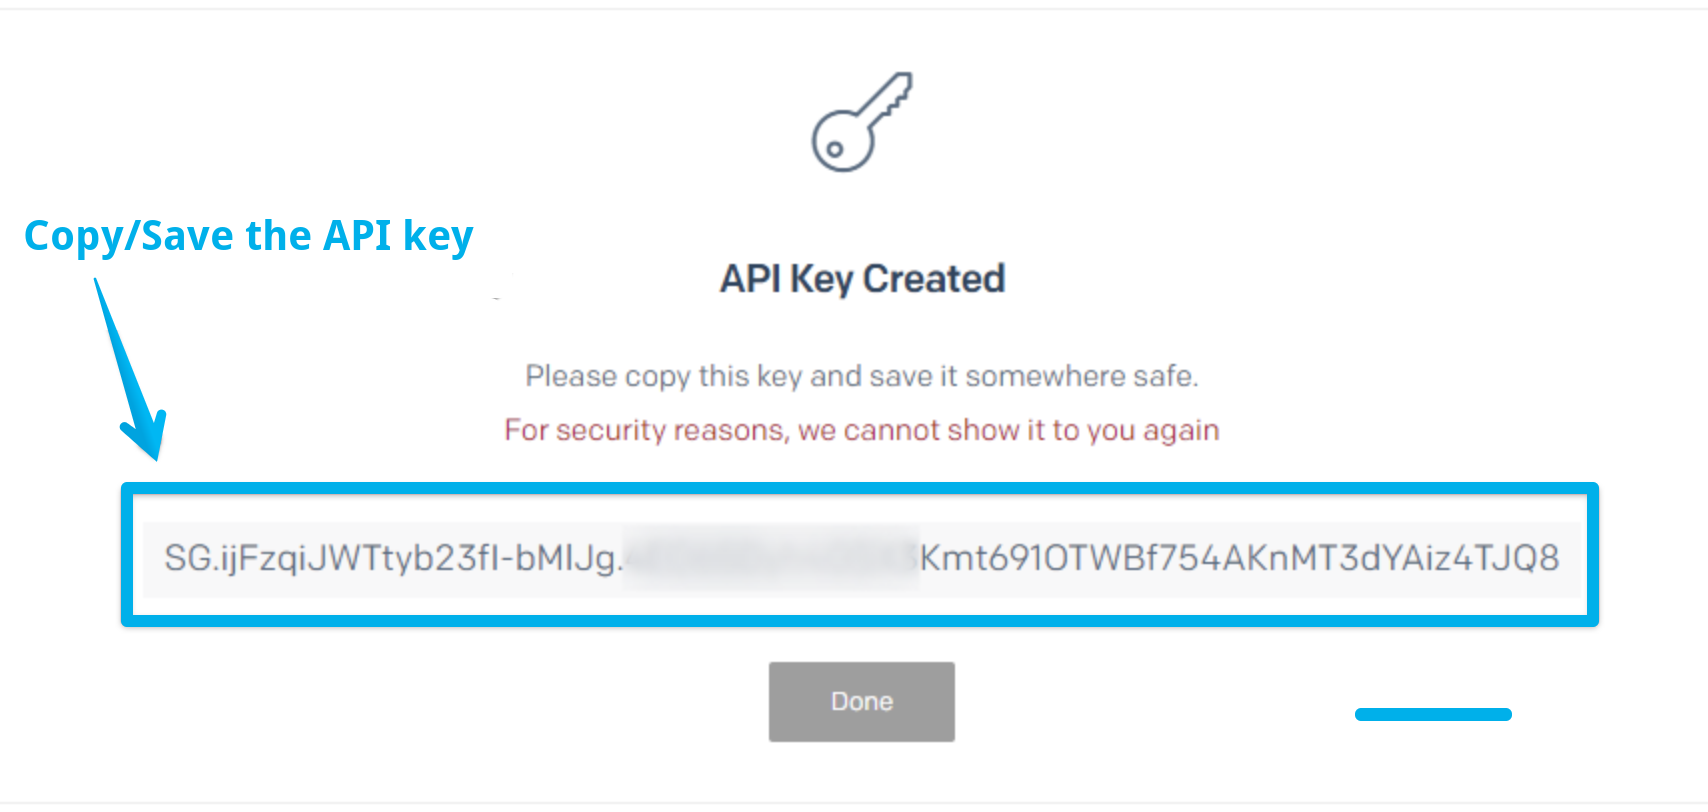
Important note: You need to copy or download the API key, and save it somewhere safe. For some security reasons, SendGrid won't show it to you again.
Step 4: Enter the SendGrid API Keys in the API Key field in your DropFunnels custom SMTP settings as below, then follow the remaining steps 1-10 below:
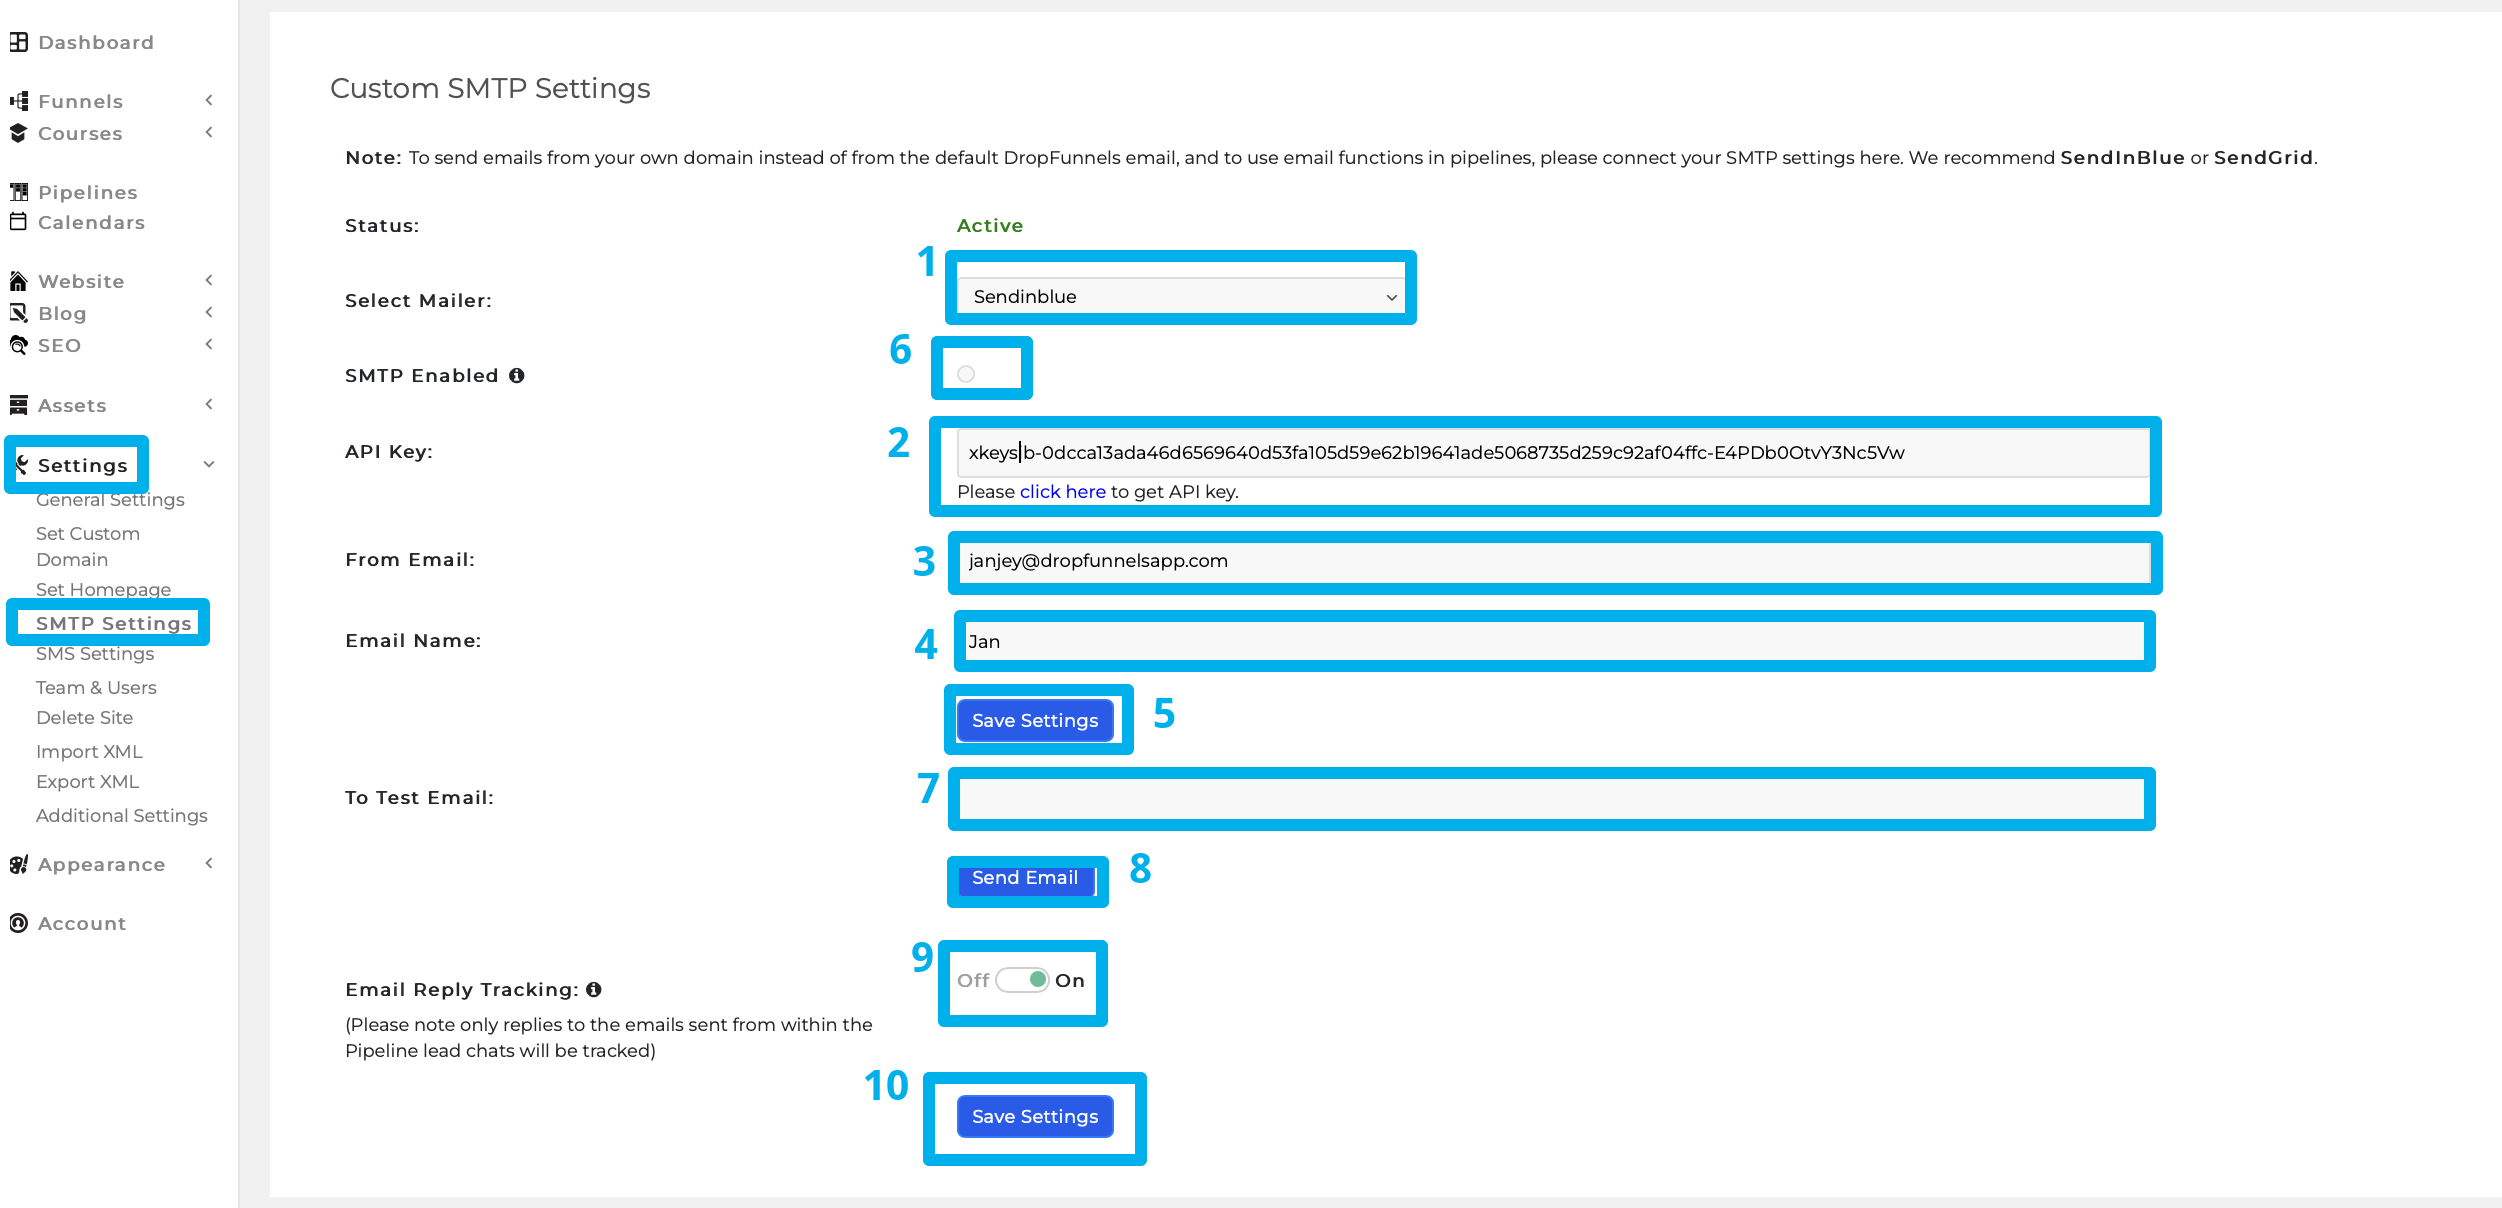
1. Select Mailer: SendGrid
2. Enter the SendGrid API KEY in its respective field
3. From Email - The email address displayed as the sender.
4. Enter Email Name - The name displayed as the email sender.
5. Click "Save Settings"
6. Enable "SMTP Enabled". This will officially send transactional emails using your custom domain name.
7. To test if the connection is successful, enter your email under "To Test Email" and you will receive a SMTP Settings Verification email in your inbox.
8. Click "Send Email" after clicking you should receive an email that looks like the image below.
9. Email Reply Tracking: This is to track incoming emails. (Please note only replies to the emails sent from within the Pipeline lead chats will be tracked)
10. Click "Save Settings" and you're good to go!
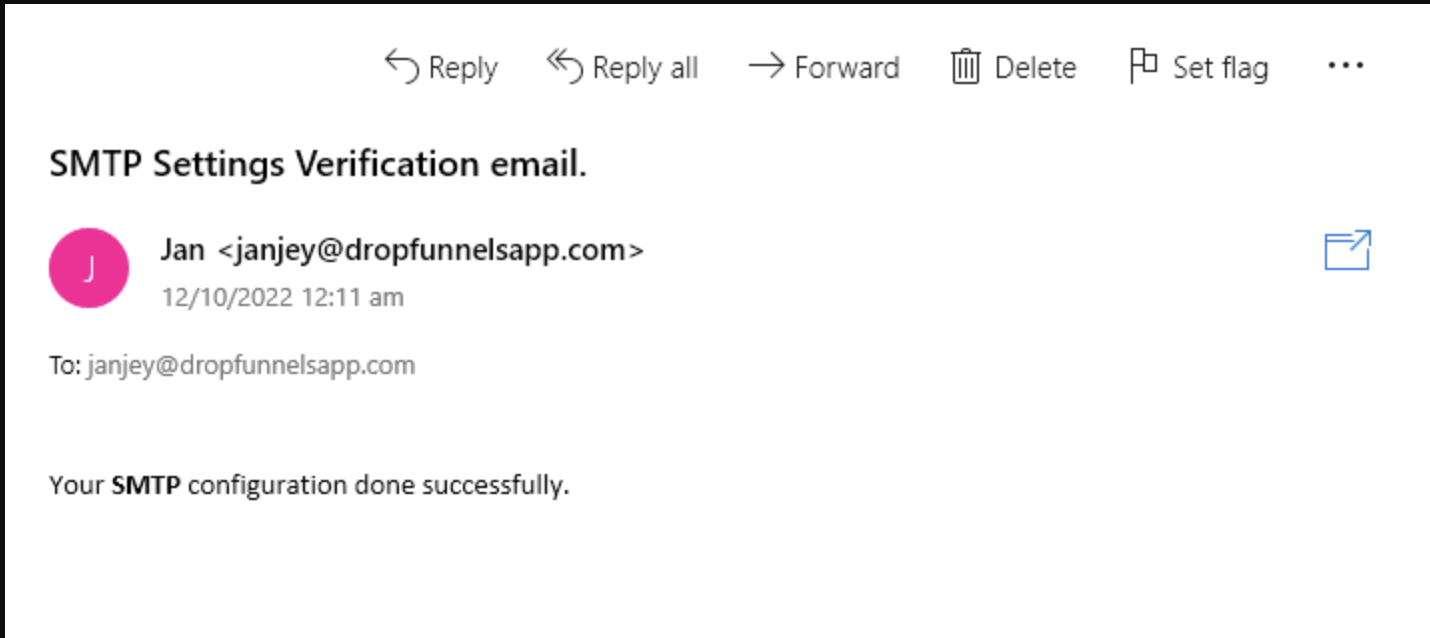
Note: If the status shows "Inactive" , you need to send a test email.
If you can't find the test email in your inbox, make sure to check your promotional emails or spam folder.

