How To Create Menus
Learn how to create dynamic menus that you can update once and apply to multiple different pages. You'll also learn how to create a scrollable menu without navigating to different pages.
If you have a new account or a home page hasn't been assigned to your account, you probably don't have the option to move forward just like the image below.
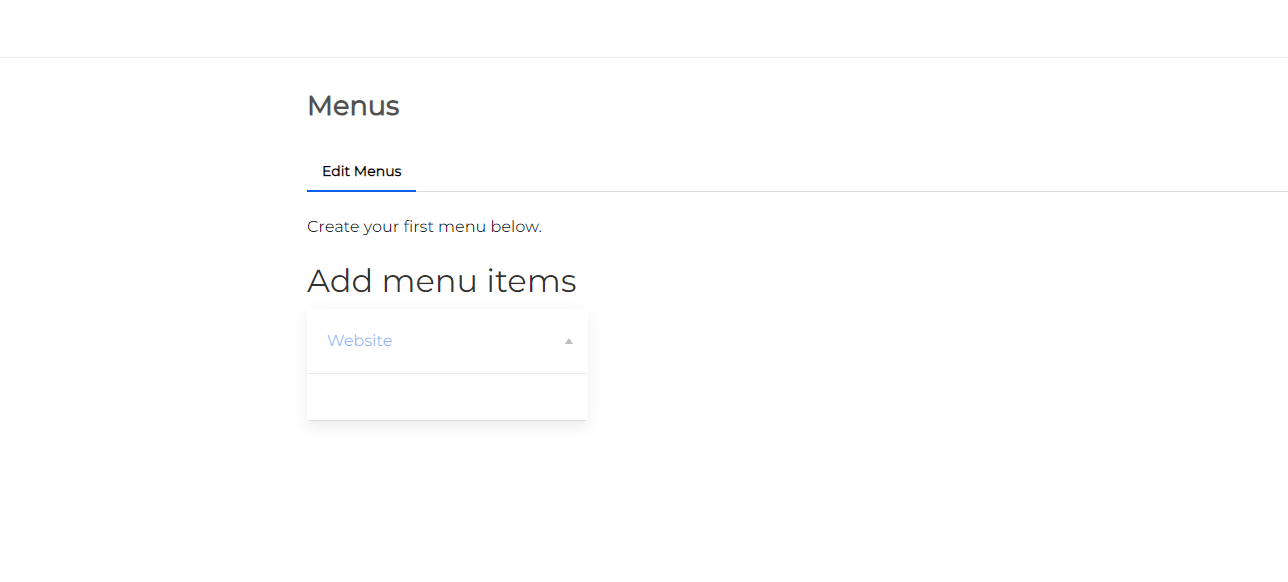
IMPORTANT NOTE: In order, for you to be able to create your Menu and add menu items, you need to make sure you have completed the following checklist items.
Checklist Items:
- Make sure you have at least ONE website page.
- Make sure you have assigned a Home Page.
Once you have both ready, you can continue to create your Menu by following the steps below.
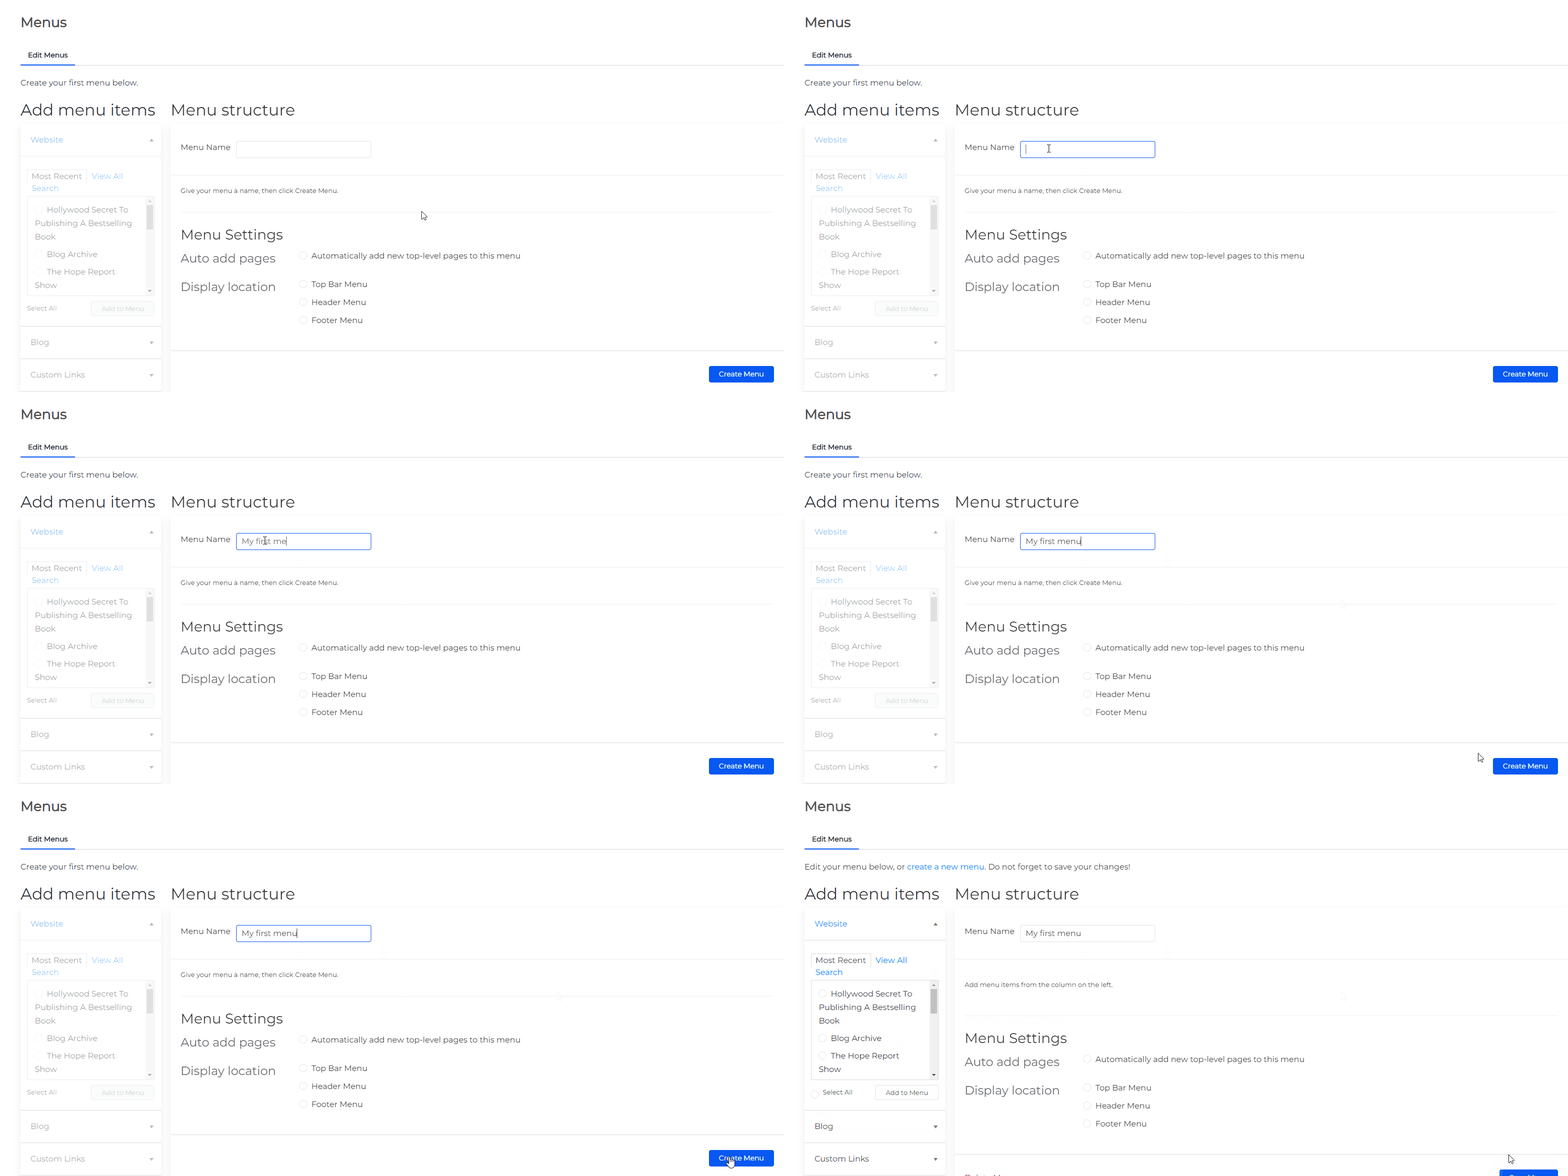
Step 1: Go to Website > Select Menus
This is where you can construct your own menu structure. You can display the menu in your header or footer.
Step 2: Add the Menu name then click "Create Menu"
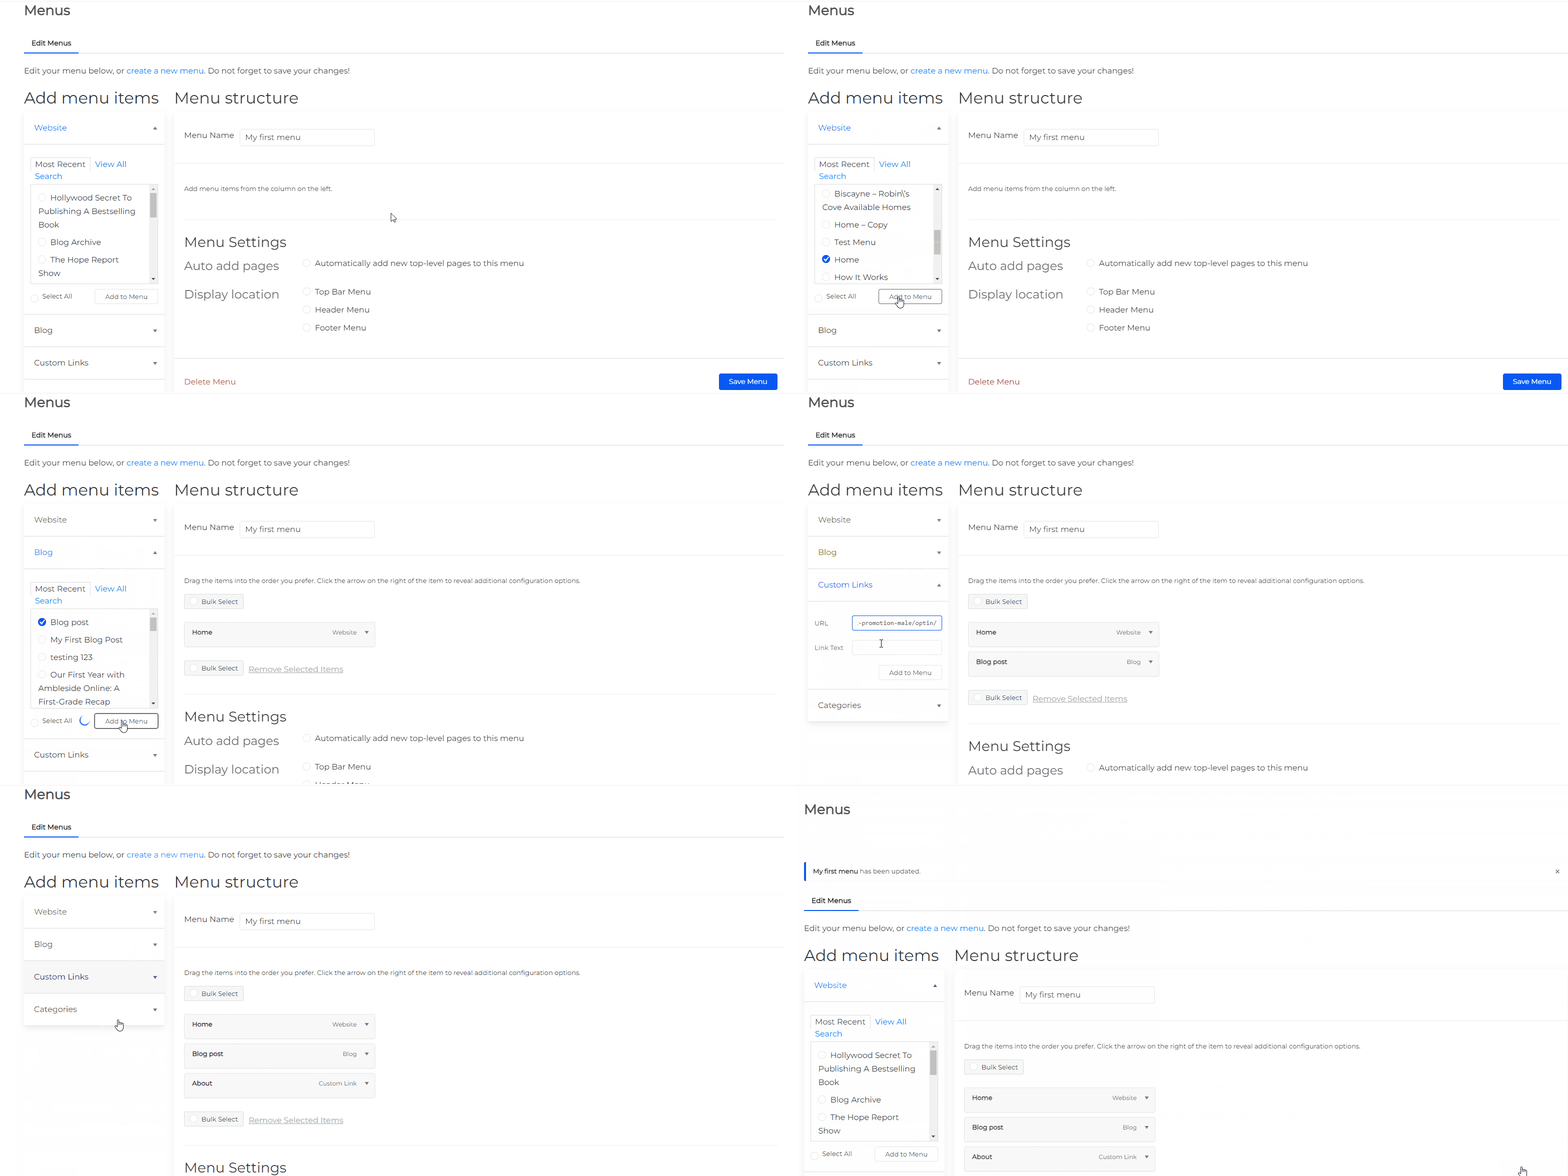
Step 3: Add menu items from the column on the left
Menu items could be:
- Website
- Blog
- Custom Links
- Categories
After selecting or declaring the menu items you need to click the button "Add to Menu".
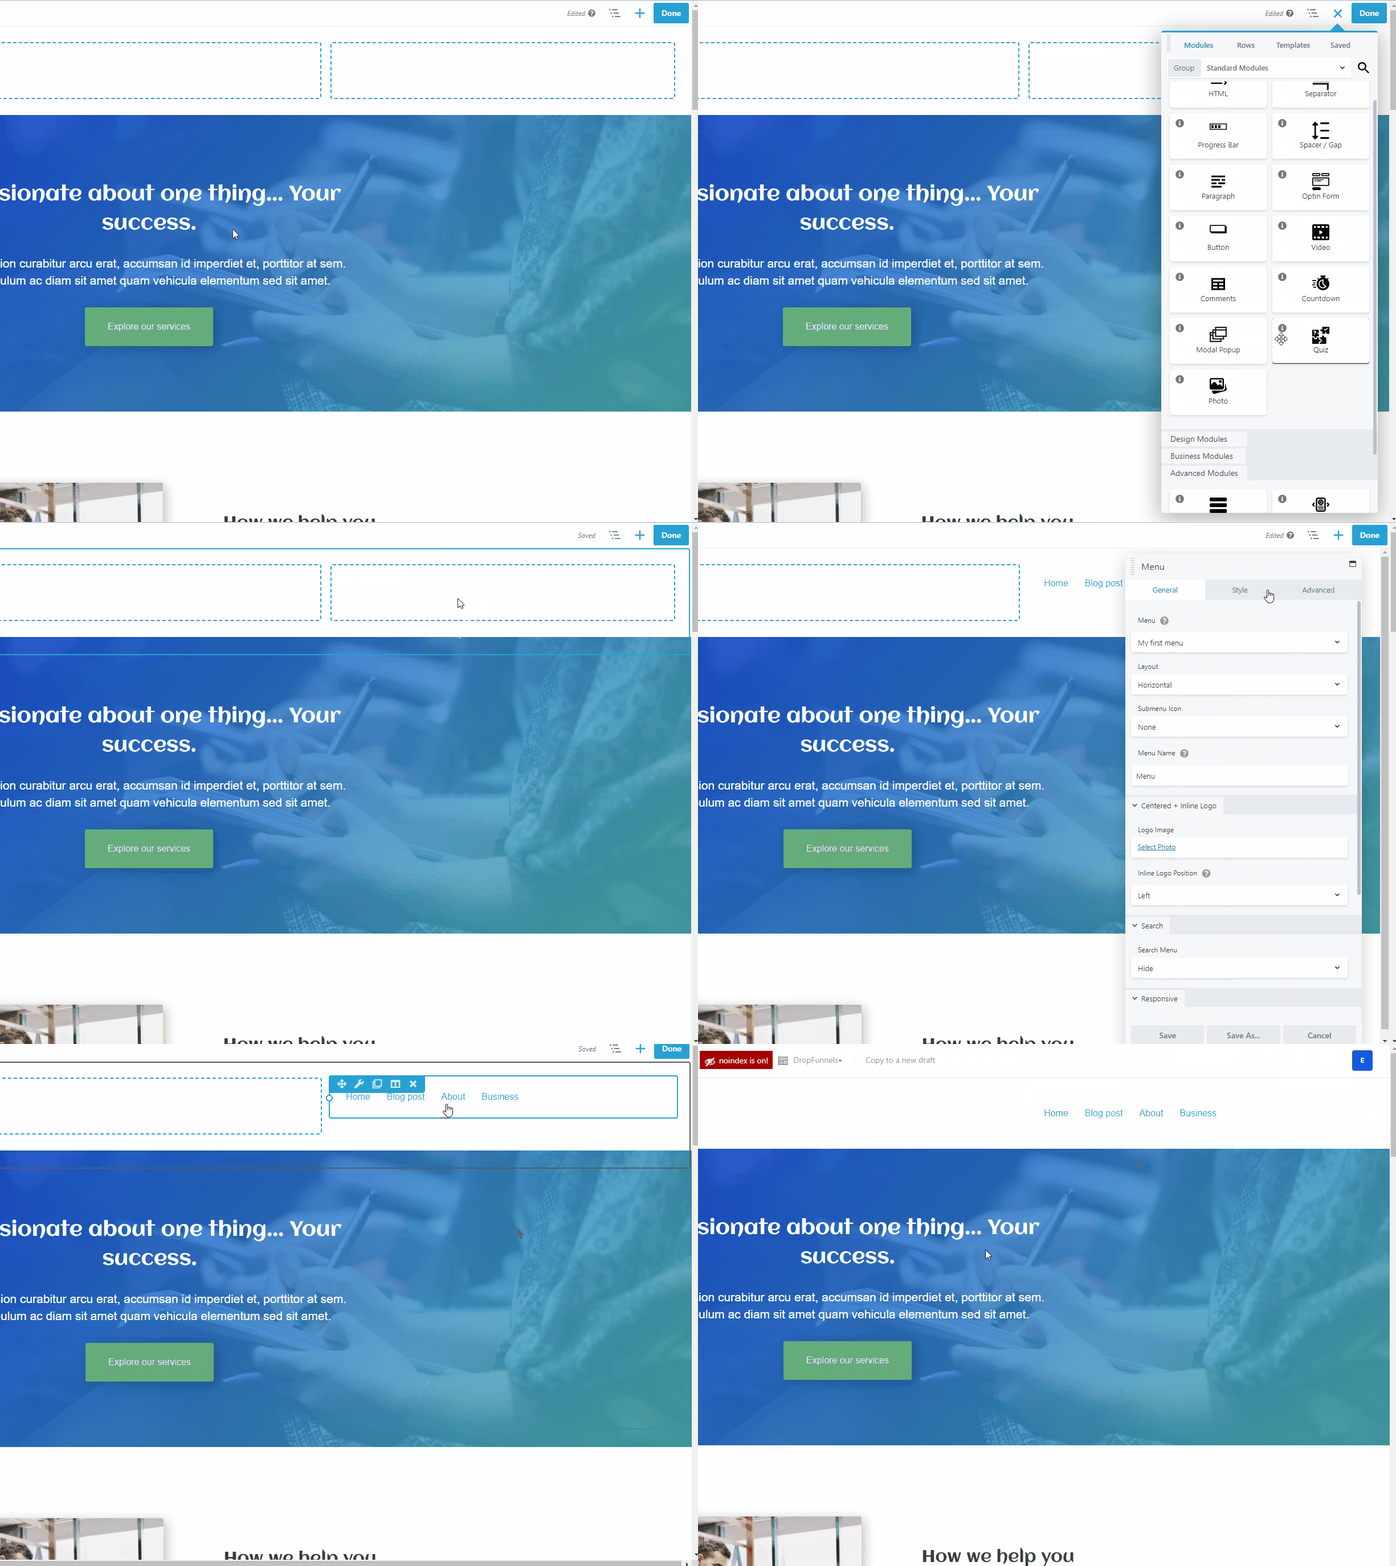
Step 4: Add menu your menu to your Page
You will be able to use your created menu by inserting the Menu module or the Pro Advanced Menu module on either the header or the footer of your funnel or page.
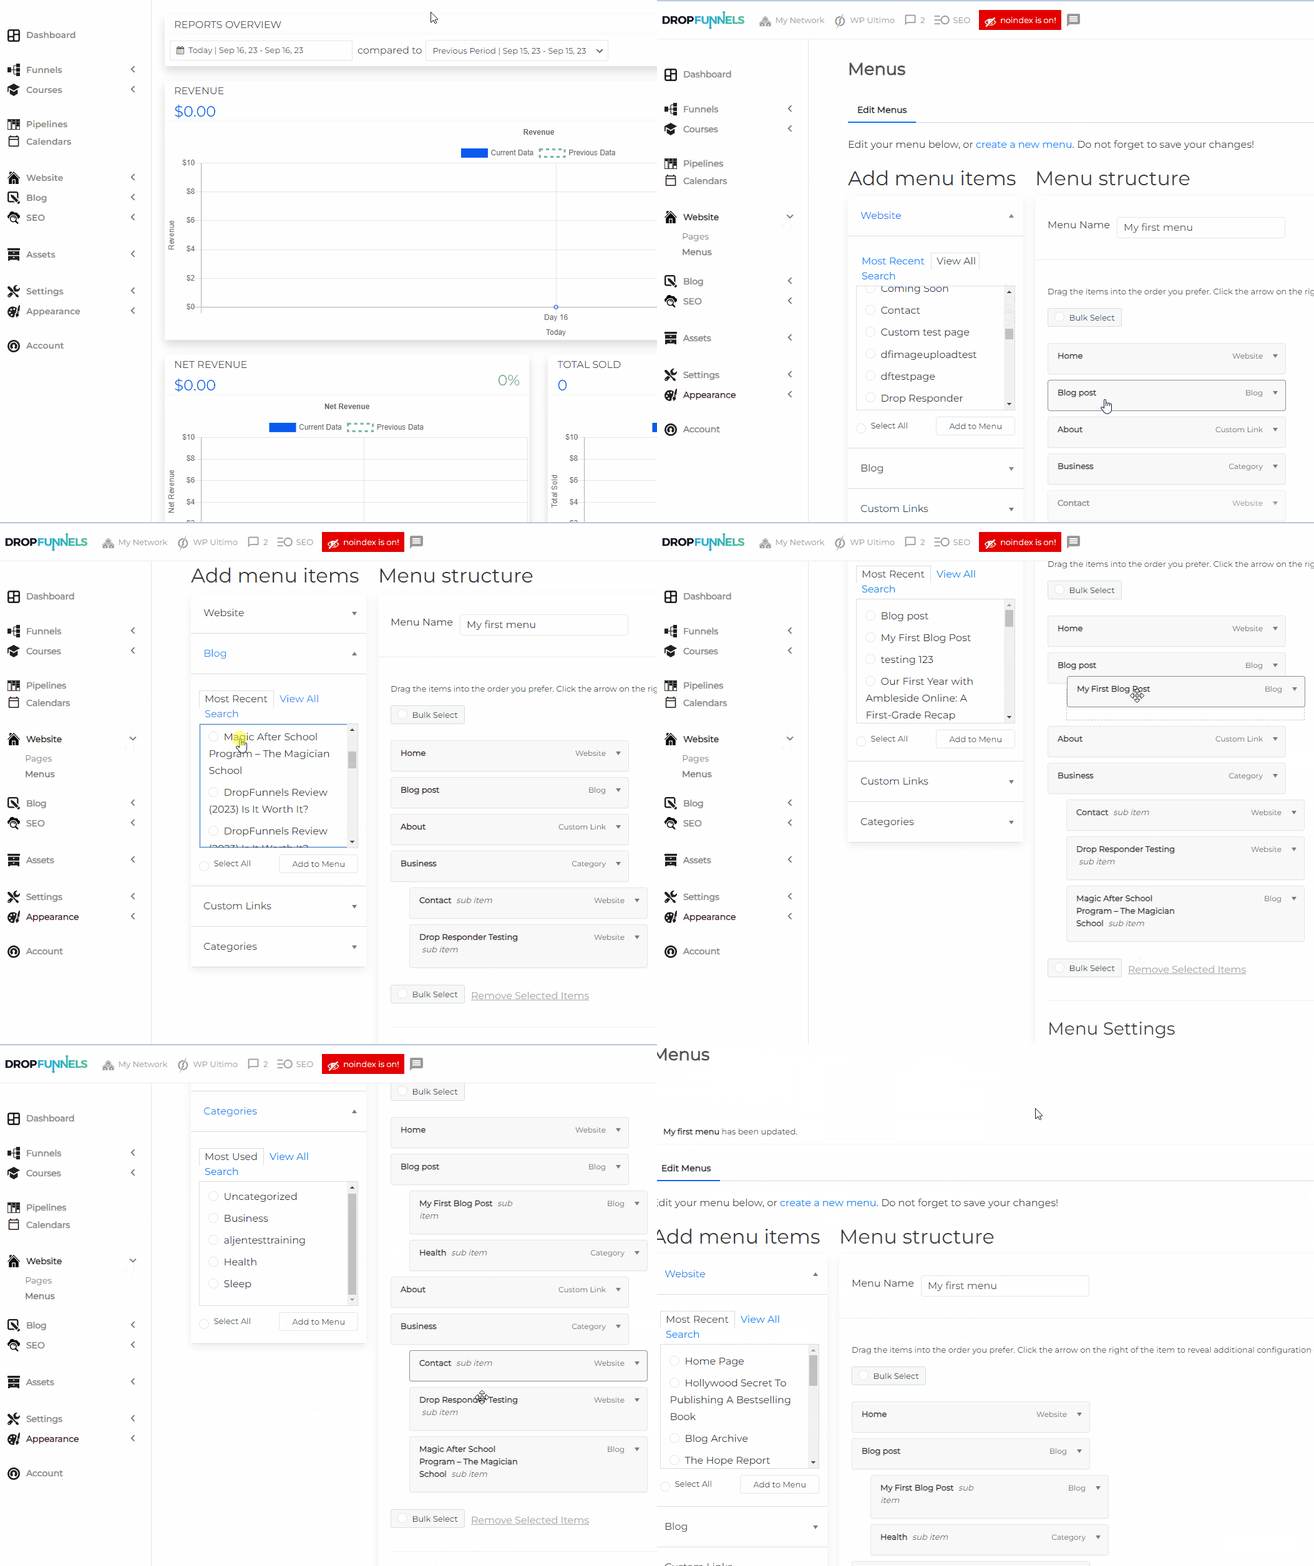
How to add Sub Menu on your existing Menu
You can also add a sub-menu to your existing menu you can do that by going to Website > Menus > Select a menu item to add > Drag it to your preferred menu as a sub-menu.
To add your newly added Menu with Sub-menu to your page, please refer back to Step 4 of this article.


