How to add Billing Portal for your Clients
In this article, you will learn how to add a Billing Portal to your Course to help your Clients manage their subscriptions.
In light of new regulatory requirements set forth by the U.S. agency’s recently adopted rule, as outlined in this article, it’s crucial to provide customers with easy and transparent billing management, especially for recurring subscriptions, courses, and memberships. DropFunnels has introduced a Billing Portal module to help you stay compliant and simplify subscription management for your customers.
Follow these steps to enable the Billing Portal in DropFunnels and give your customers control over their subscriptions:
Step 1: Set Up a Payment Gateway Integration
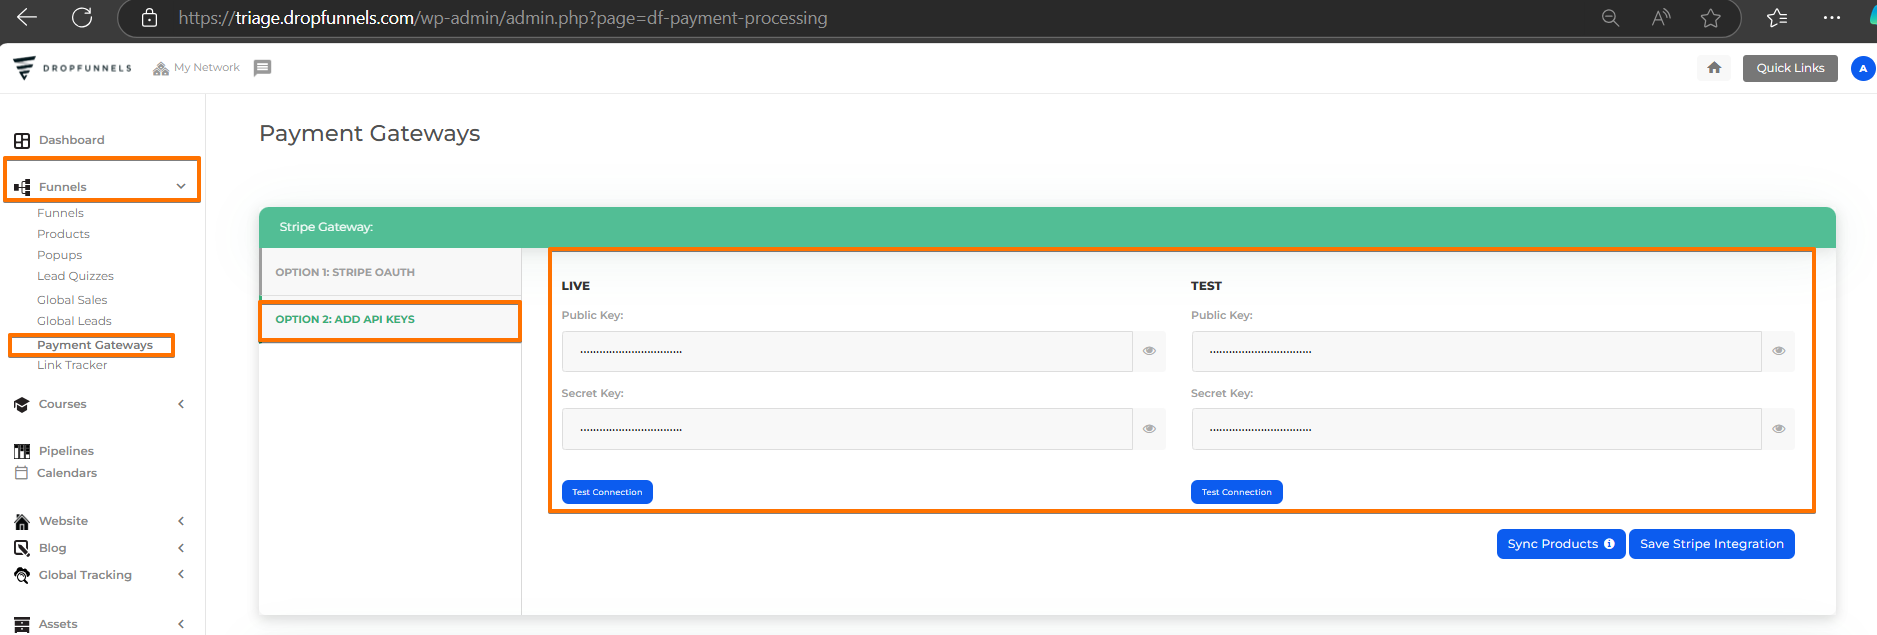
Before enabling the Billing Portal, ensure you have a Payment Gateway set up on your site. If you're using Stripe as the payment processor, make sure it’s integrated with DropFunnels using API keys (Option 2). For a detailed setup guide, refer to this guide.

Step 2: Access Billing Portal Settings inside the Course
- Log in to your DropFunnels Dashboard.
- Go to the Courses section.
- Select the Course for which you want to enable the Billing Portal.
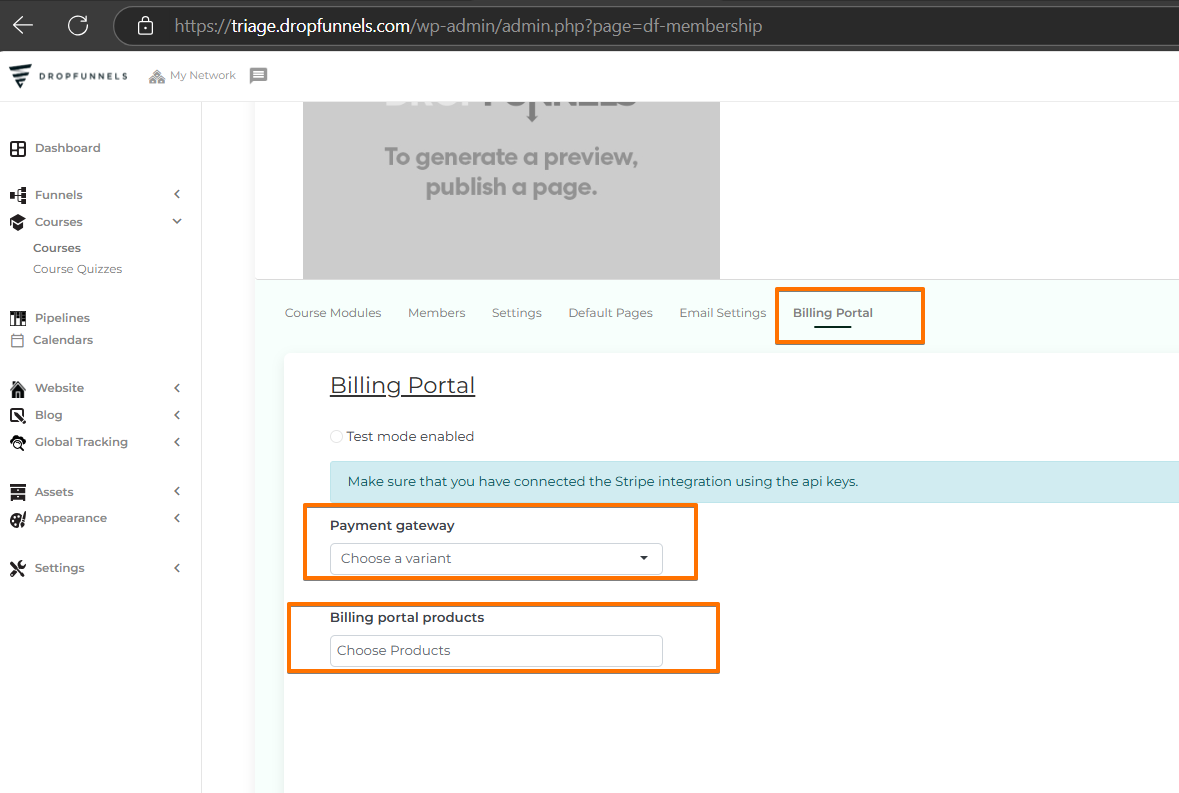
- Navigate to the Billing Portal tab within the course settings.

Step 3: Configure Payment Gateway and Products
- Select a Payment Gateway: Choose your connected Stripe account or another payment gateway you’ve integrated with DropFunnels.
- Choose Products: Select the specific products or subscription plans that can be managed by customers within the Billing Portal.
- Save Configuration: Click Submit to save your settings and activate the Billing Portal.
If you enable the "Use Stripe Native Billing Portal" checkbox, the /members/settings page will display only one button labeled "Manage Account". Clicking this button will open a Stripe Billing Portal session, allowing users to manage their account directly within Stripe.
Note: Be sure to disable test mode when going live.

Step 4: Add the Billing Portal Module to Course Pages
- Navigate to Course Pages: Go to your Default Pages or specific Course Lessons where you want to make the Billing Portal accessible.
- Add the Billing Portal Module: Drag and drop the Billing Portal module into the selected page. We recommend adding it under Account Settings in the Default Pages to give your customers easy access to manage their subscription plans.

Why It Matters
The new Billing Portal simplifies subscription management and ensures compliance with recent regulations on subscription cancellations. Customers can easily manage their plans, adjust subscriptions, and update payment details, providing a smooth and transparent experience.
For further assistance, feel free to contact DropFunnels support!

