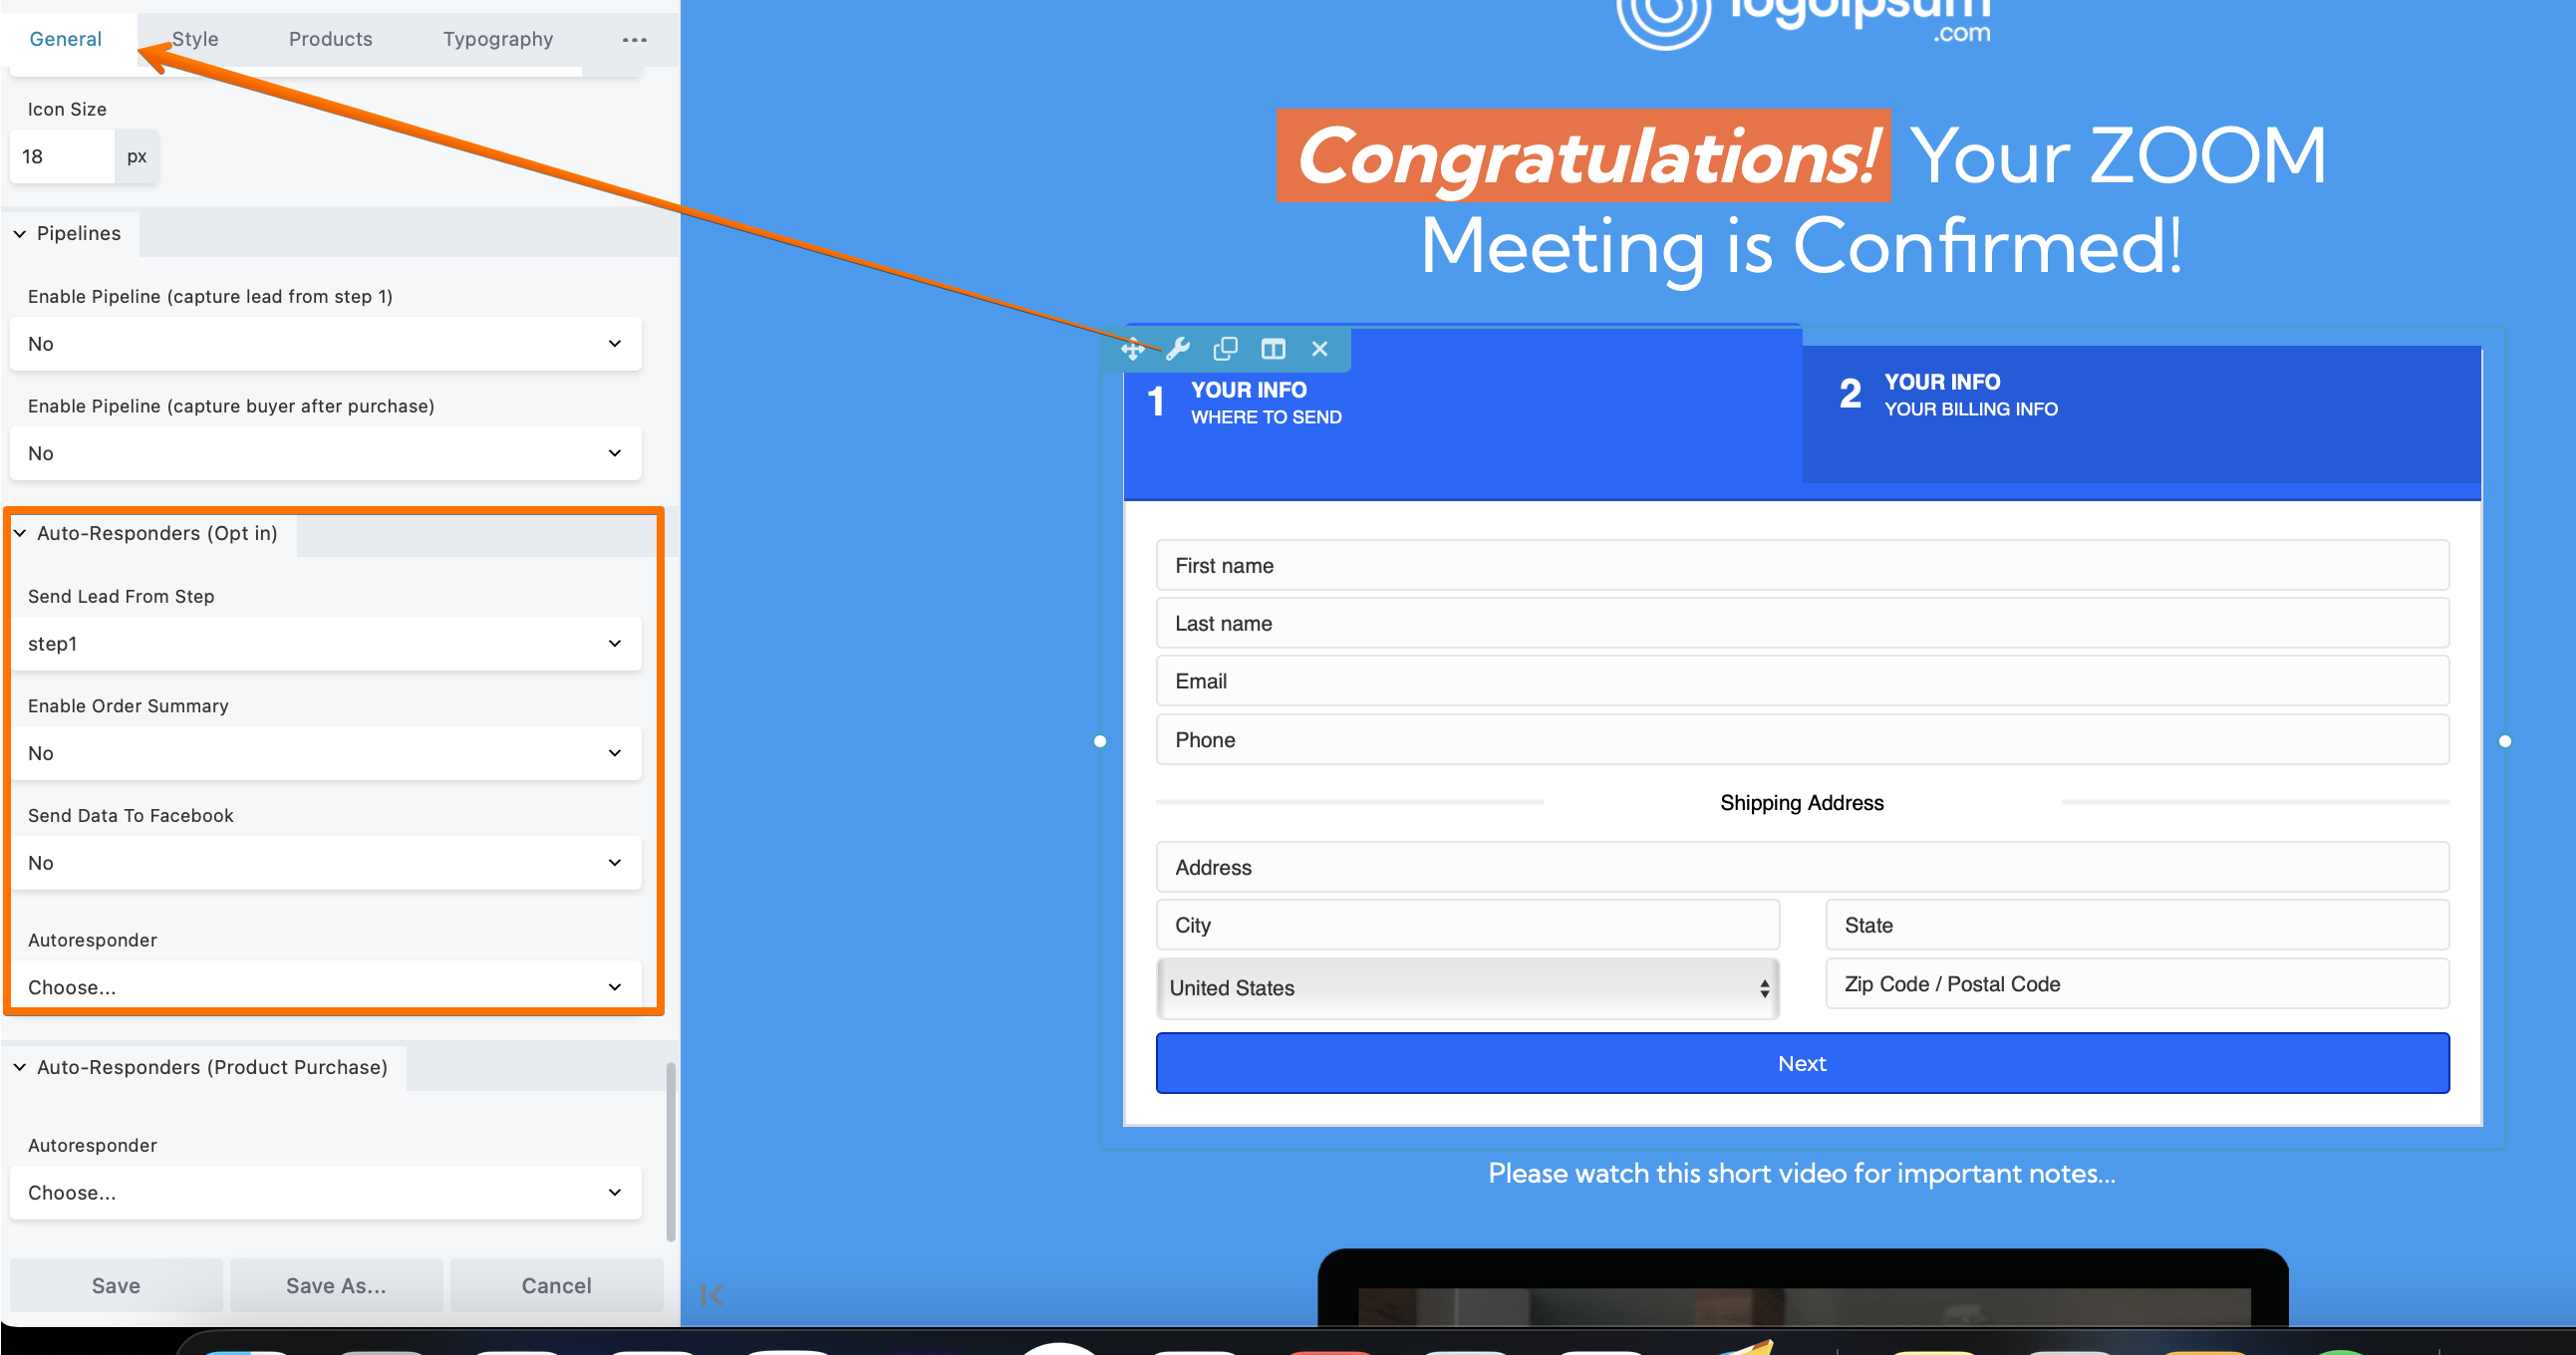
Adding Autoresponders to Your Checkout Module
How to Connect an Autoresponder Using Checkout Form or Two-Step Checkout
Step 1: Access the Checkout Form Settings.
- Navigate to your funnel and open the Checkout Module.
- Go to Settings > General > Auto Responders.
Step 2: Select an Autoresponder Service.
- Choose your preferred autoresponder from the full list of integrations.
Step 3: Add Service Details.
- Enter the required details for the selected autoresponder.
- Click Connect to link your account.
Step 4: Configure Lead Sending Settings.
- Specify the account, list, or tag where you’d like to send the lead after a purchase.
- Note: The setup process may vary depending on the autoresponder app/service.

Additional Settings
Facebook Pixel Integration
- Enable the Send Data to Facebook option to include Facebook Conversion API tracking.
Autoresponder for Two-Step Checkout Only
- Configure this option to send product purchase leads to the autoresponder app/service.
Upsell/Downsell Module Integration
To send data of customers who purchase an upsell or downsell:
- Access the Upsell/Downsell Module Settings > Autoresponders.
- Configure the settings similarly to the checkout module.

By following these steps, you can automate lead management and ensure seamless communication with your customers.

