User Management
In this guide, we'll explain how to add or register accounts to your white label site.
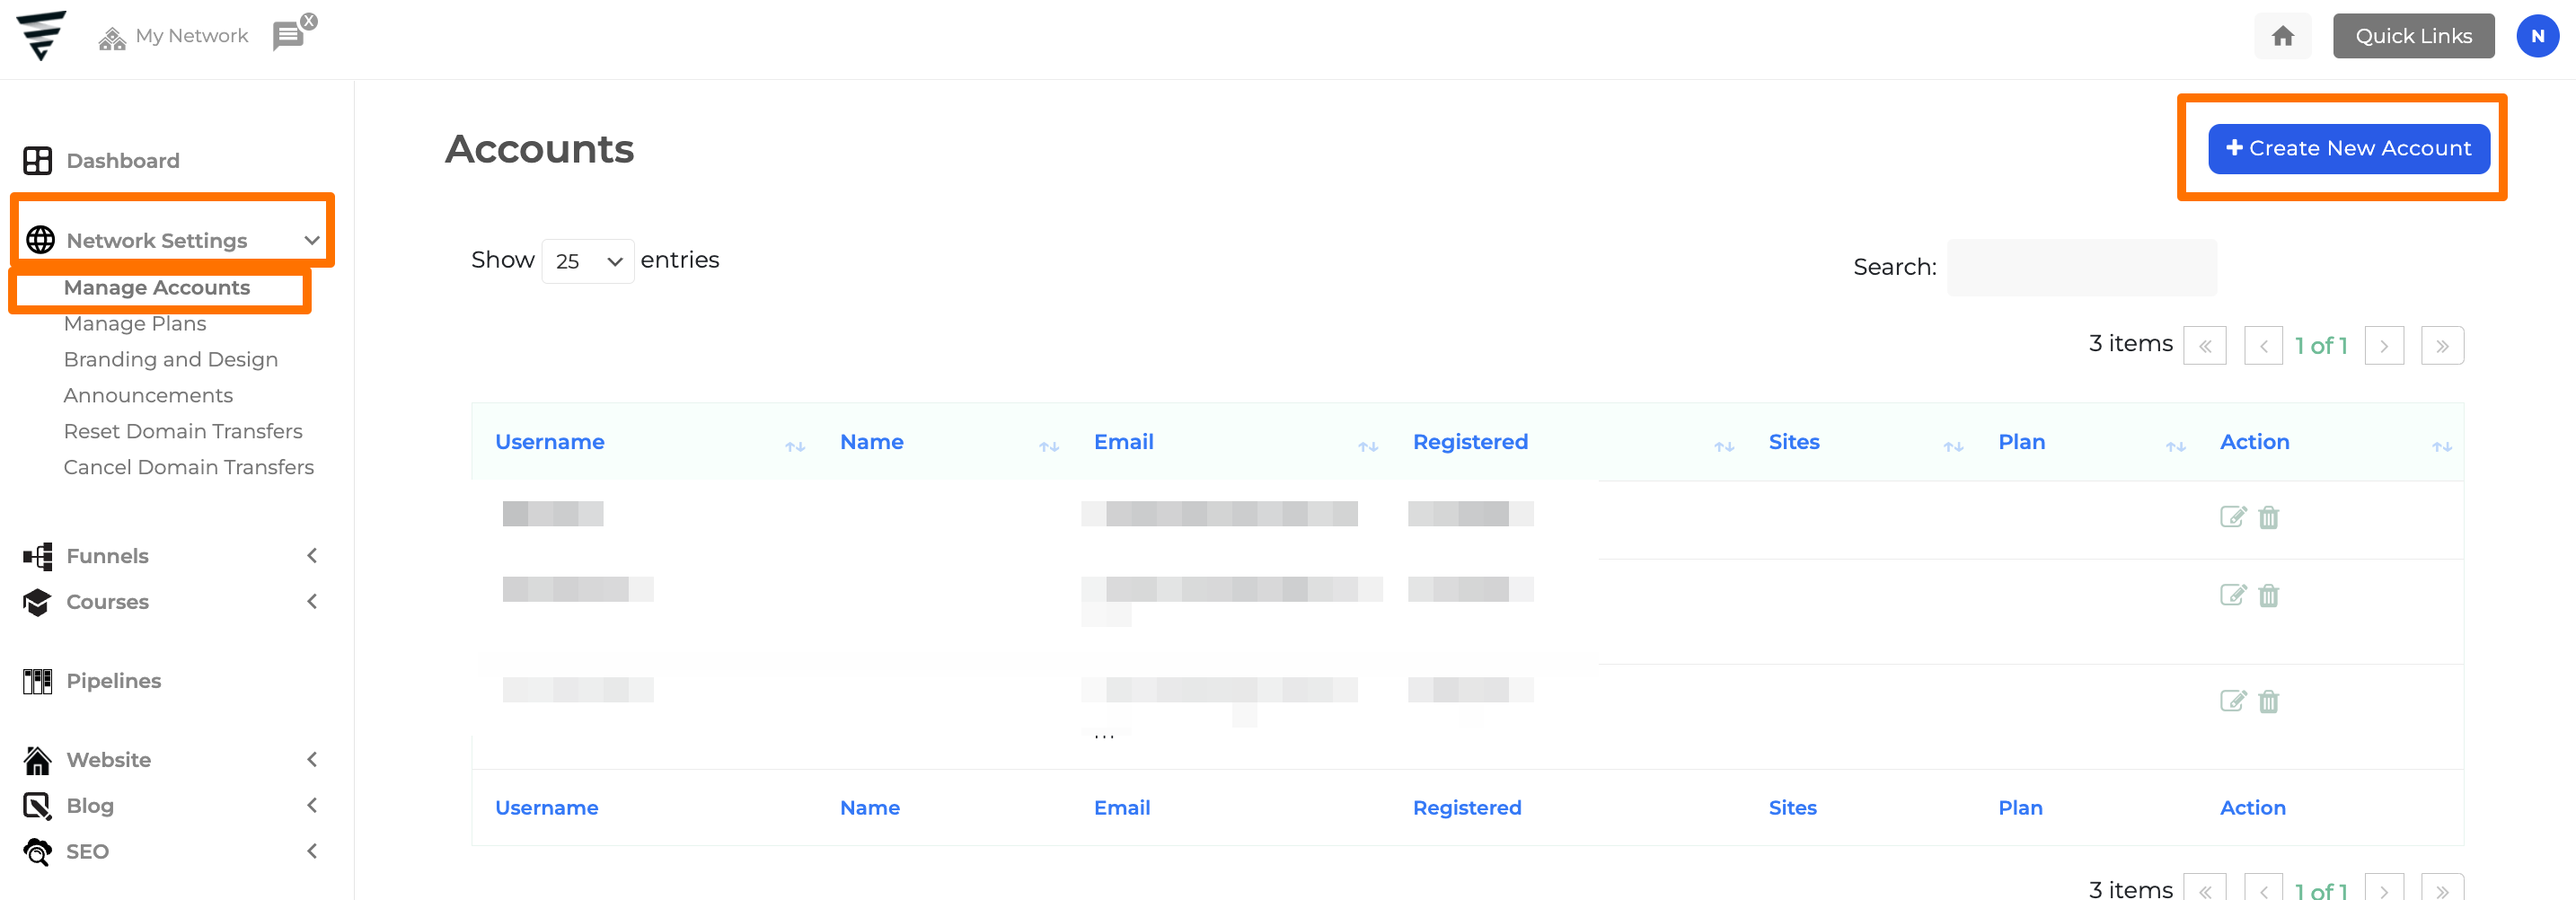
To add a new or configure an existing account, navigate to your Left Dashboard and access Network Settings. From there, go to Manage Accounts and click on Create New Account.

Adding a New Account
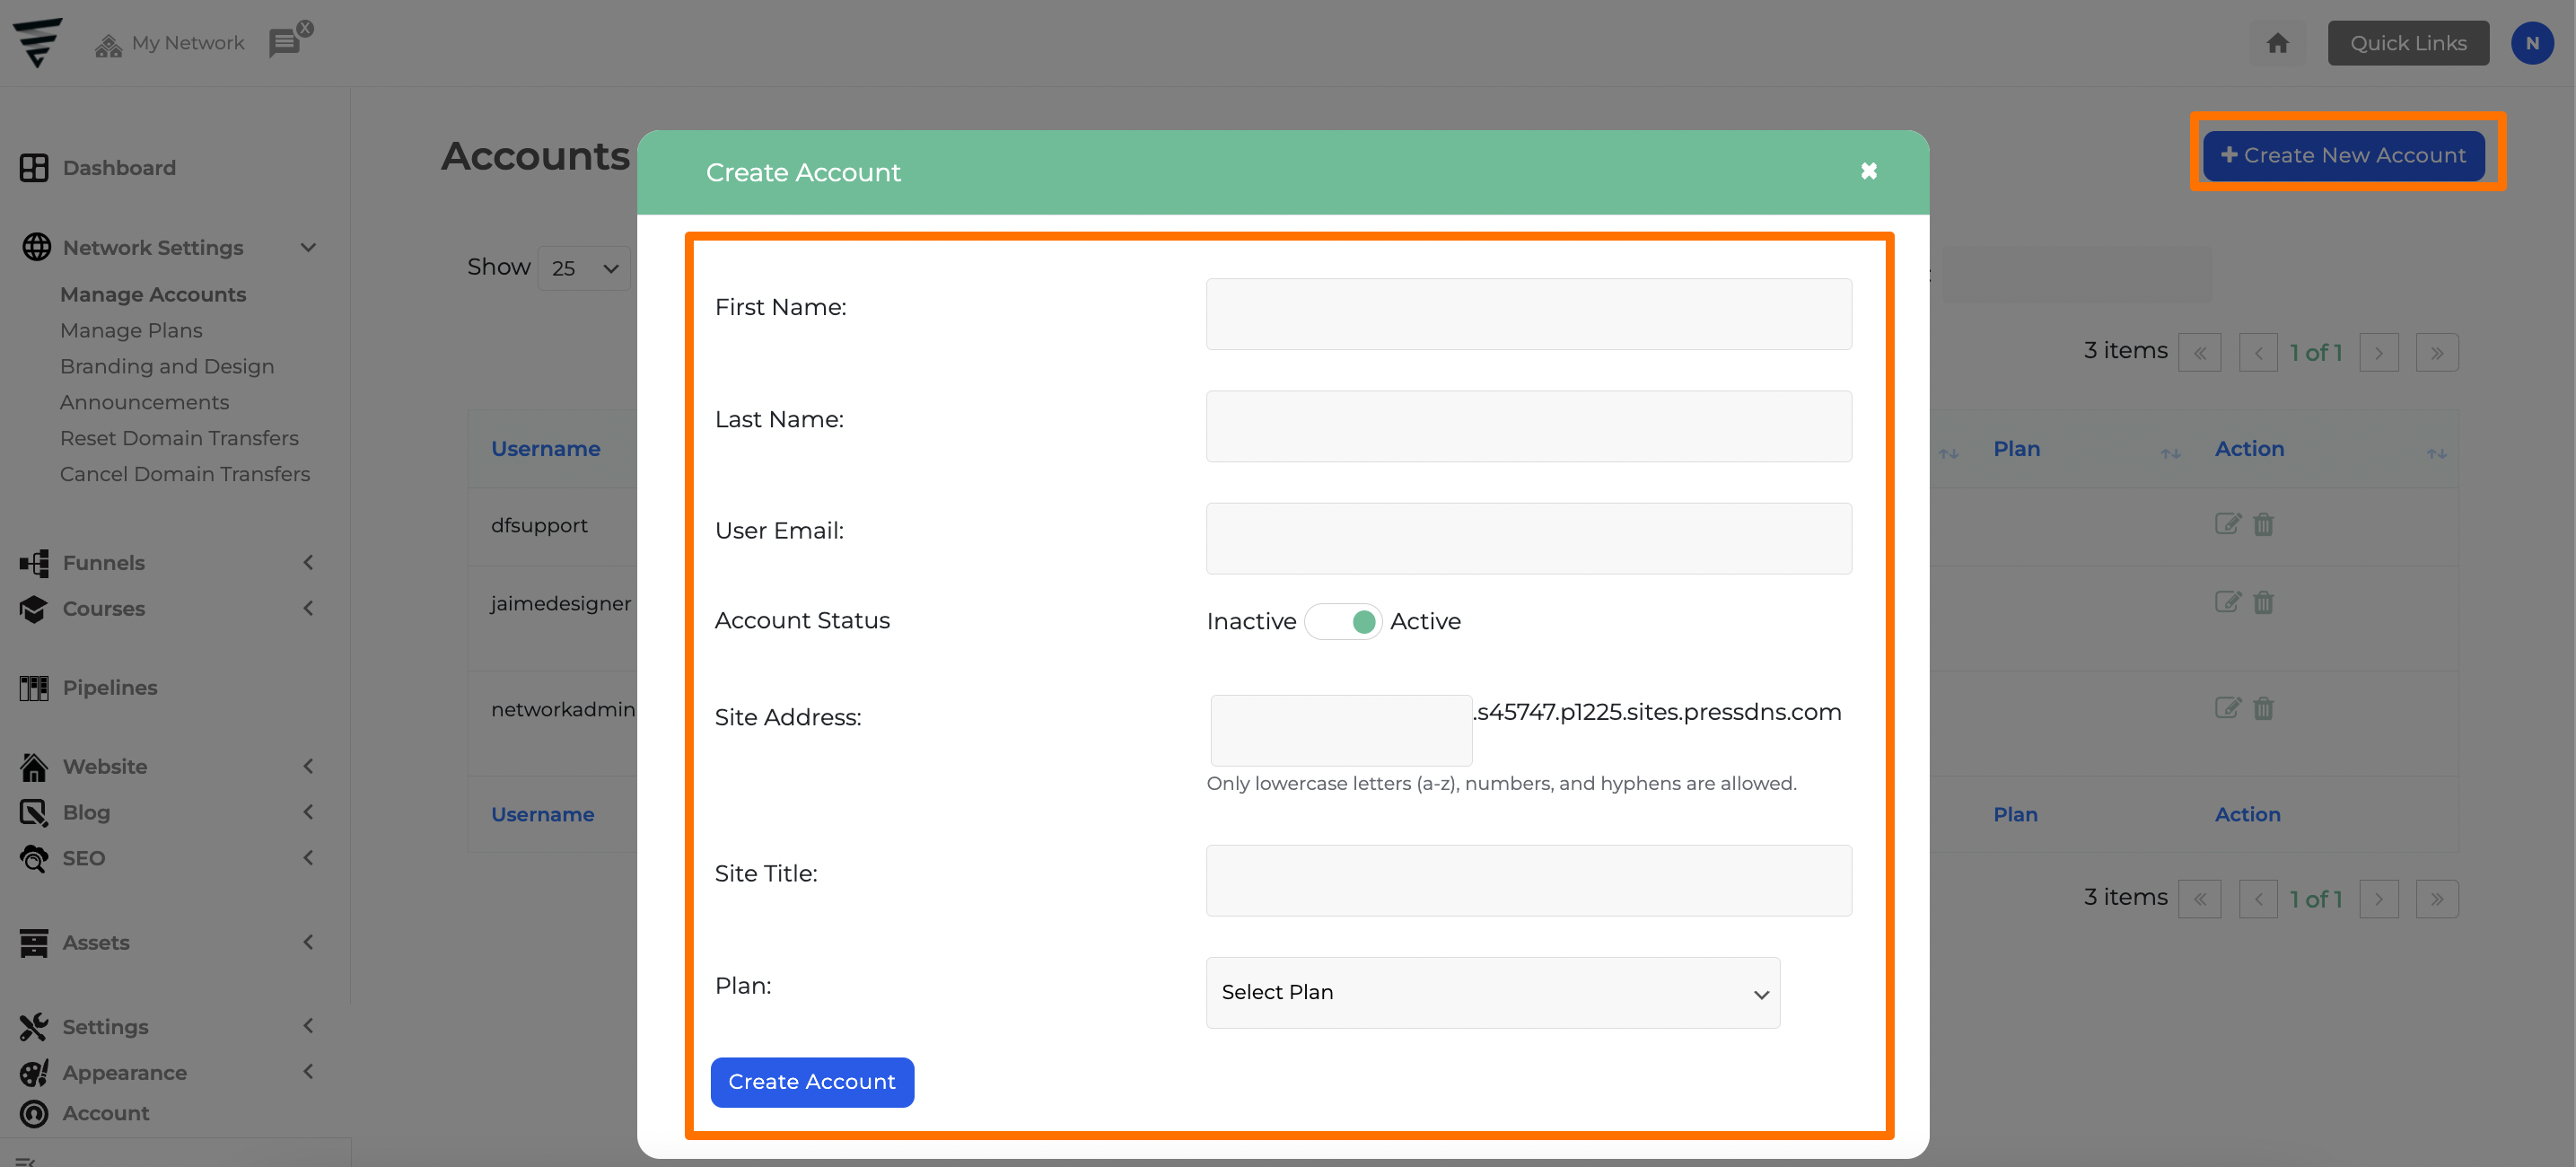
Click on Create New Account and fill out the following fields below.
- First and Last Name: Enter the name that will be displayed in your "Accounts" section.
- User Email: Input the email address you wish to link to the account on your White Label site. (The email being added will receive login information to access the site if you do not have yet an account)
- Account Status: Ensure it is set to "Active" to provide immediate access.
- Site Address: This will serve as the default subdomain link to access the site. You can connect a custom domain later.
- Site Title: This will be used as the Site Title.
- Plan: Choose a plan for this user. Refer to the Managing Plans guide for more information.

Editing Existing Accounts
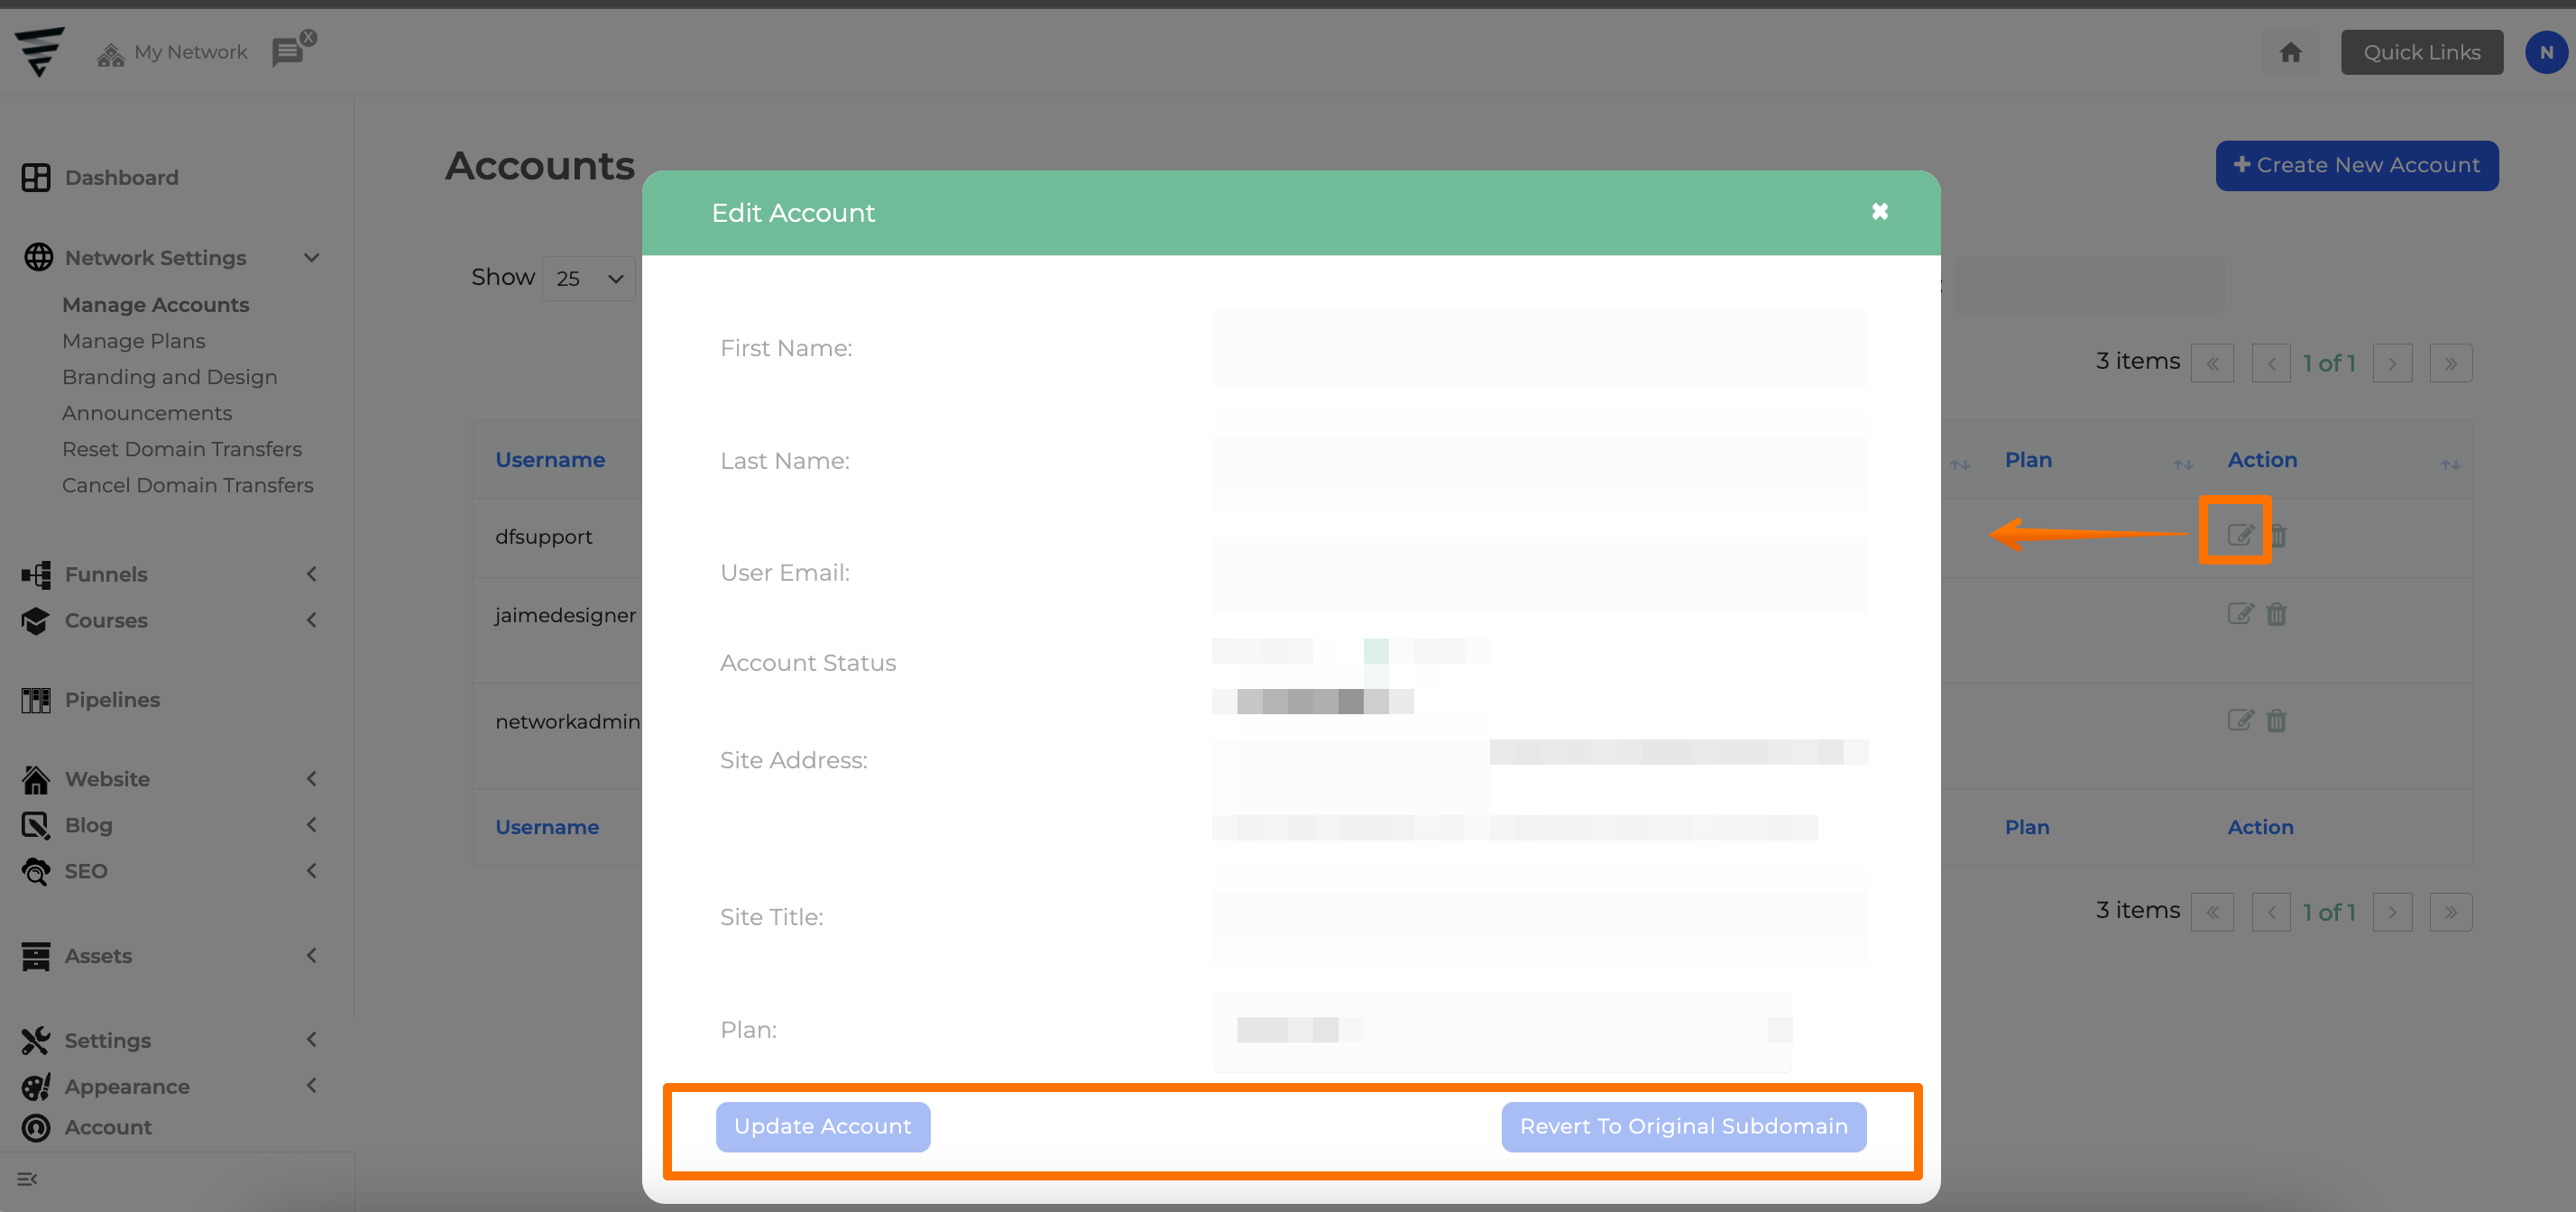
To access the account information and make changes, click on the edit button (pen icon) next to the user. After making the necessary adjustments, be sure to click on "Update Account" to save the changes.
The option "Revert To Original Subdomain" allows users to switch back from a custom domain to the default subdomain link.

Automate New User Creation
We offer the option to automatically create and deactivate users using Webhooks and Zapier. The process will differ slightly depending on your setup, so, if you’d like us to do this for you, please reach out to us via your support portal link.

