Plans Management
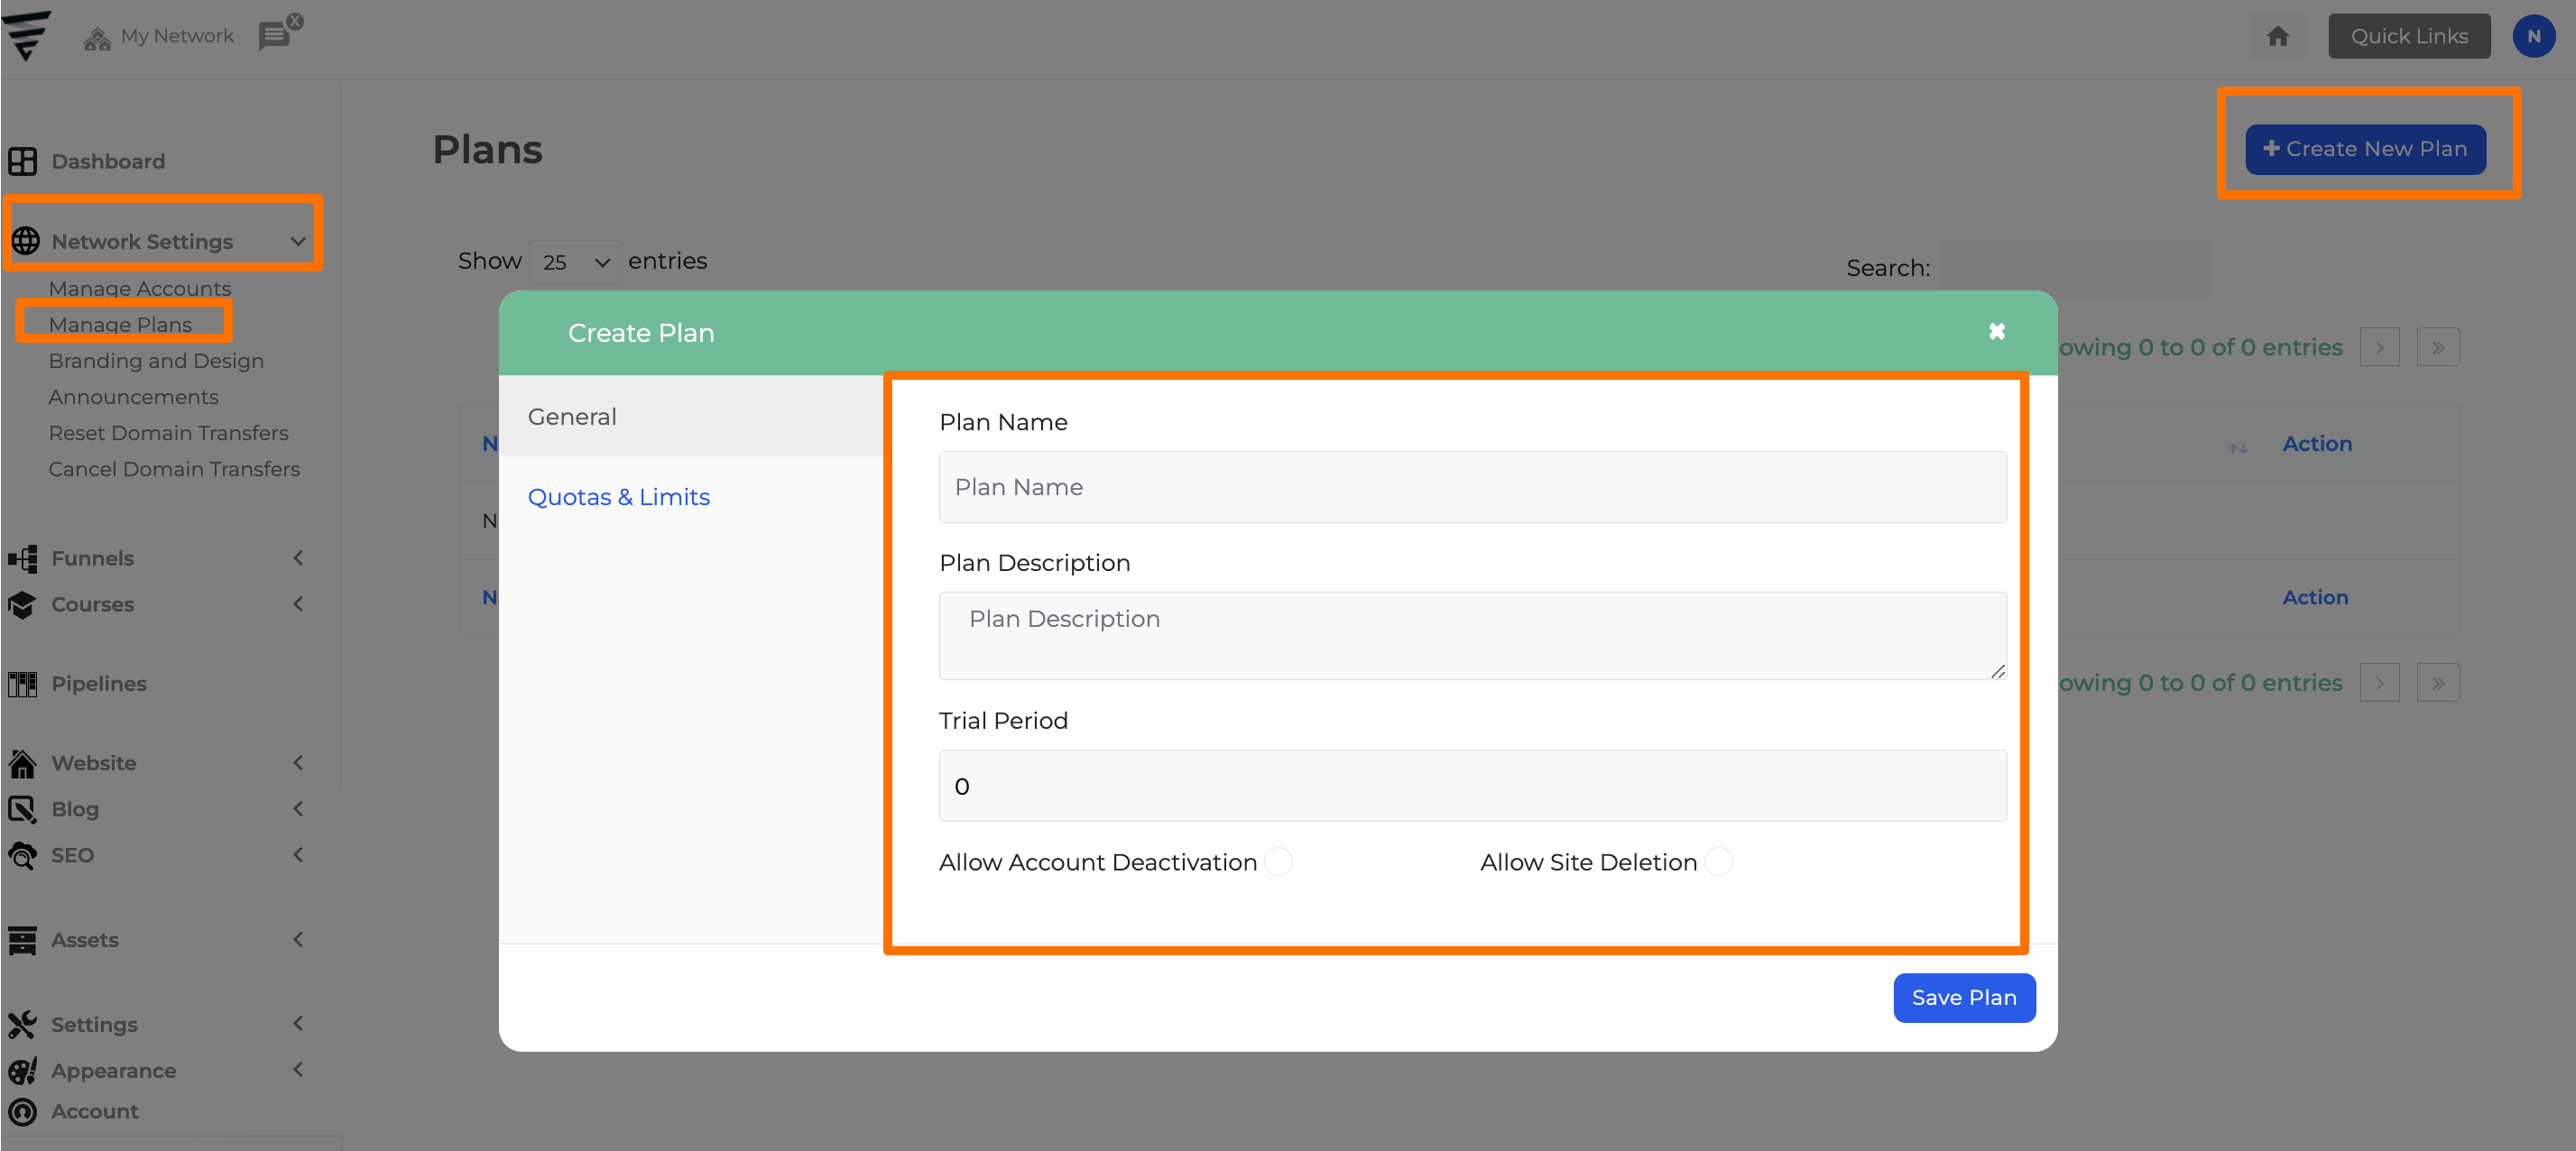
General
Plan Name: This is the title or name of the plan that will be displayed when users select a plan.
Plan Description: Provide a brief description of the plan to inform users about its features and benefits.
Trial Period: Specify the number of days for the trial period, if applicable. Enter 0 if you do not want to offer a trial period.
Allow Account Deactivation: Enable this option to allow users to deactivate their accounts if needed.
(Note: This option will be enabled in your settings. However, we strongly recommend leaving it inactive or unmarked.)
Allow Site Deletion: Choose whether to permit users to delete their sites.
Note: (This option will be activated by default in your settings. We highly advise keeping it inactive or unmarked.)

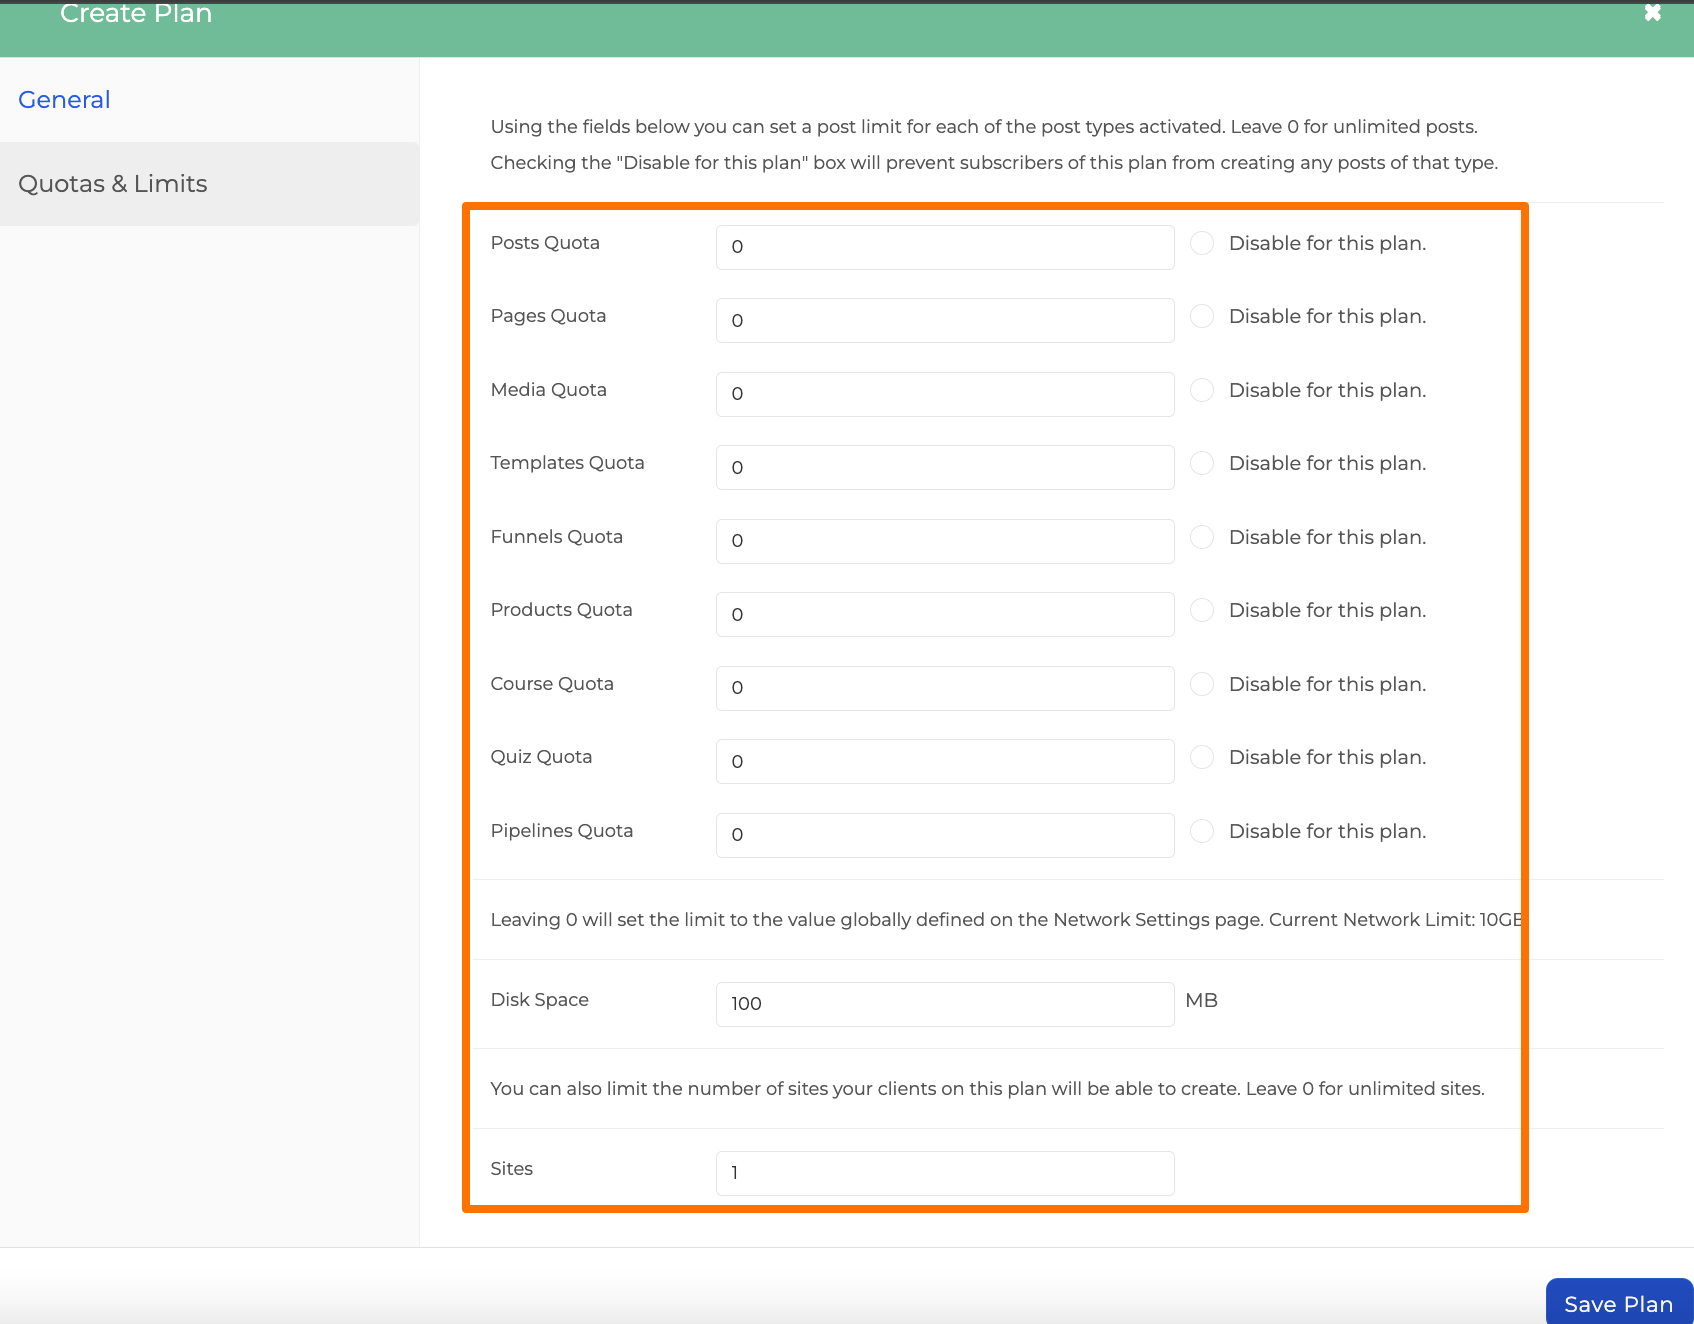
Quotas & Limits
You have the option to set a limit or quota for the features you are offering within the plan you are creating.
Posts Quota: The number of blog posts that a user can create.
Pages Quota: The limit on the website pages a user can create.
Templates Quota: The maximum number of Templates that can be created.
Funnels Quota: The number of Funnels that can be created.
Products Quota: The limit on the number of Products that can be created.
Course Quota: The maximum number of Courses that can be created.
Quiz Quota: The number of Quizzes that can be created.
Pipelines Quota: The limit on the number of Pipelines that can be created.
Note: (Using the fields below you can set a post limit for each of the post types activated. Leave 0 for unlimited Quota/Limit. Checking the "Disable for this plan" box will prevent subscribers of this plan from creating any posts of that type.)
Disk Space: This feature allows users to save files or any attachments, with a default display of 100MB when creating a plan. However, you can set a limit of up to 10GB for this feature.
Note: (Leaving 0 will set the limit to the value globally defined on the Network Settings page. Current Network Limit: 10GB.)
Sites: The number of Sites that can be created.
Note: (You can also limit the number of Sites your clients on this plan will be able to create. Leave 0 for Unlimited Sites.)

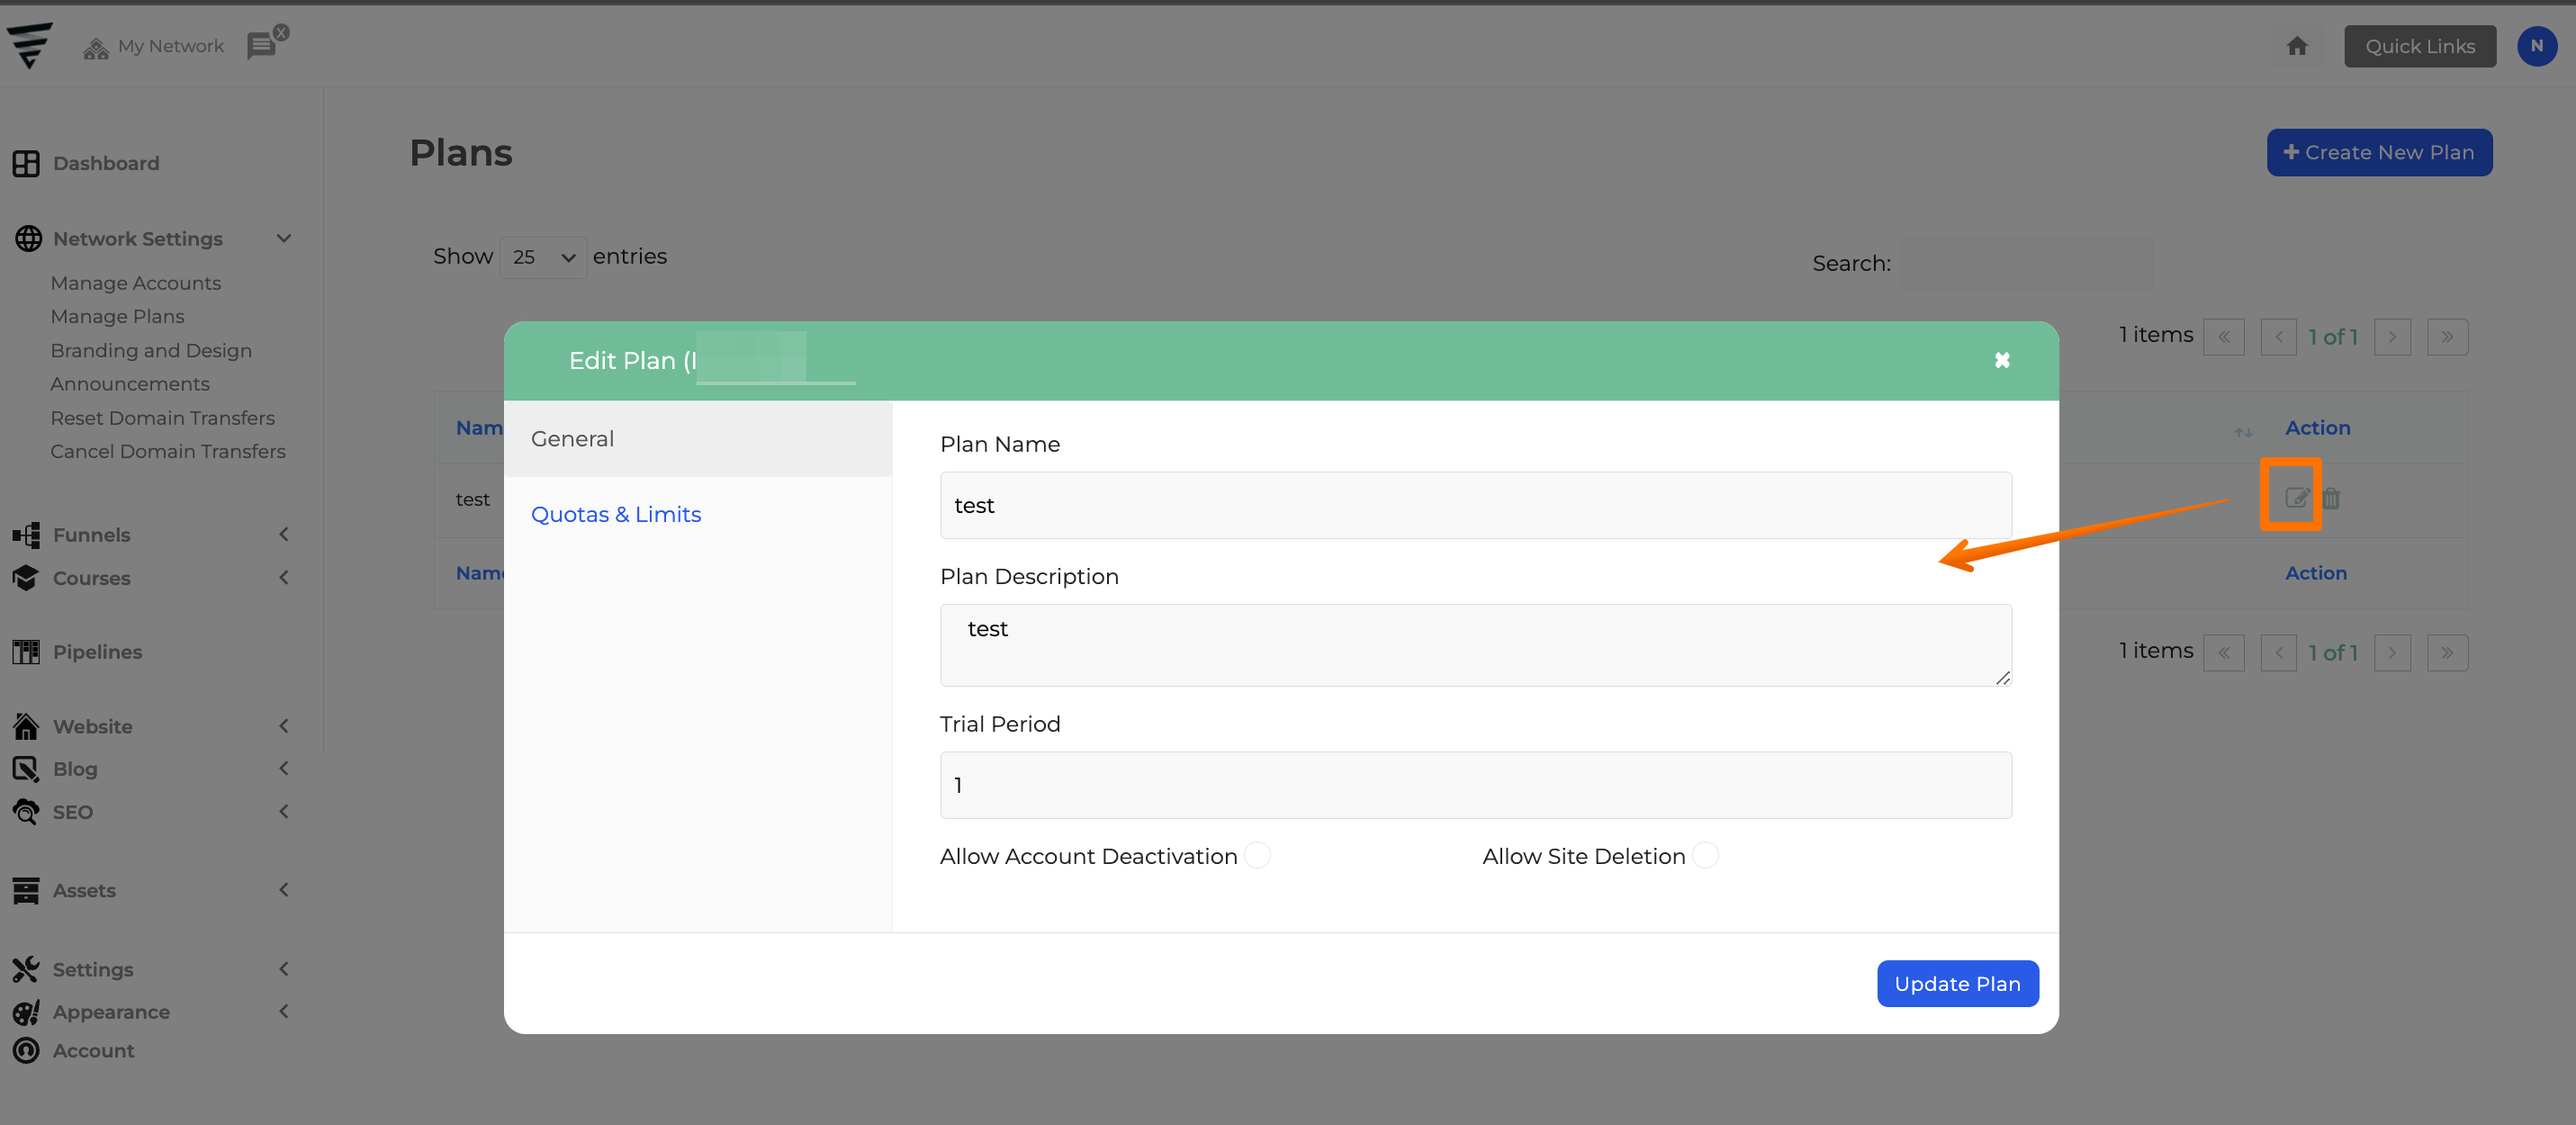
Editing a Plan
To edit a plan, go to your Dashboard, then access Network Settings, and click on Manage Plans.
Click on the Edit button (pen and note icon) next to the plan you wish to edit.


