How to Verify Your Email When Using SendGrid Inside Your SMTP Configuration
When configuring SendGrid as your SMTP provider within DropFunnels, it's important to follow a few key steps to avoid issues with API key blocking and ensure smooth email delivery. SendGrid has implemented several security measures that require you to verify your sender email or domain, generate a secure API key, and configure it correctly within your DropFunnels settings.
In this guide, we’ll walk you through the process of verifying your sender or domain, generating a new API key, and using it securely in DropFunnels.
Step 1: Verify a Single Sender or Domain
Before using an API key, SendGrid requires you to verify either your email address or domain. This ensures that only authorized emails are sent using your account.
How to Verify a Sender or Domain:
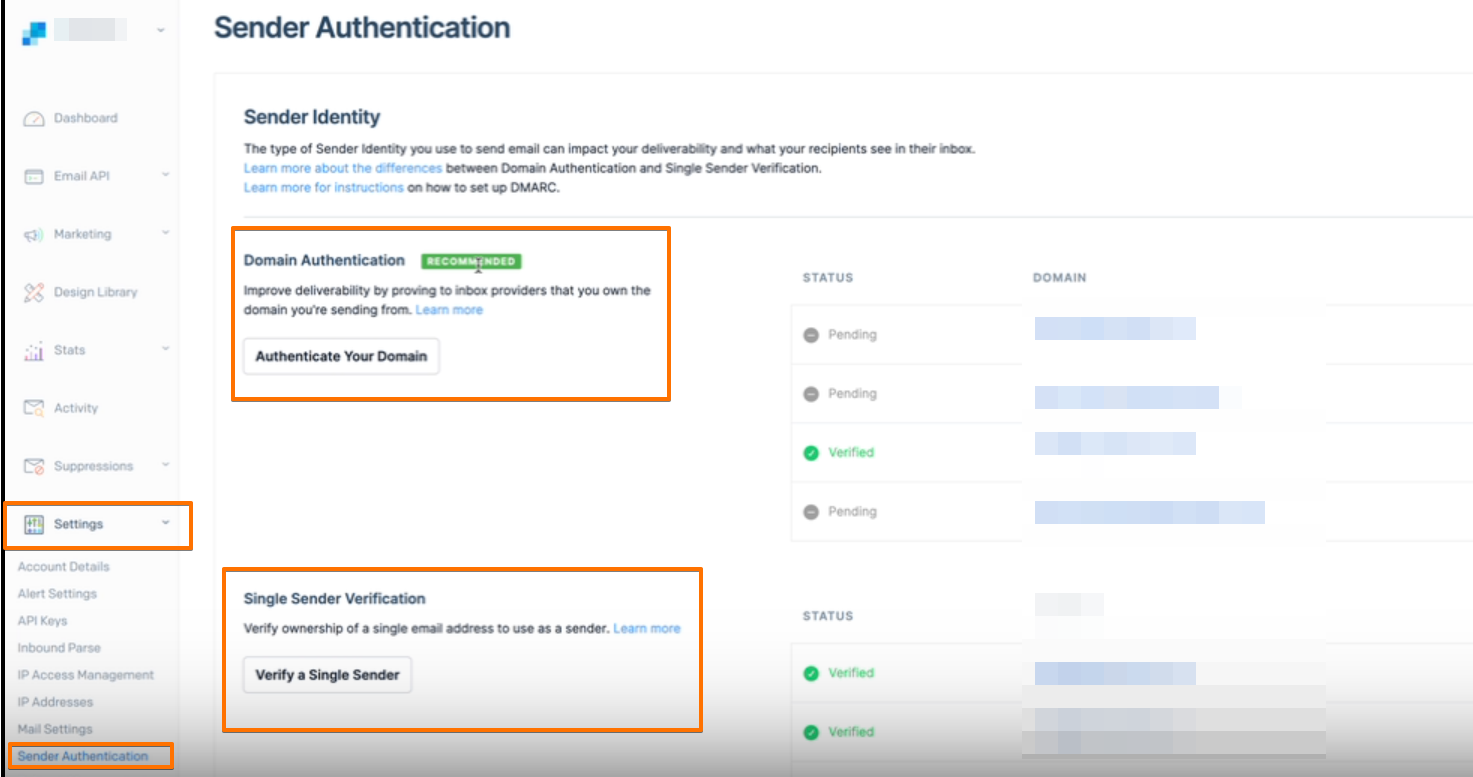
- Log in to SendGrid: Visit the Sender Authentication page and sign into your account.
- Choose Verification Method: You may choose between Single Sender Verification or Domain Authentication. For more information here's an article from Sendgrid about Sender Identity.
- Complete the Verification: Follow the prompts to complete the process. You may need to confirm your email address or add DNS records to your domain.
Once verified, your email address or domain is ready for sending emails through SendGrid.

Step 2: Generate a New API Key
Once you have completed the sender or domain verification, the next step is generating a new API key that you will use exclusively for your DropFunnels integration.
How to Generate an API Key:
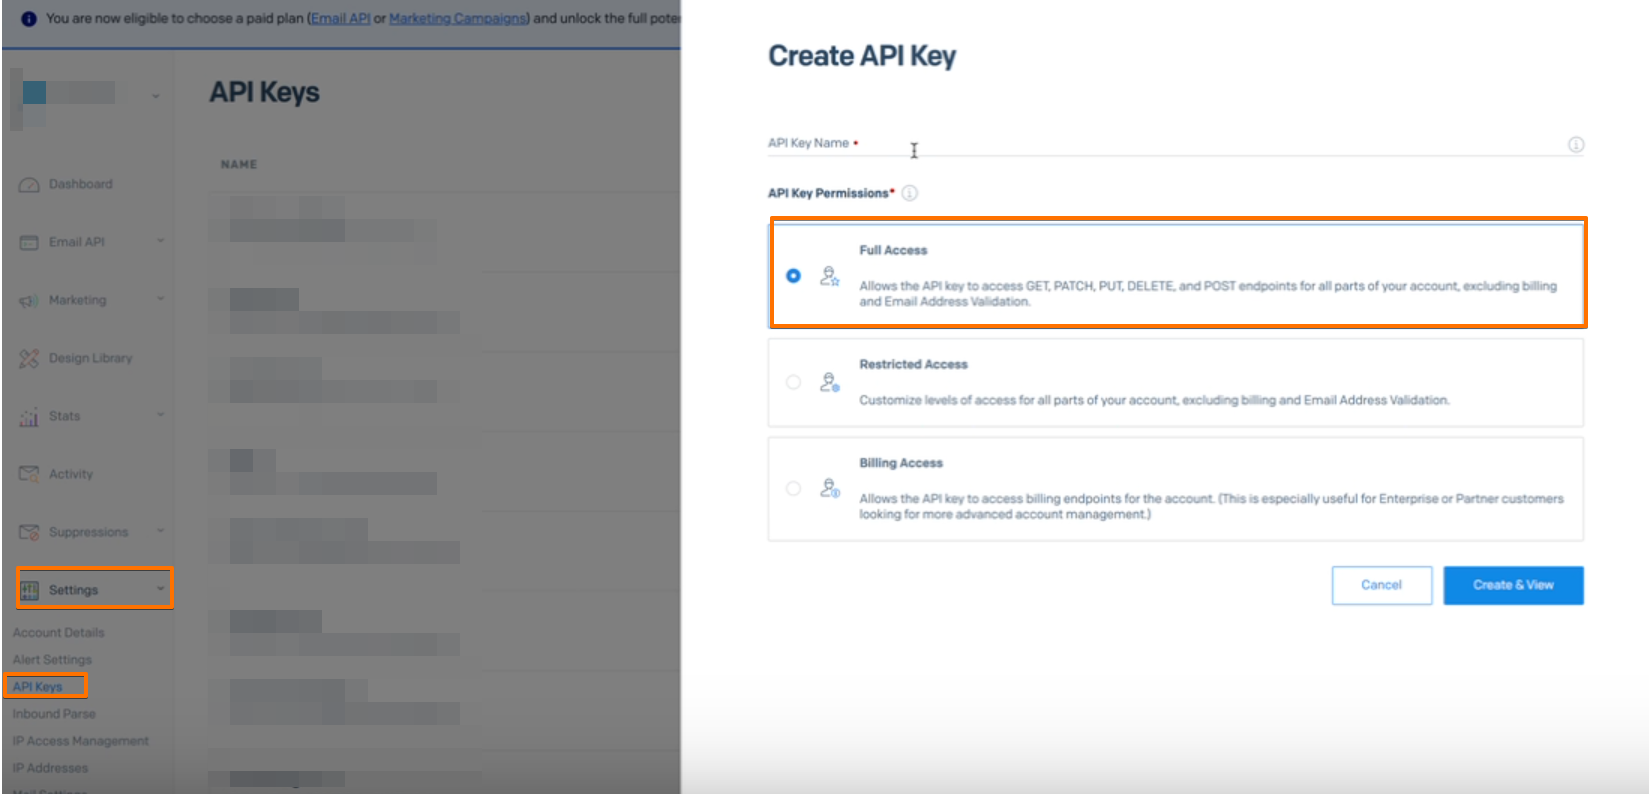
- Log in to SendGrid: Navigate to SendGrid's API Key settings page and log in to your account.
- Create API Key: Click on "Create API Key."
- Name the API Key: Give your API key a descriptive name such as "DropFunnels Integration" so you can easily identify it later.
- Assign Permissions: Select the appropriate permissions. It's recommended to use Full Access for DropFunnels.
- Copy the API Key: After generating the API key, make sure to copy it immediately as you won’t be able to see it again. Store it in a secure place.
For more information about SendGrid API keys please see this Article API Keys SendGrid.

Step 3: Enter API Key in DropFunnels
Now that you have your API key, the final step is to configure DropFunnels to use it for sending emails.
How to Add Your SendGrid API Key to DropFunnels:
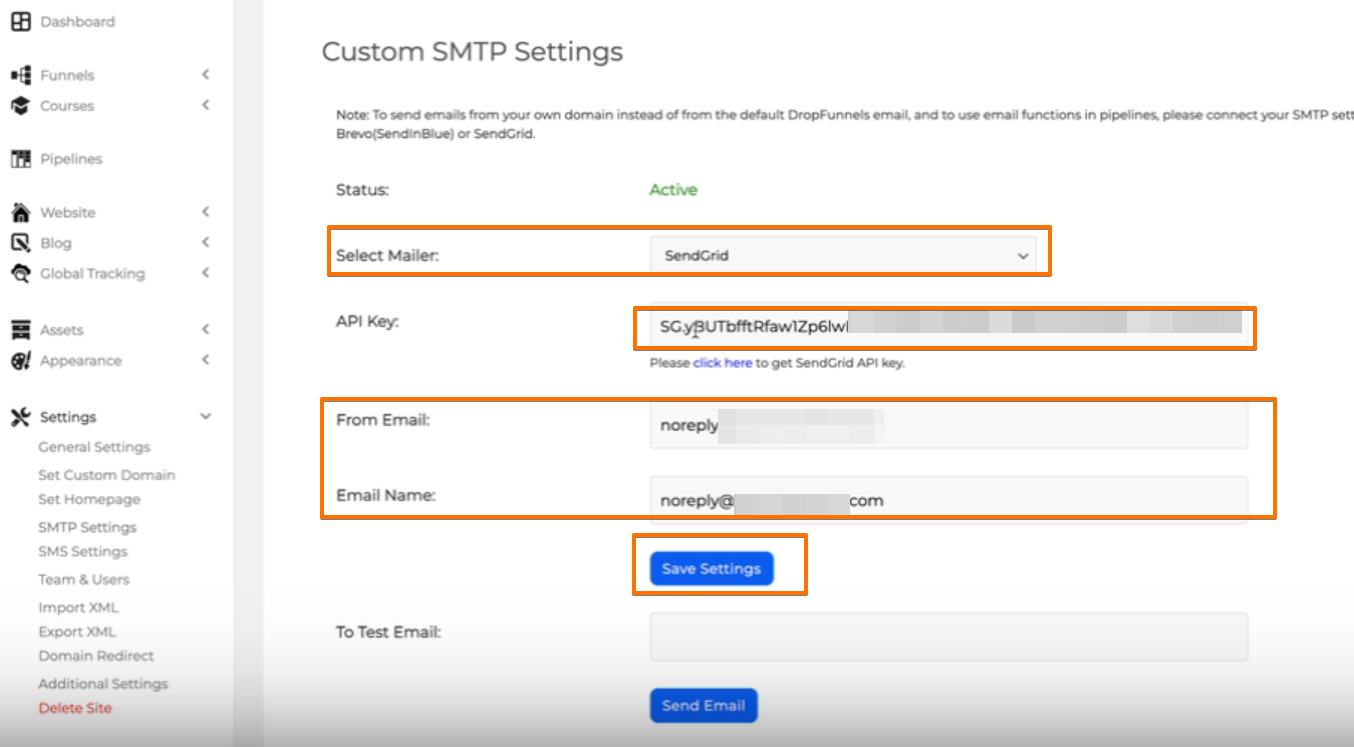
- Log in to DropFunnels: Access your DropFunnels account and navigate to the email integration settings.
- Enter the API Key: Paste the API key into the API key Field.
- Fill out the other details: Enter the From Email, Email Name.
- Save Settings: Save your changes to ensure the API key is applied. DropFunnels will now use this key to send emails.

Important Note:
Only use this API key for DropFunnels and avoid sharing it with other services to maintain security and avoid API key blocking.
By following these steps, you can set up your SendGrid API key properly and avoid issues with email delivery through DropFunnels. Remember to verify your sender or domain first, generate a fresh API key, and ensure you’re using that key exclusively for DropFunnels.

