How to Use DropFunnels Auto Course Uploader
Creating online courses just got easier! The Auto Course Uploader in DropFunnels allows you to quickly import videos from Google Drive, organize your content automatically, and save hours of work. This tool is perfect for course creators looking to streamline the uploading process without sacrificing time or resources.
Authenticate Google Account
Step 1: To import a course from Google Drive, begin by connecting your Google account in DropFunnels.
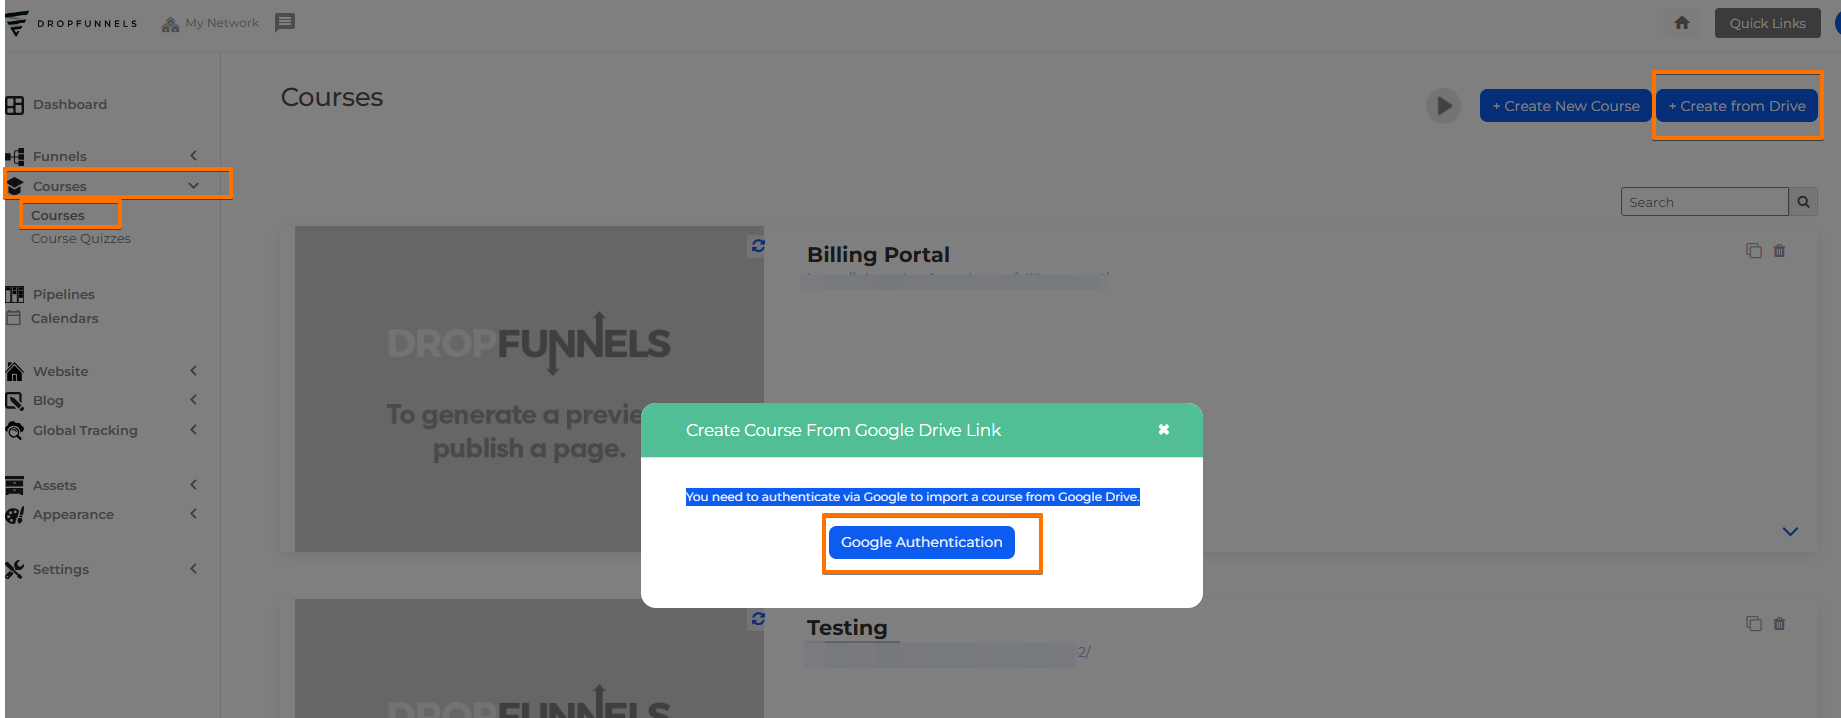
- Go to Courses in your DropFunnels Dashboard.
- Click on +Create From Drive.
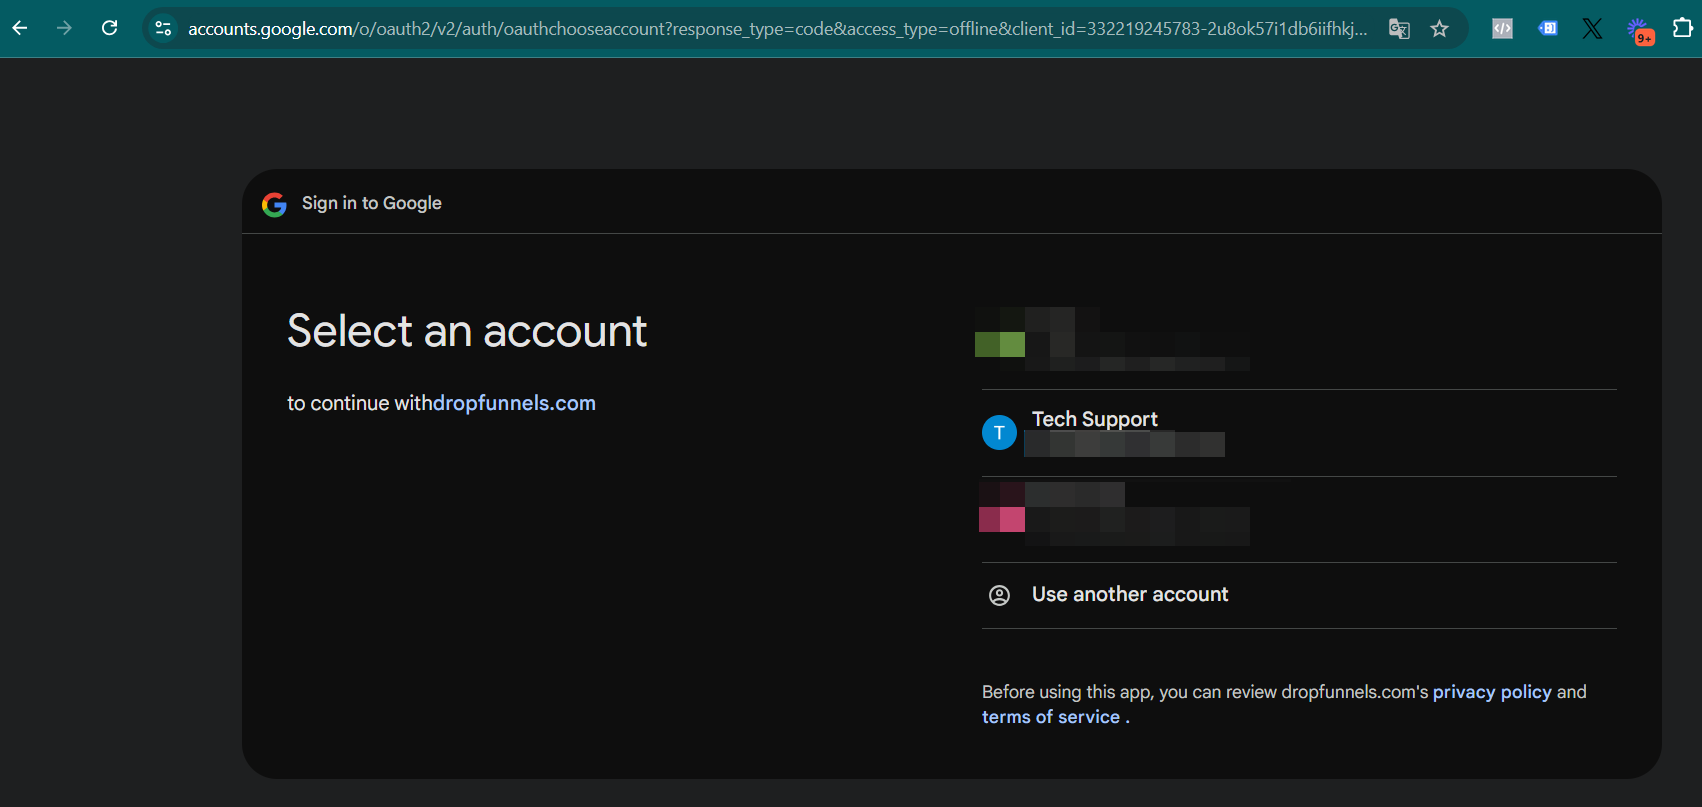
- Select Google Authentication to connect your Google account.
Step 2: Ensure Google Drive Folder Link Access
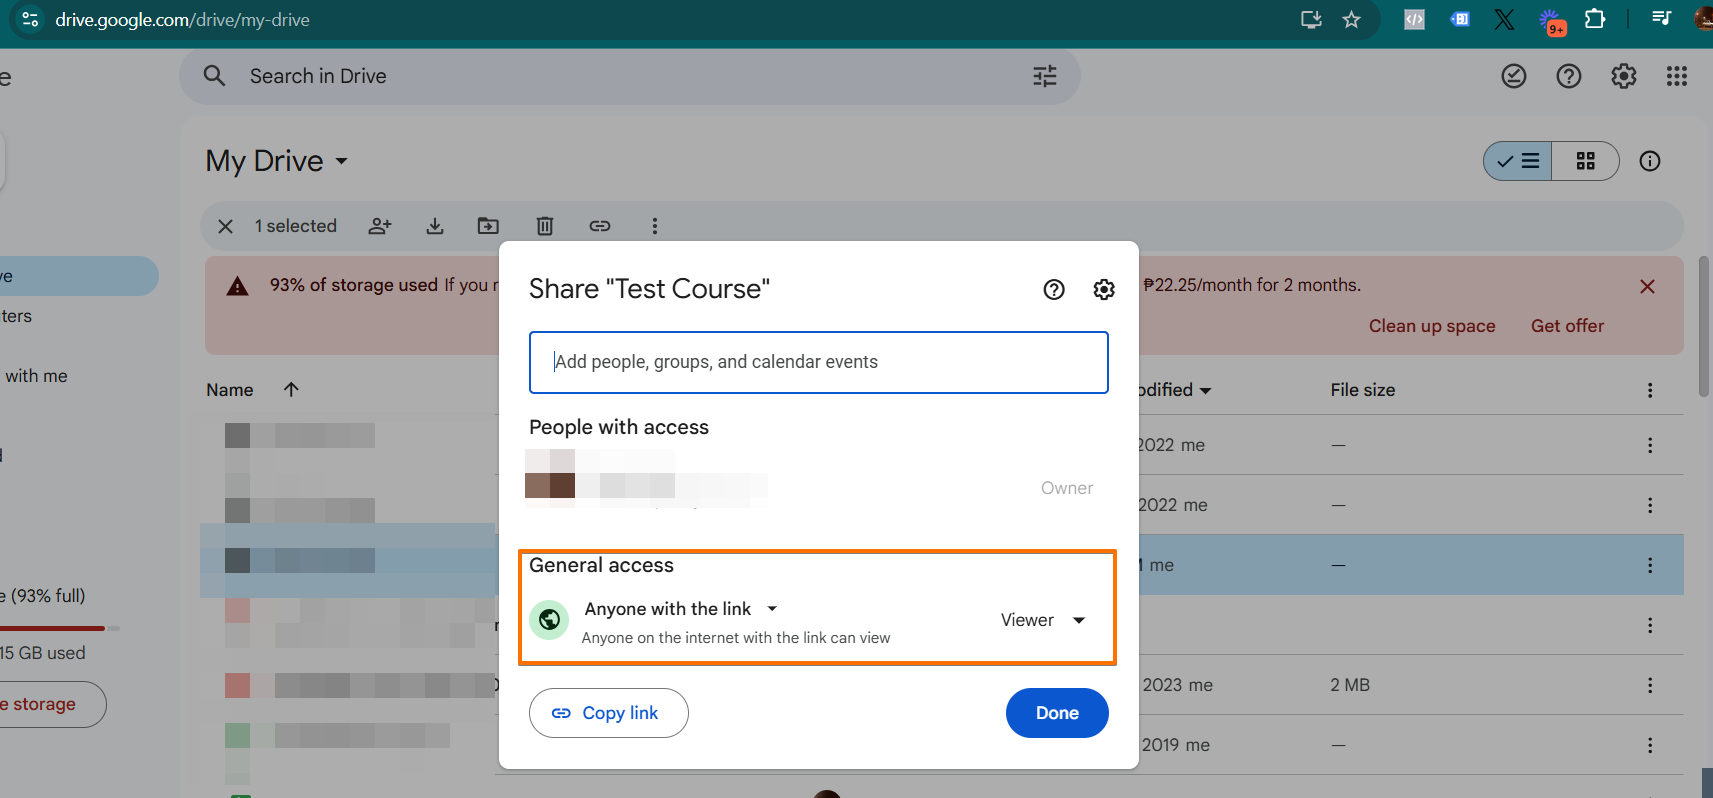
Make sure your Google Drive folder link is set to "Anyone with the link can view." This allows the uploader to access and retrieve your files. You may also view this guide from Google on How to Change default file sharing to anyone with link can view.
Structure Your Course Folder Inside Google Drive
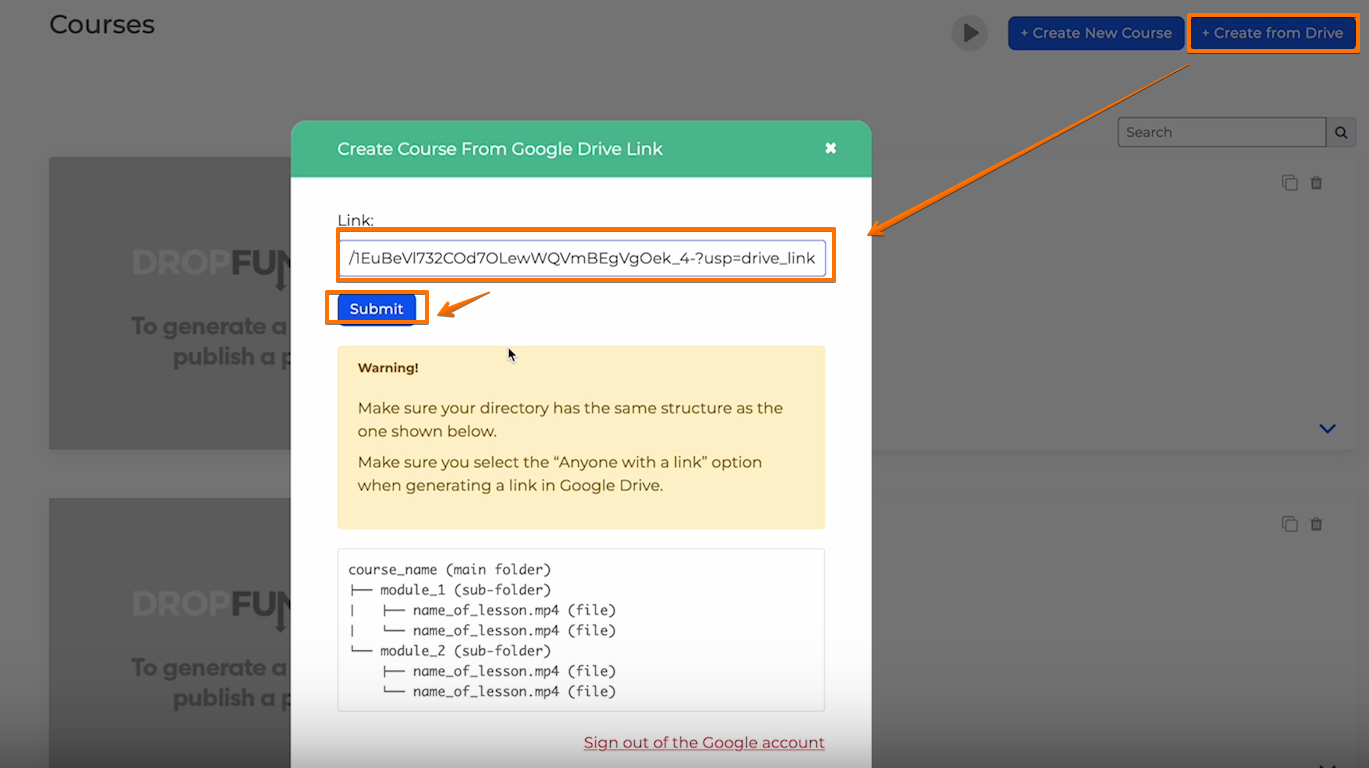
Step 3: Organize your course content within Google Drive, following this format:
- Main Course Folder
- Module Folder 1
Lesson1.mp4Lesson2.mp4
- Module Folder 2
Lesson1.mp4Lesson2.mp4
- Module Folder 1
The Auto Course Uploader will use the folder and file names to set up module titles and lesson names.
Import Google Drive Folder
Step 4: Import Google Drive Folder Contents In DropFunnels:
- Go to Courses > Create from Drive.
- Paste the shareable link to your Google Drive course folder.
- Click Submit.
The uploader will automatically pull in your videos, naming lessons and modules as specified.
Once the Google Drive link is submitted, you’ll see a confirmation message and an import loading bar will appear to show the progress. You can continue with other tasks as the import runs in the background.

Sit Back and Let DropFunnels Do the Rest
Step 5: The Auto Course Uploader will handle the rest:
- Uploads videos to DropFunnels in the background.
- Organizes modules and lessons based on your folder names, saving you time on typing titles.
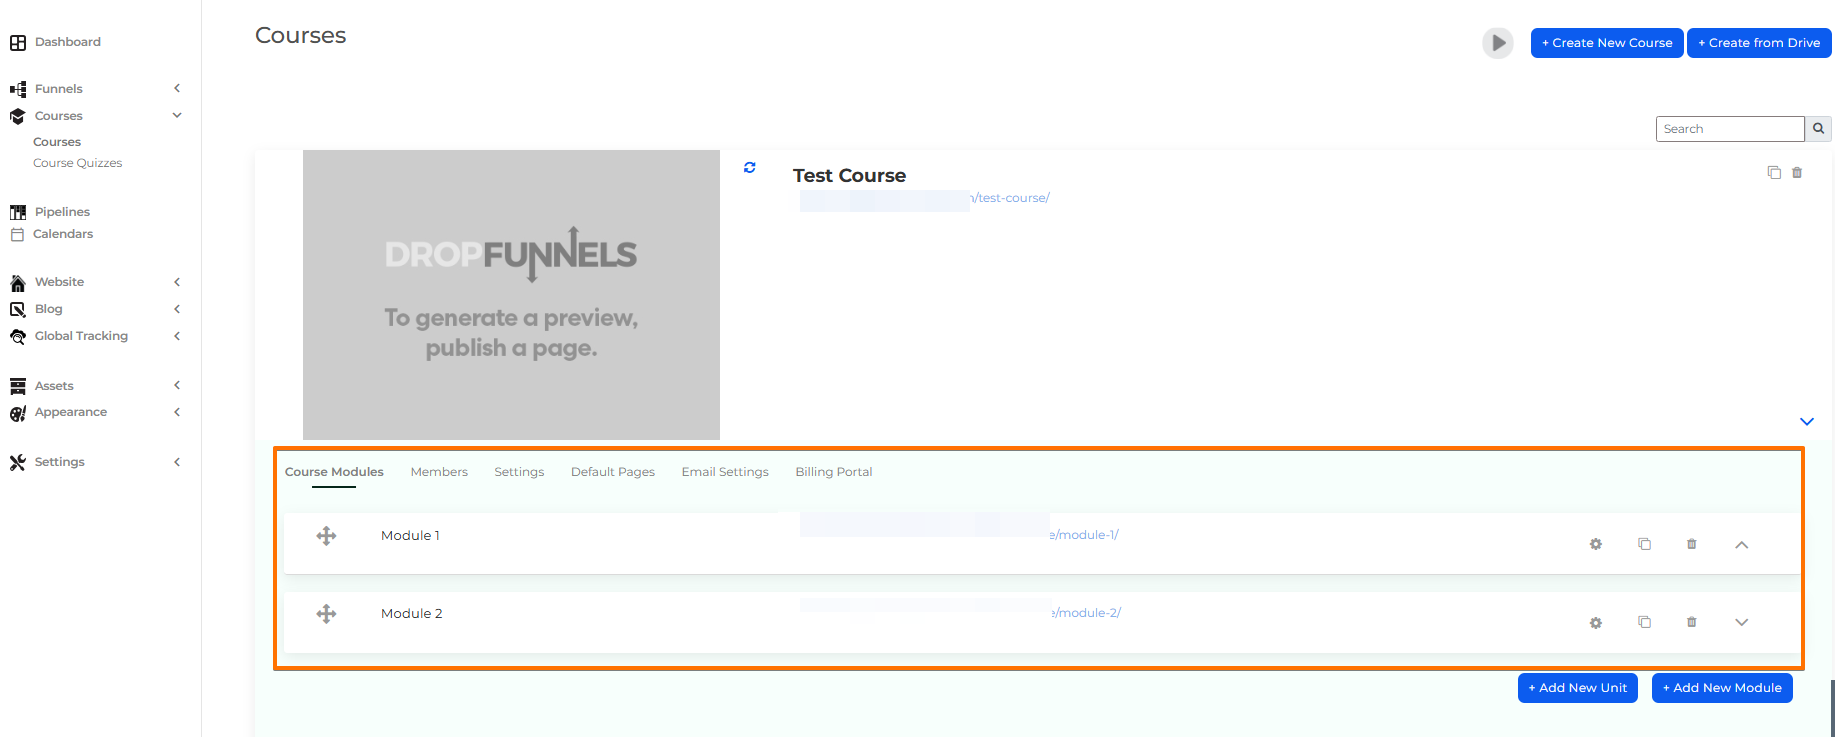
How to Use Auto Course Uploader for Individual Modules
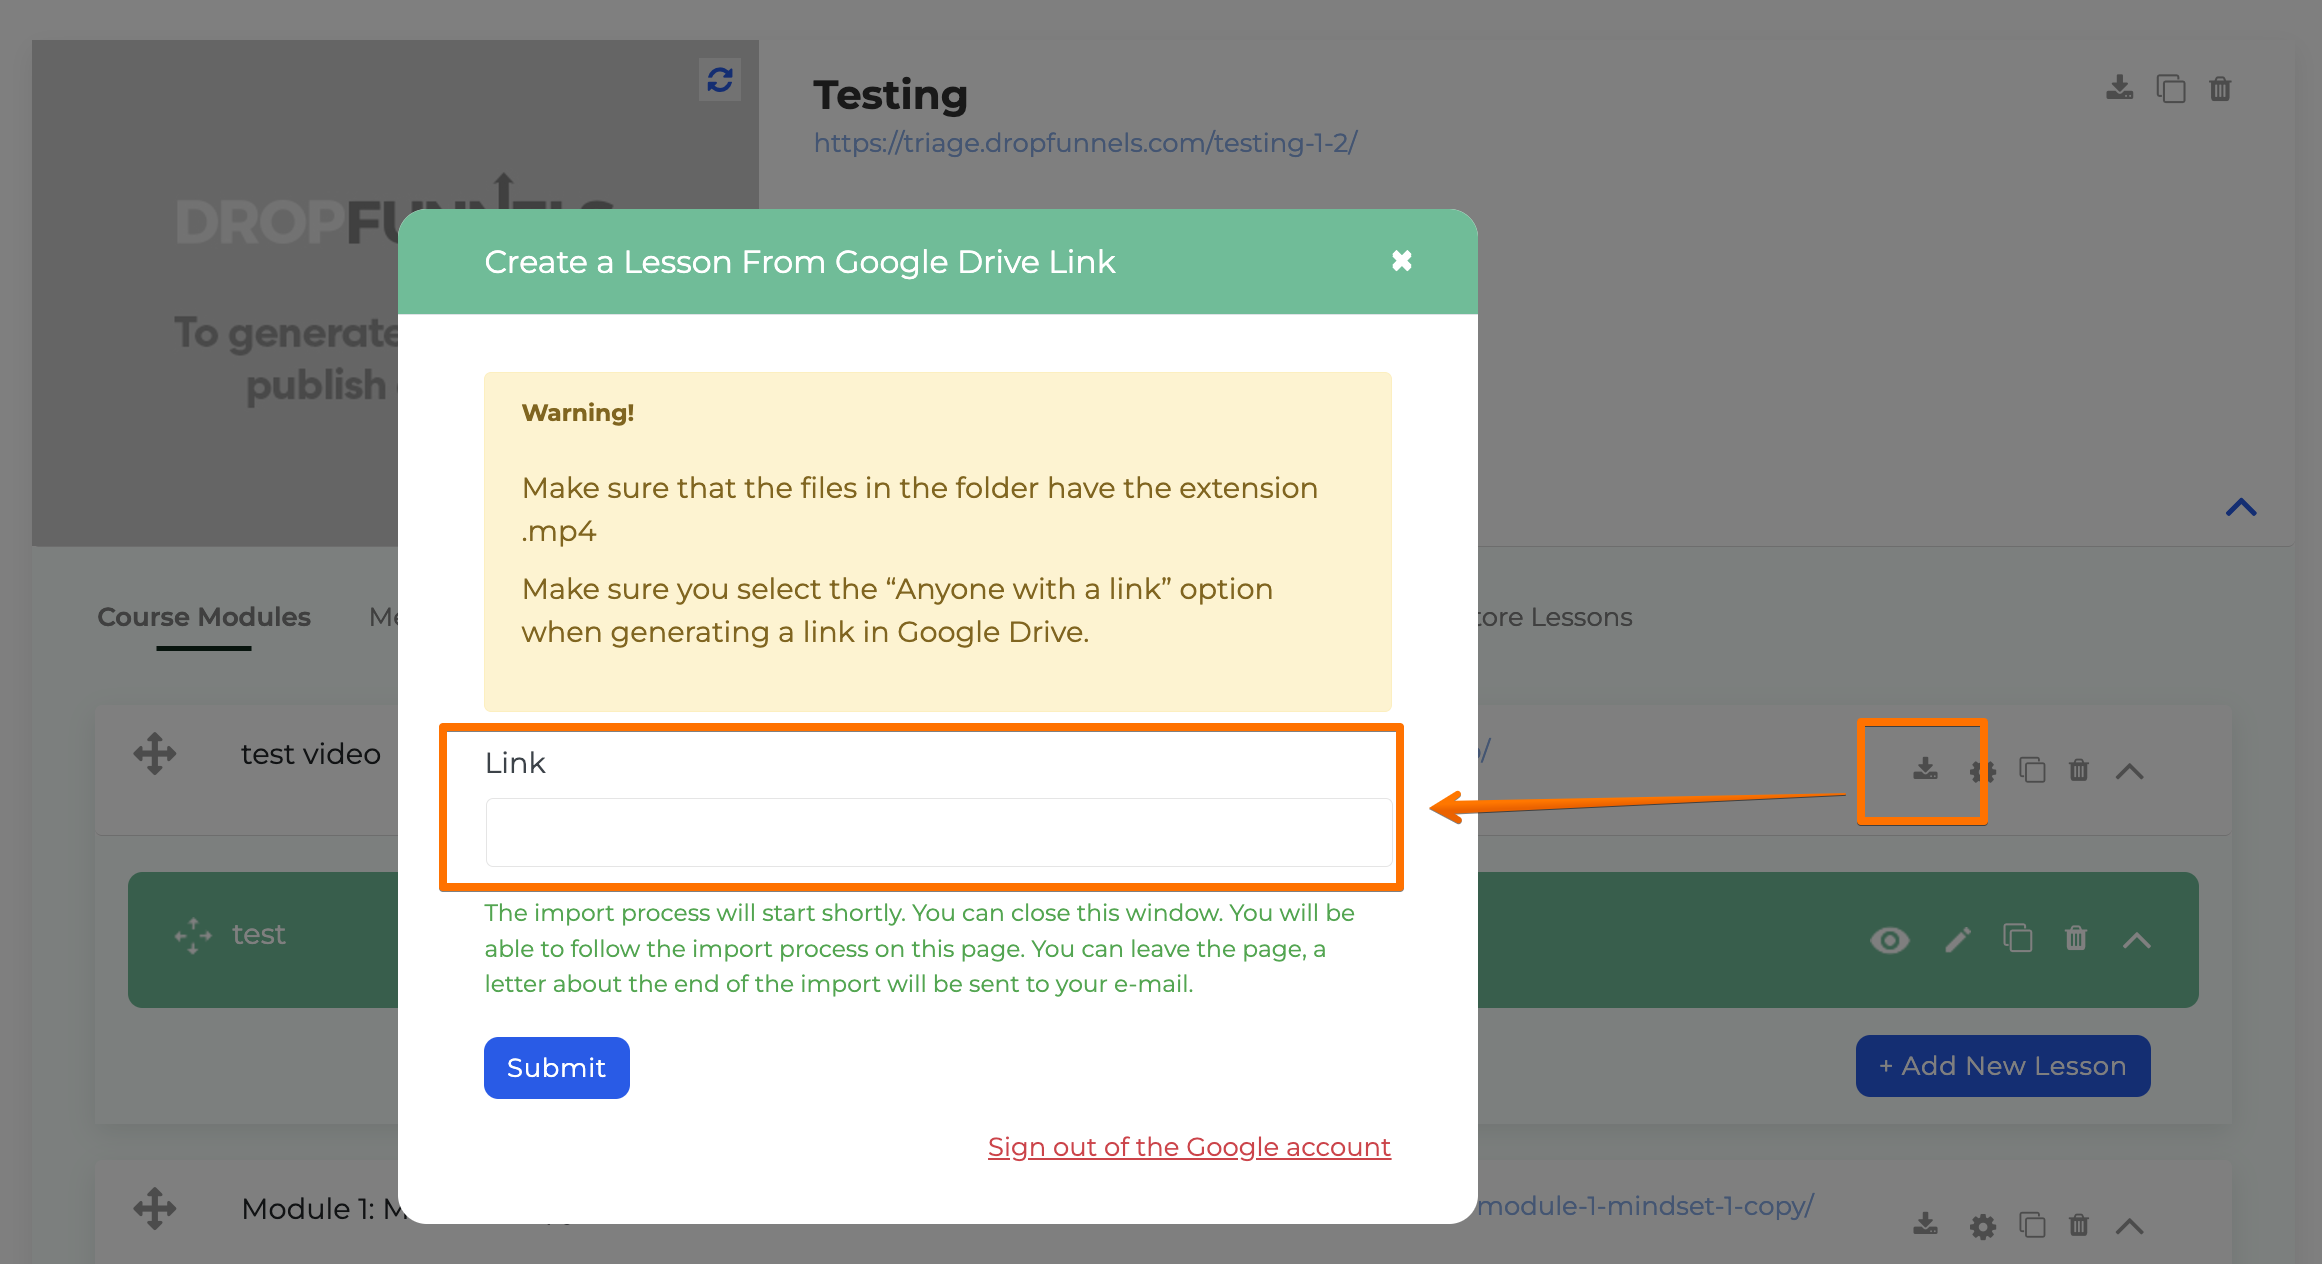
Step 1: Access the course and select the module where you’d like to upload the file as lesson content. Click the uploader icon to begin the process.
Step 2: Copy the Google Drive file URL where the video resides, ensuring you exclude the parent folder from the link. Paste the link into the uploader.
Here’s a sample format:
- Module 1 Folder > Lesson 1.mp4
Step 3: Verify that the files are in MP4 format and update the file's sharing settings to "Anyone with a Link" to allow access for uploading.
This setup allows you to upload lesson content efficiently for each module.
Note: If a blank module appears, it may be due to an empty module folder or a video file exceeding the 350MB upload limit. To resolve this, use video compression tools such as HandBrake to reduce the file size before re-uploading.
Streamline Your Course Creation with Auto Course Uploader
The Auto Course Uploader streamlines your course creation by automating video uploads and maintaining your course structure from Google Drive. It saves you time by eliminating manual uploads and reducing the need for input, speeding up the setup process.

