Can I Create Webhooks with Zapier?
Webhooks are used to create automated messages between applications. DropFunnels webhook capabilities allow you to do just that with Zapier. Webhooks are available inside the funnels section inside DropFunnels.
NOTE: In order to use the Webhook by Zapier integration, you'll need to upgrade to a Zapier paid plan. You can view the paid plans here.
In this example, we are going to move a lead from DropFunnels into a third party CRM (Hubspot).
Step 1: Navigate to the funnel you want to connect and automate with webhooks by going to Funnels > Funnels
Step 2: Click the down arrow located on the far right of the funnel
Step 3: Inside the dropdown, click on the Settings tab > Scroll further down and you'll see the Add New Webhook button
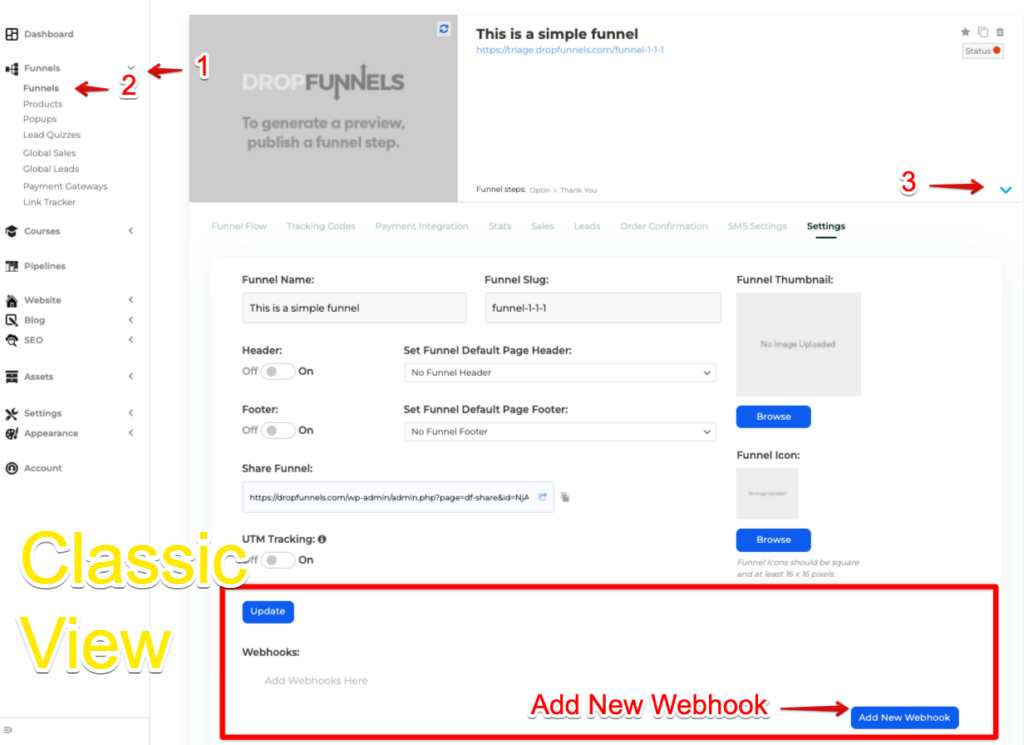
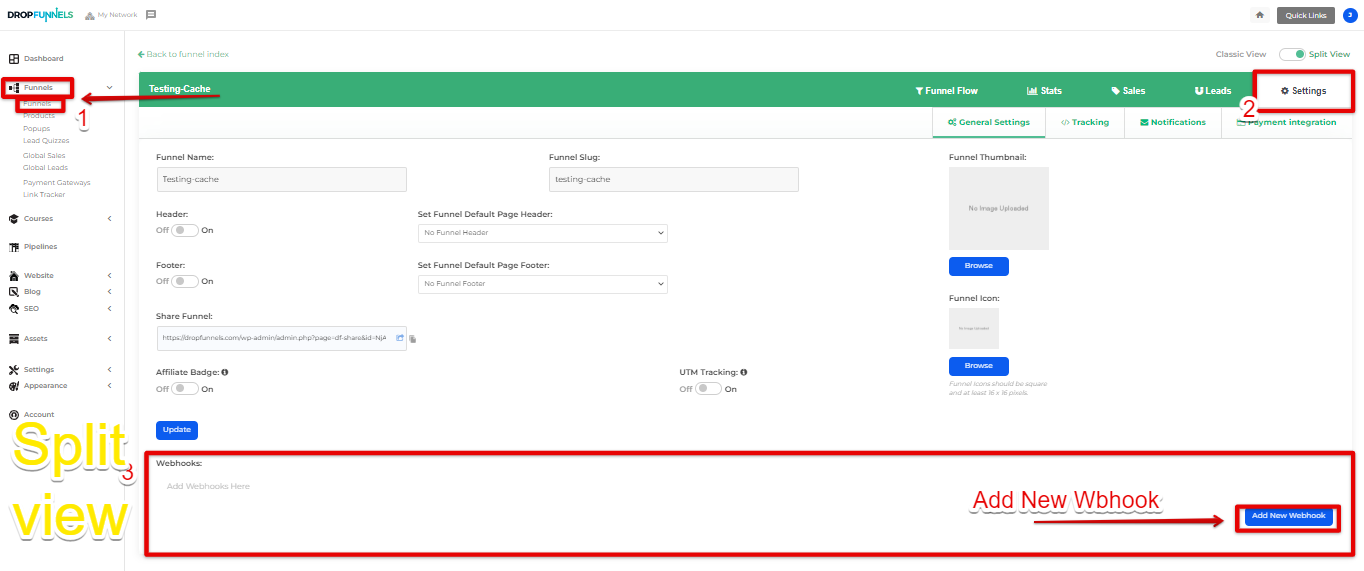
Step 4: Click on Add New Webhook button
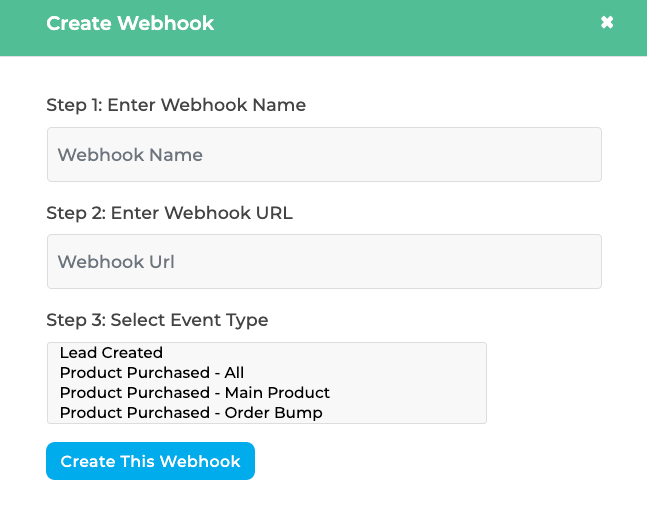
Step 5: Inside the popup window, you will find the following fields that are required to proceed with the automation:
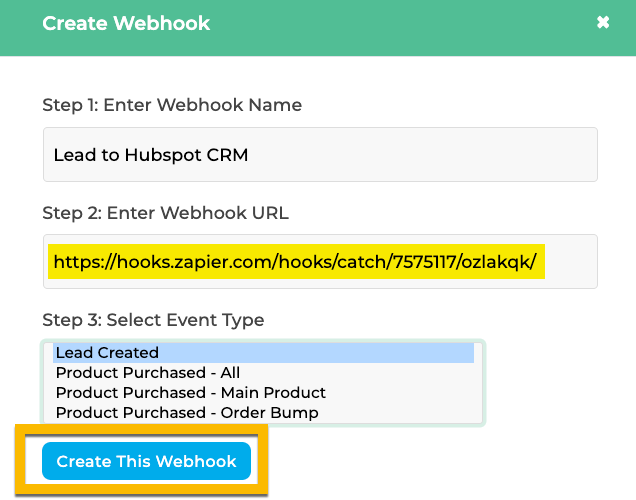
Webhook Name: give it a description so you know exactly what the webhook is for
Webhook URL: this will be provided for us inside Zapier (keep this window open)
Select Event Type: depending on what information you want automated will depend on the type of event you select. For this example, we are going to automate a 'Lead Created' into a third party CRM (Hubspot).
Step 6: Open up a new window and login to Zapier. If you are new to Zapier, create an account here.
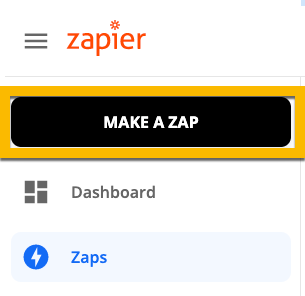
Step 7: Click on the Make A Zap button
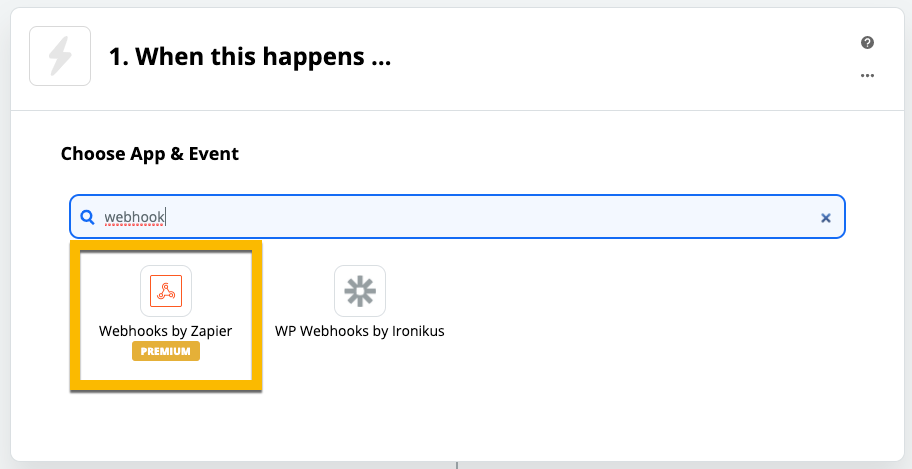
Step 8: Create the first step of the zap by typing in 'webhook', and selecting the Webhooks by Zapier App.
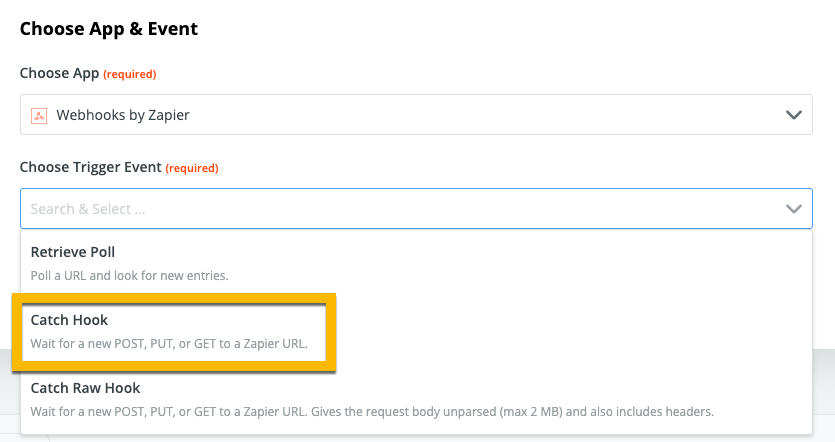
Step 9: Inside the 'Choose Trigger Event' field, select Catch Hook and click Continue
Step 10: Copy the Custom Webhook URL provided to you

Step 11: Paste the URL back into the DropFunnels popup window that you left open from Step 5. Click Create This Webhook
Step 12: Back in Zapier, click Continue
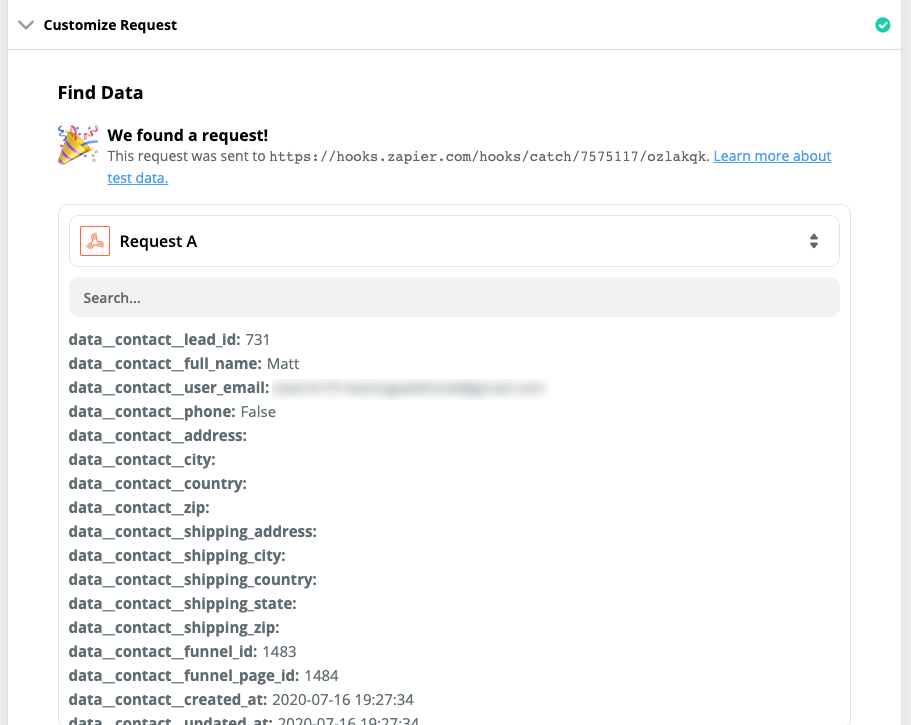
It's recommended that you Test the trigger. In order to do this, a new lead must be recorded in DropFunnels. Head over to the funnel you are creating a webhook for and submit a lead. If you do not have an optin form on a funnel page, this trigger will not fire.
You will received a screen like this once your request is successful:
Step 13: Click Continue to move onto the next step in the zap.
This step will be different for everybody. For this example, we will be sending my lead over to Hubspot (a CRM).
Step 14: Search for and select Hubspot (you will search for your application to integrate with). This example will send over my lead from DropFunnels and Create Contact inside Hubspot.
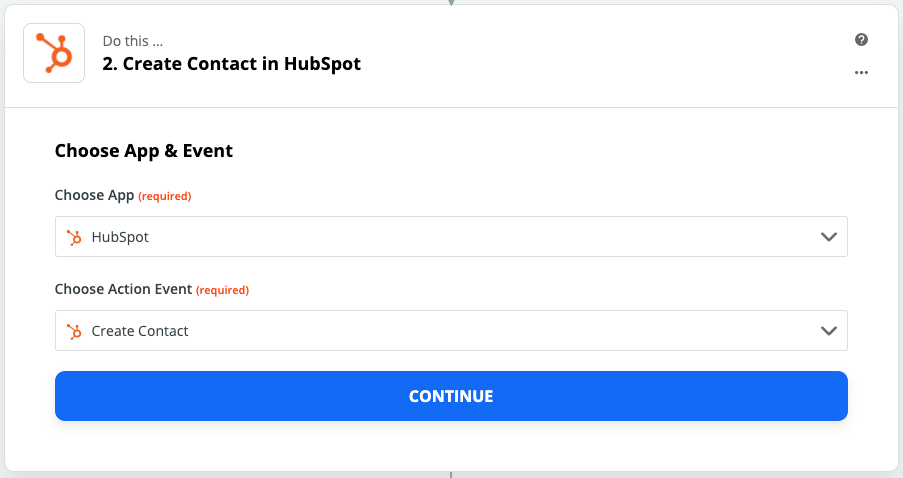
Step 15: Click Continue
Depending on which application you choose, you'll be required to login to that application and verify your credentials. Follow the rest of the prompts to complete you zap.
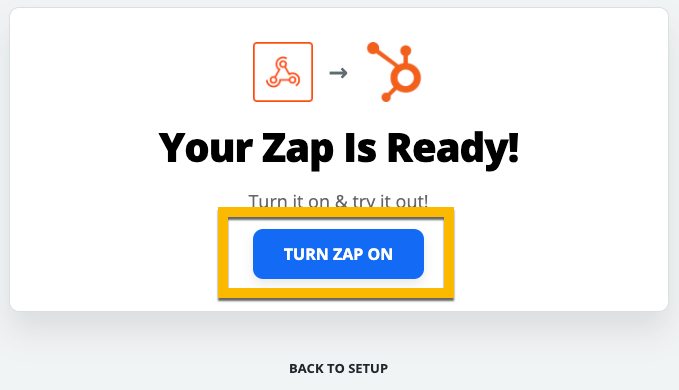
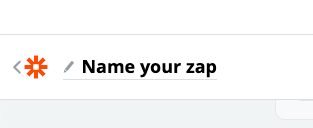
Step 16: In the upper left, give your zap a descriptive name so you can easily reference it in the future.
Step 17: Once you have completed all the steps, click the Turn Zap On button.