Setting up Automations with Zapier
We have released our second revision of the DropFunnels -> Zapier integration. Zapier 2.0 covers sending information out of DropFunnels to any application that's supported by Zapier or Webhooks.
Some examples of using Zapier would be:
Check 1: Update a Google Spreadsheet with customer data during a purchase.
Check 2: Adding a contact in an unsupported autoresponder or other CRM system.
Check 3: Shipping physical products.
So here's how to use Zapier 2.0 with DropFunnels.
Step 1: Signup for a free account at https://zapier.com. Your free account allows for up to five Zaps.
Step 2: From your Zapier Dashboard click the black '+' button, also labelled "MAKE A ZAP".
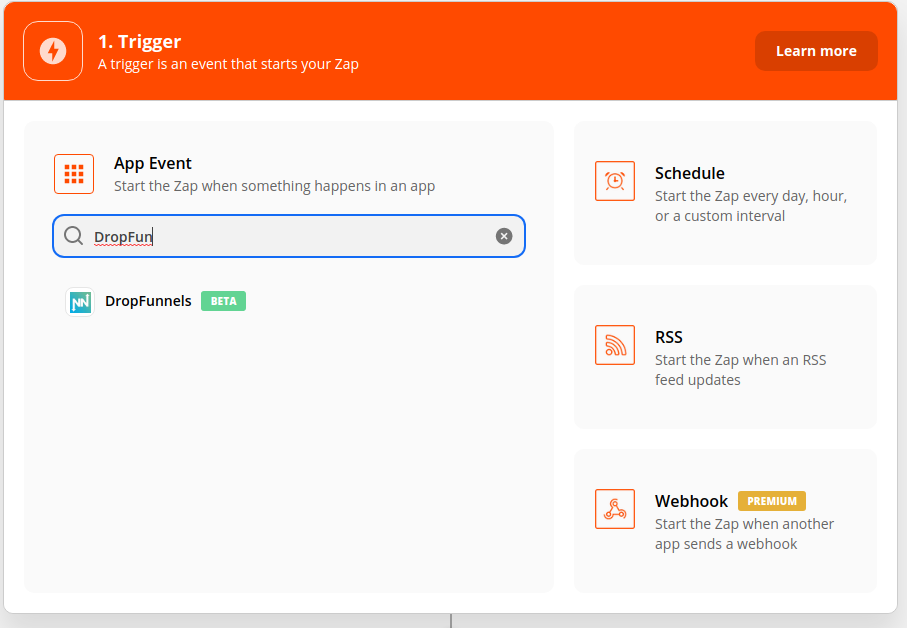
Step 3: In the Search Bar type "DropFunnels", then click on the DropFunnels app.

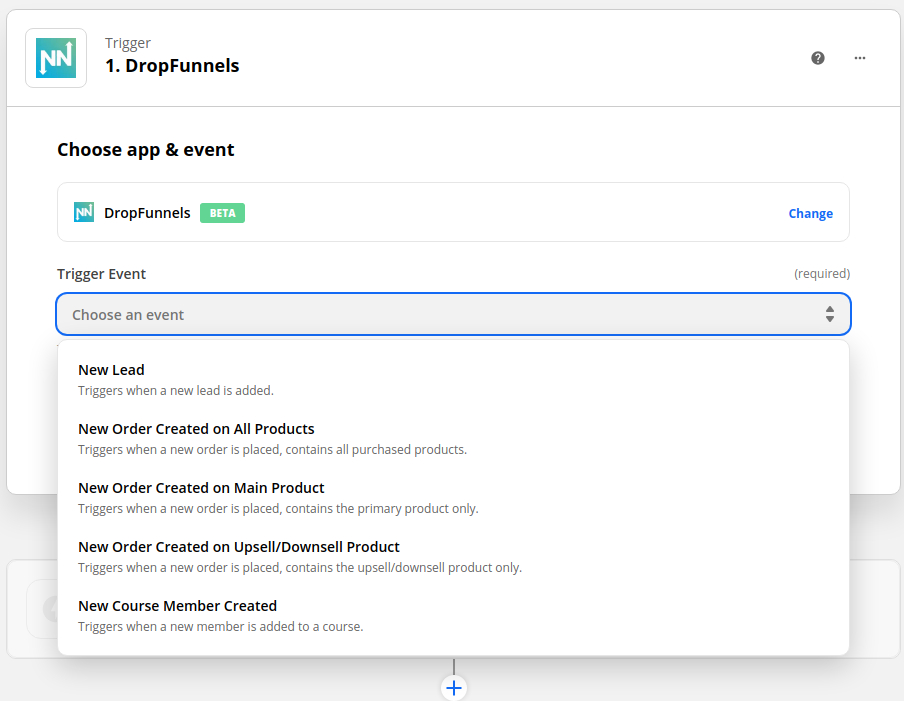
Step 4: Select the Trigger Event from the drop-down and click Continue.
NOTE: Triggers fire on funnel by funnel basis as you'll see in Steps 5 and 6.

Step 5: Select the site you want to have monitored from the drop-down.
Step 6: Select the funnel that you would like to monitor for triggering this event and click Continue.
Step 7: Click "Test Trigger". If you don't have any data pertaining to the event you want to trigger, you can run through the funnel (in Test Mode if necessary), or create a new member in one of your Courses to create the data to be sent to Zapier during the event.
Step 8: When you see the data from the event, you can click Continue. This data is what you'll have to work with for the application you're connecting.
Step 9: Next, add an action: This can be any of the applications that Zapier lists for integrating with.
Step 10: Choose your action app: the Zap will perform an action in this app when it is triggered.
Step 11: Select your action event: this will be the event that the Zap performs in the selected app when it is triggered.
Step 12: Select your app account: select or connect the specific app account to use in the Zap action.
Step 13: Set up your action: Set up the data that you want to send over to your action app.
Step 14: Test your action: Test your action to see if it's working as expected.
For detailed information about Zapier, please see Zapier's website and help articles.

